Practical WordPress Guide: Deployment, Debugging & Backup

In the modern website development field, WordPress has become the platform of choice for developers due to its flexibility and powerful ecosystem. However, truly efficient and stable WordPress development goes beyond theme design or plugin development; it is more crucially about the standardization and optimization of the overall development process and deployment strategy. From setting up the local development environment and code debugging, to ultimately deploying the website smoothly and securely, every step is a cornerstone for ensuring project quality and development efficiency. A well-defined development process not only reduces potential errors and vulnerabilities, improves collaboration efficiency, but also lays a solid foundation for future maintenance and functionality expansion. Proper deployment methods are key to a website's performance, data security, and user experience. A well-organized, interconnected development and deployment system allows developers to handle project requirement changes or technical challenges with ease, truly achieving twice the results with half the effort.
This WordPress tutorial article will systematically outline the core steps of WordPress development and key considerations during deployment, helping developers establish a clear, efficient, and sustainable iterative workflow. Whether you are an independent developer or a team member, you will be able to draw practical experience and optimization ideas from it to enhance project efficiency and quality. Given that the content of the article is quite comprehensive and involves multiple important stages, the blogger has specifically organized the complete table of contents for the article "WordPress Development (Key Points Guide for WP Development and Deployment)" as follows. The table of contents adopts a hierarchical structure, covering major chapters and sub-sections. Each title is equipped with a convenient anchor link, allowing readers to quickly jump to the corresponding section by clicking the title, thus facilitating efficient reading and navigation.
- WordPress Local Development Environment Setup
- WordPress Local Installation and Configuration
- Key Files for WordPress Theme Development
- WordPress Debugging and Testing
- Two Methods for WordPress Backup and Restoration
Ⅰ、WordPress Local Development Environment Setup

Before starting any WordPress project development, a stable and efficient local development environment is an essential foundation. The so-called WordPress local development environment setup mainly refers to configuring the WNMP environment on a local computer — it consists of four major components: Windows Operating System + Nginx Web Server + MySQL Database + PHP Parser, which fully simulates the operating environment of an online server. This is not only the prerequisite for the normal access of WordPress.org, theme and plugin development testing, and code debugging, but also a core part to ensure efficient iteration and secure verification during the development process. Compared to working directly in the production environment, the local development environment offers higher flexibility and security, as it can avoid the risk of crashing the live site due to code errors and also facilitates version control and troubleshooting during team collaboration. Therefore, mastering and properly setting up the WNMP environment is a must for every WordPress developer. Next, the blogger will provide a detailed step-by-step breakdown of deploying each component of WNMP locally with images and instructions, helping everyone easily set up their development environment and lay a solid foundation for subsequent WordPress development work.
1、Windows Environment Preparation
In the WNMP architecture, the Windows operating system serves as the foundation platform for the development environment, supporting the operation of all service components. Therefore, a good system environment is crucial. It is recommended to use a 64-bit version of the Windows operating system, as it not only fully leverages the performance advantages of modern hardware but also ensures better compatibility and stability with subsequent components such as Nginx, MySQL, and PHP, avoiding runtime errors or environment conflicts caused by mismatched bit versions.
2、Installation and Configuration of Nginx Web Server
As a lightweight and high-performance web server, Nginx plays a key role in handling client requests, static resource distribution, reverse proxying, and more in the WordPress local development environment. Properly configuring Nginx helps simulate the production environment's operation mechanism and aids developers in identifying potential deployment issues early. This section will detail how to install Nginx on a Windows platform and explain how to adjust core configuration options for WordPress's needs.
(1) Step 1: Visit the Nginx official website and choose the version to download
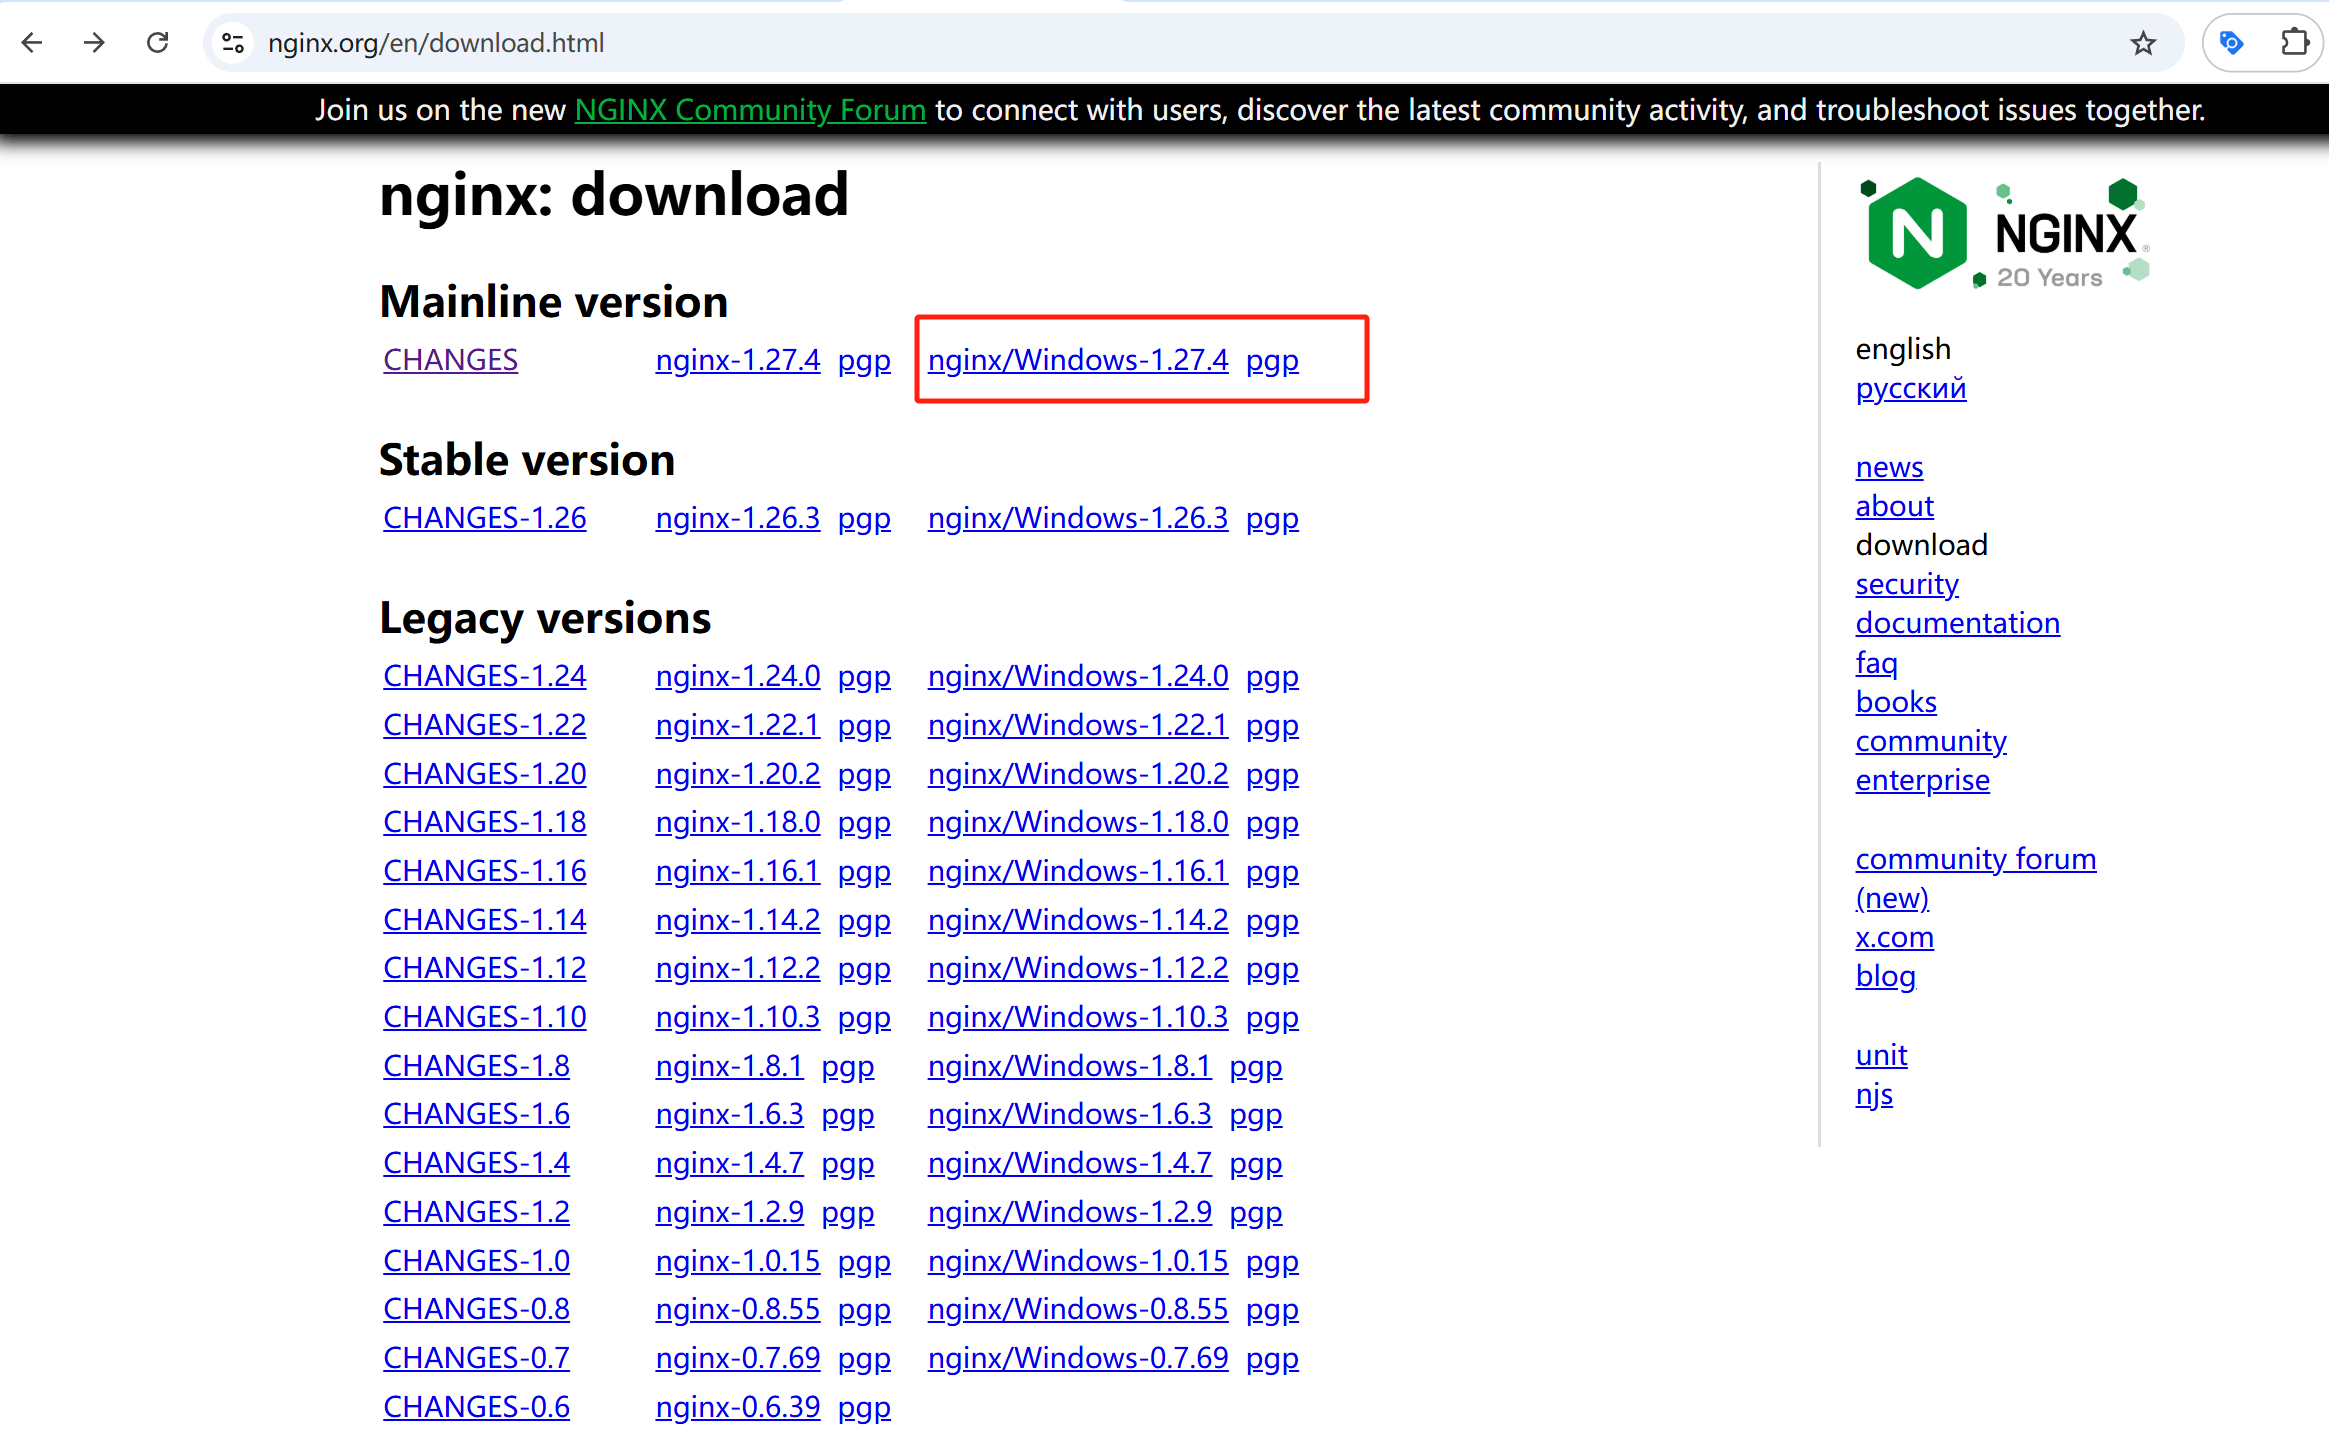
Visit the Nginx official download page and select the version for Nginx for Windows (as shown in the image above, the version marked with a red box). Download the Windows version of the Nginx installation package.
(2) Step Two: Extract the Nginx.zip File on Windows

Extract the downloaded compressed file to the directory where you want to store Nginx, such as: C:\wnmp\nginx. This will make the file path clear, making it easier for you to locate, modify, and maintain the files later.
(3) Step Three: Start the Nginx Service on Windows
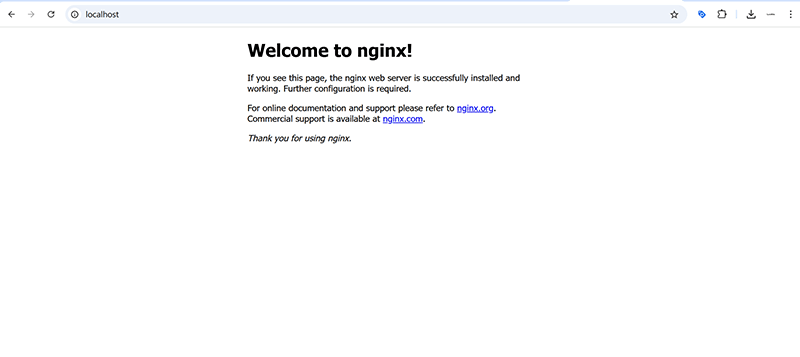
Navigate to the extracted Nginx folder and run nginx.exe. It's important to note that Nginx does not display an interactive window by default on Windows. Instead, it starts as a background service, and the nginx.exe process will appear in the process list. Therefore, when you double-click nginx.exe or run the command “start nginx” in the command line, you won't see any prompt or a command window remain open. Don’t be confused by this behavior. After confirming that nginx.exe is running in the Windows system’s process management, visit the URL below in your browser. If you successfully access it and see “Welcome to nginx” as shown in the image above, it means Nginx has started successfully.
http://localhost/(4) Step Four: Configure Nginx to Support PHP on Windows
By default, Nginx cannot parse PHP files. It needs to be configured to support PHP requests. The specific steps are as follows:
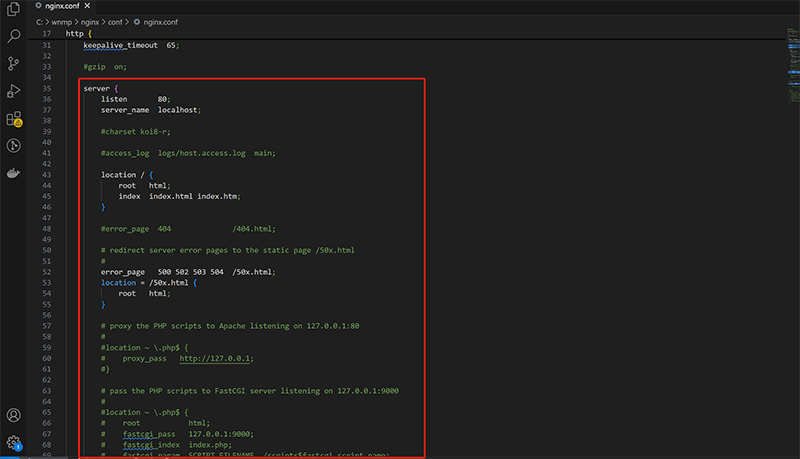
Open the C:\wnmp\nginx\conf\nginx.conf file. It is recommended to use Visual Studio Code or Notepad++ for editing. Once the file is open, find the server configuration block as highlighted in the image above, and add the following configuration to enable PHP support:
server {
    listen       80;
    server_name  localhost;
    root   C:/wnmp/www;
    index index.php index.html index.htm;

    location / {
        try_files $uri $uri/ /index.php?$args;
    }

    location ~ \.php$ {
        fastcgi_pass   127.0.0.1:9000;
        fastcgi_index  index.php;
        fastcgi_param  SCRIPT_FILENAME  $document_root$fastcgi_script_name;
        include        fastcgi_params;
    }
}- root specifies the directory where the WordPress files are stored, such as C:/wnmp/www.
- fastcgi_pass is the PHP execution port, which will be set during PHP configuration later.
(5) Step Five: Configure the Hosts File on Windows (Optional)
Configuring the Hosts file is an optional step. If you want to use a custom domain name to access WordPress locally, follow the steps below to configure the Hosts file. For example, use szlogic.local. Edit the C:\Windows\System32\drivers\etc\hosts file and add the following:
127.0.0.1 szlogic.localThen, change the server_name in the Nginx configuration file to:
server_name szlogic.local;(6) Step Six: Restart the Nginx Service on Windows
After modifying the nginx.conf file, Nginx needs to reload the configuration to apply the changes. You can restart the Nginx service by entering the following command in the Command Prompt (CMD) to apply the latest configuration:
nginx -s reloadAlternatively, you can stop and restart Nginx. The commands to stop and restart Nginx are as follows:
nginx -s stop
start nginx
3、PHP Environment Configuration and Version Management
PHP is the core running language for WordPress, and its version selection and environment configuration directly impact the compatibility and performance of WordPress, as well as its plugins and themes. In this section, we will explain how to install PHP on Windows, configure PHP extensions and parameters, and provide practical solutions for multi-version coexistence and switching, helping developers adapt to different project needs flexibly.
(1) Download PHP for Windows
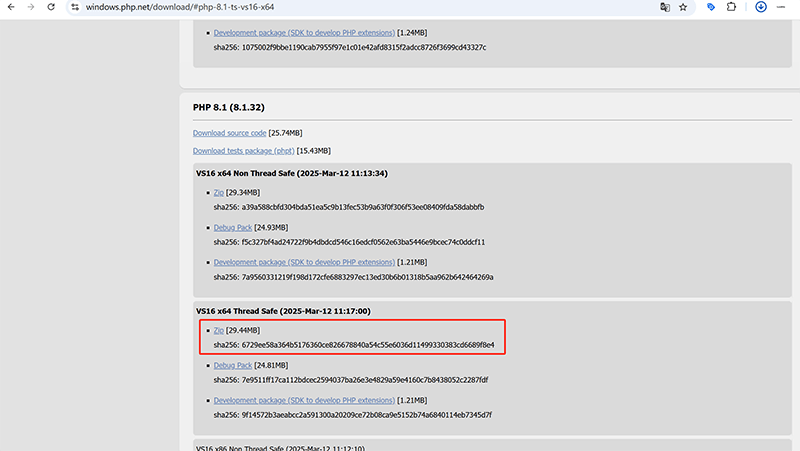
First, we need to visit the PHP official download page, and then it is recommended to choose the Thread Safe version, as indicated by the red box in the image above. This version is suitable for running with Nginx. Additionally, depending on whether the Windows system is 64-bit (x64) or 32-bit (x86), download the corresponding Zip package. It is recommended to use a newer stable version, such as PHP 8.1 or higher.
(2) Extract PHP Files
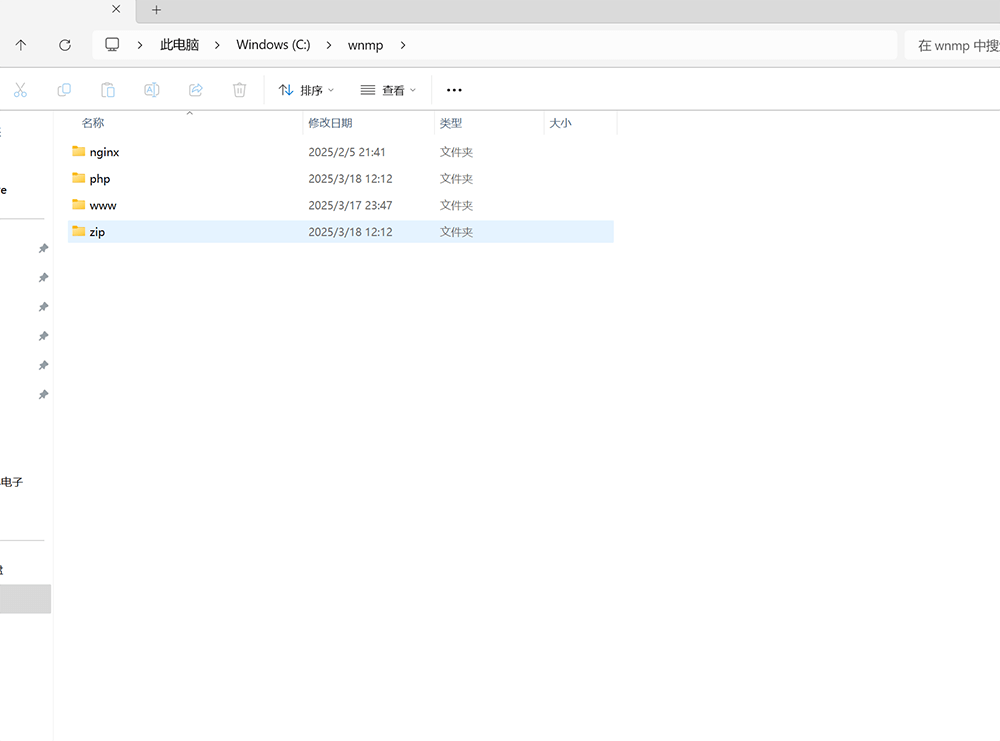
As shown in the image above, extract the php.zip file into the same wnmp folder as the Nginx directory, so that all wnmp components are placed in the same directory for easier operation and management. It is important to note that the folder name after extraction should not contain spaces or special characters
(3) Configure PHP Environment Variables
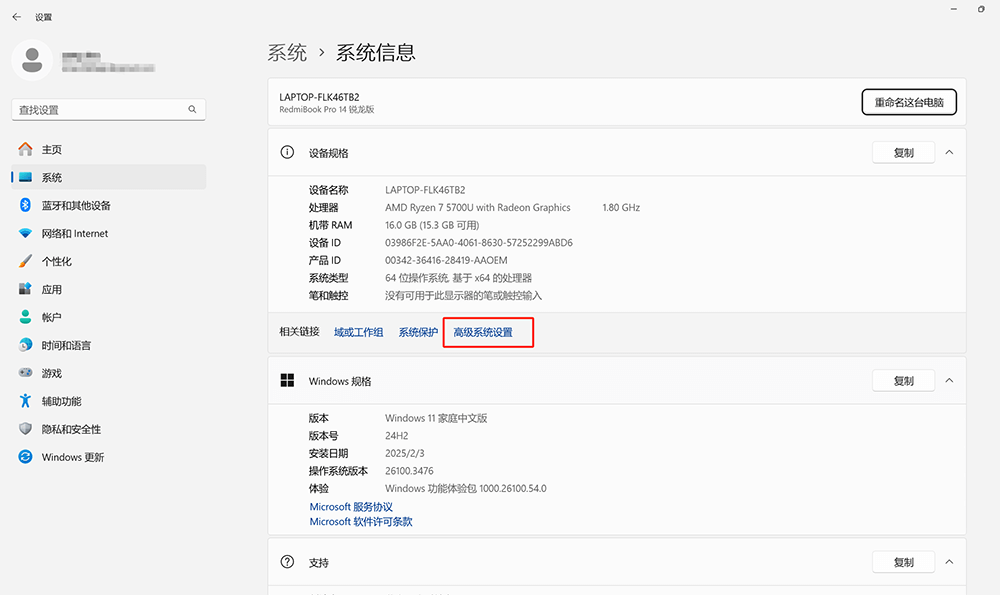
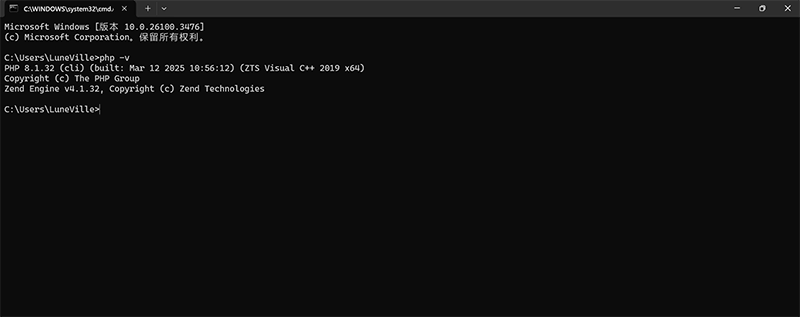
Right-click "This PC" or go directly to the Windows system settings interface as shown in the image above > "Advanced System Settings" (the entry marked in red in the image) > in the pop-up window, click on the "Environment Variables" button at the bottom. Then, in the "System Variables" section of the "Environment Variables" window, find Path, click "Edit", and add the PHP directory path: C:\wnmp\php. After confirming and saving, open the Windows Command Line window and execute the following command. If the feedback shows the PHP version information, it means that the PHP environment variable has been configured successfully.
php -vIn CMD, the feedback message indicating successful PHP environment variable configuration is shown below:
(4) Modify PHP Configuration File (php.ini)
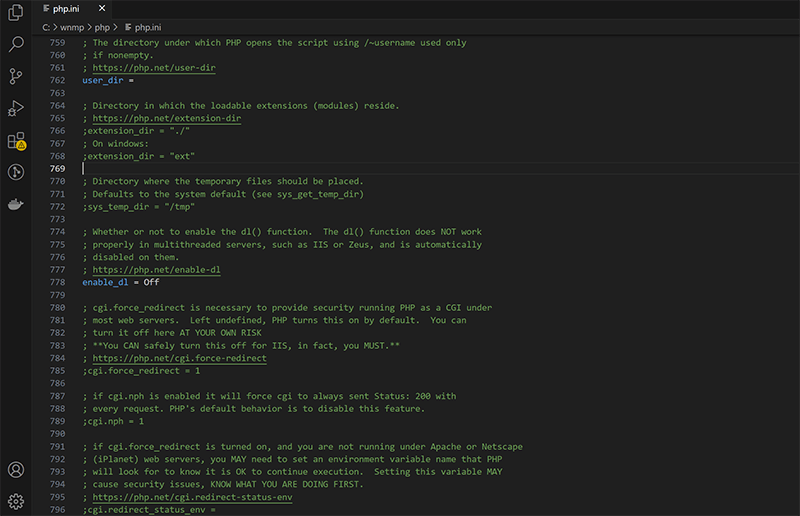
Go to the PHP folder, copy the php.ini-development file, and rename it to php.ini. Open the php.ini file with a text editor (either a text editor or VSC will work), and adjust the following configurations as needed:
Enable commonly used extensions (remove the semicolon at the beginning ;)
extension_dir = "ext"
extension=mysqli
extension=pdo_mysql
extension=gd
extension=mbstring
extension=openssl
extension=curl
Set the timezone (change it to your local timezone)
date.timezone = Asia/Shanghai(5)Configure PHP FastCGI support
By default, Nginx does not include a PHP parser, and it needs to connect to PHP via FastCGI. First, we need to check the PHP folder to confirm if the php-cgi.exe file exists. Once confirmed, we can execute the command in CMD to start the PHP FastCGI process. After running the command, it will listen on the local 9000 port, waiting for Nginx to pass PHP requests. A reminder for readers: each time the environment is started, this command needs to be run first. For convenience, a batch script can be written to automatically start it in the future. The command to execute is as follows:
php-cgi.exe -b 127.0.0.1:9000(6) Connecting With Nginx Configuration
Go back to the Nginx configuration tutorial and open C:\wnmp\nginx\conf\nginx.conf. Make sure the PHP section in the server block is configured as follows (after saving the configuration, restart Nginx):
location ~ \.php$ {
    fastcgi_pass   127.0.0.1:9000;
    fastcgi_index  index.php;
    fastcgi_param  SCRIPT_FILENAME  $document_root$fastcgi_script_name;
    include        fastcgi_params;
}
(7) Verify That PHP is Configured Successfully
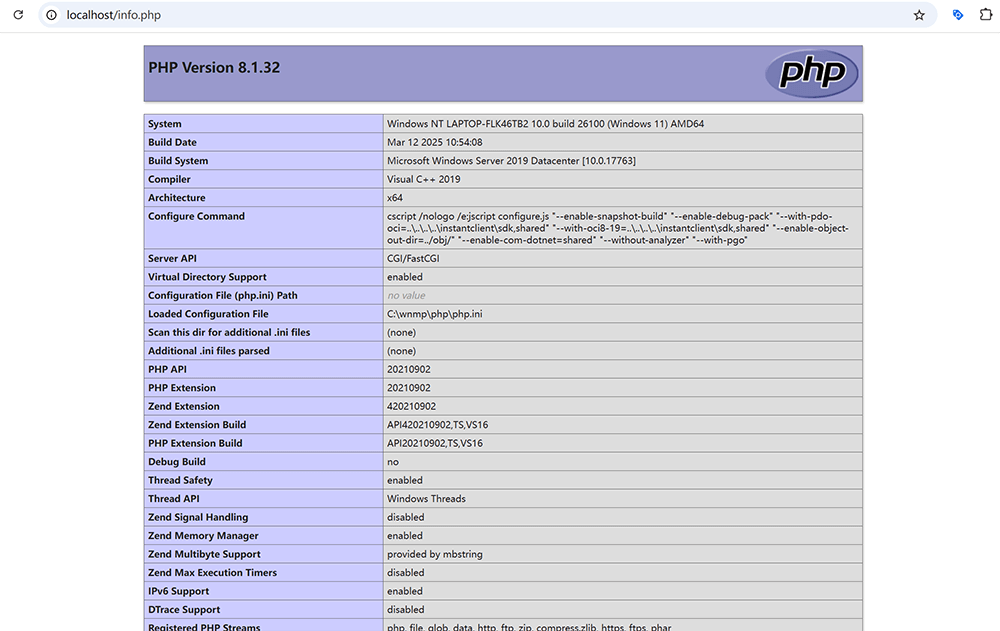
In the Nginx web root directory (e.g., C:\wnmp\www), create a new "info.php" file and add a line of PHP code inside. Then, visit the URL http://localhost/info.php in your browser. If the page successfully displays PHP configuration details, it means PHP has been successfully integrated with Nginx, and the environment setup is complete! At this point, PHP installation and configuration are finished, and it is successfully connected to Nginx, providing the runtime environment for WordPress. Next, we just need to configure the MySQL database and install WordPress. The code written in the "info.php" file used for test verification is as follows:
<?php phpinfo(); ?>After visiting http://localhost/info.php, if PHP and Nginx are integrated successfully, the page will return configuration details as shown in the following image:
4、MySQL Database Installation and Configuration
WordPress relies on a powerful database for data storage and management, and MySQL is currently the most widely used relational database system in WordPress websites. In a local development environment, setting up MySQL correctly and initializing the database is a crucial step for the website to function properly. In this section, the author will guide you through the MySQL installation process and help you set up the necessary accounts and permissions for the subsequent WordPress database connection.
(1)Download the MySQL installation package

Visit the MySQL Official Website, and after creating a MySQL official account, select the MySQL Community Edition suitable for the Windows platform from the download page. The recommended version is shown in the red box in the image above, specifically the ZIP Archive (portable version), which is suitable for a local development environment. After downloading, unzip it to the specified local directory, C:\wnmp\mysql.
(2) Initialize the MySQL data directory
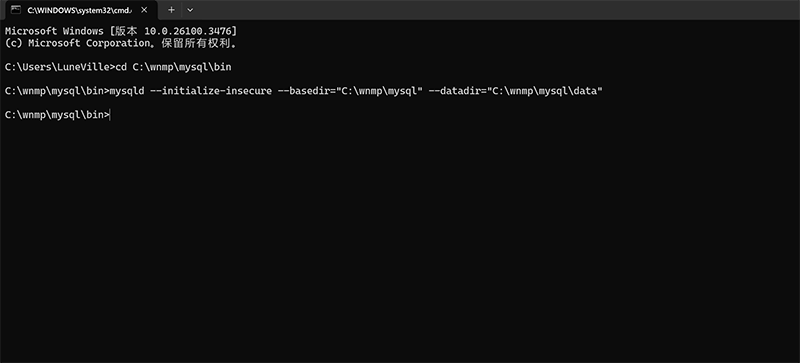
Open the command line and use the "cd C:\wnmp\mysql\bin" command to enter the bin folder of the MySQL decompression directory, and execute the following command to initialize the data directory again (note that C:\wnmp\mysql\data should be replaced with your own data path):
mysqld --initialize-insecure --basedir="C:\wnmp\mysql" --datadir="C:\wnmp\mysql\data"The CMD feedback after the above MySQL initialization data directory command is executed is as shown in the following figure:
(3) Create and configure the MySQL my.ini file
Create a new configuration file "my.ini" in the MySQL root directory (C:\wnmp\mysql) and add the following code to the file:
[mysqld]
# 设置端口
port=3306

# 数据存放路径
basedir=C:/wnmp/mysql
datadir=C:/wnmp/mysql/data

# 最大连接数
max_connections=200

# 字符集设置
character-set-server=utf8mb4
collation-server=utf8mb4_general_ci

# 允许远程连接
bind-address=0.0.0.0

# 禁用密码过期
default_password_lifetime=0

[client]
default-character-set=utf8mb4
(4) Install and start the MySQL service
You can choose to register MySQL as a Windows system service for easier startup and shutdown. The command to register MySQL as a Windows system service is as follows (you need to run CMD as an administrator, otherwise, you may encounter an installation/uninstallation service permission denial error):
cd C:\wnmp\mysql\bin
mysqld --install MySQL --defaults-file="C:\wnmp\mysql\my.ini"
After executing the above command to register MySQL as a Windows system service, you also need to start MySQL. The command to start MySQL is as follows:
net start MySQL(5) Log in and configure the root user
Log in to MySQL
Use the following command to log in to MySQL. You can log in directly because the default password is empty when MySQL is deployed:
mysql -u root -pSet root password
Before creating a database, you must create a password for the MySQL root account, otherwise you will not be able to proceed to the next step of database creation. You can use the following command to set the root password:
ALTER USER 'root'@'localhost' IDENTIFIED BY 'yourpassword';Create WordPress Database
Execute the following CMD command to create the WordPress database we will need to deploy WordPress.org. The command to create the WordPress database is as follows:
CREATE DATABASE wordpress DEFAULT CHARACTER SET utf8mb4 COLLATE utf8mb4_general_ci;Create a WordPress-specific user and authorize it
Use the following commands to create a WordPress-specific user for the WordPress database and authorize it. Execute the commands as follows:
CREATE USER 'wpuser'@'localhost' IDENTIFIED BY 'wppassword';
GRANT ALL PRIVILEGES ON wordpress.* TO 'wpuser'@'localhost';
FLUSH PRIVILEGES;
At this point, the local deployment and configuration of the MySQL database on Windows has been successfully completed, and the database is ready for WordPress to use. With the previously configured Nginx and PHP environment, the entire WNMP architecture has been basically built, and the next step is to install WordPress locally.
Ⅱ、WordPress Local Installation and Configuration
After completing the local deployment of Nginx, PHP, and MySQL, the next step is to install the WordPress program under Windows, connect the various components in series, build a complete and operational WordPress development environment, and achieve access, development, editing, and operation on the Windows local machine. In this section, the blogger will gradually explain the local download, installation, configuration, and startup process of WordPress.
1、Download Official WordPress Program
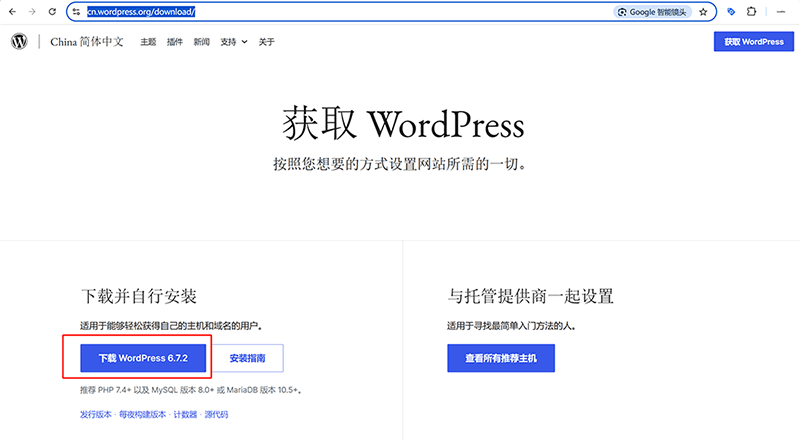
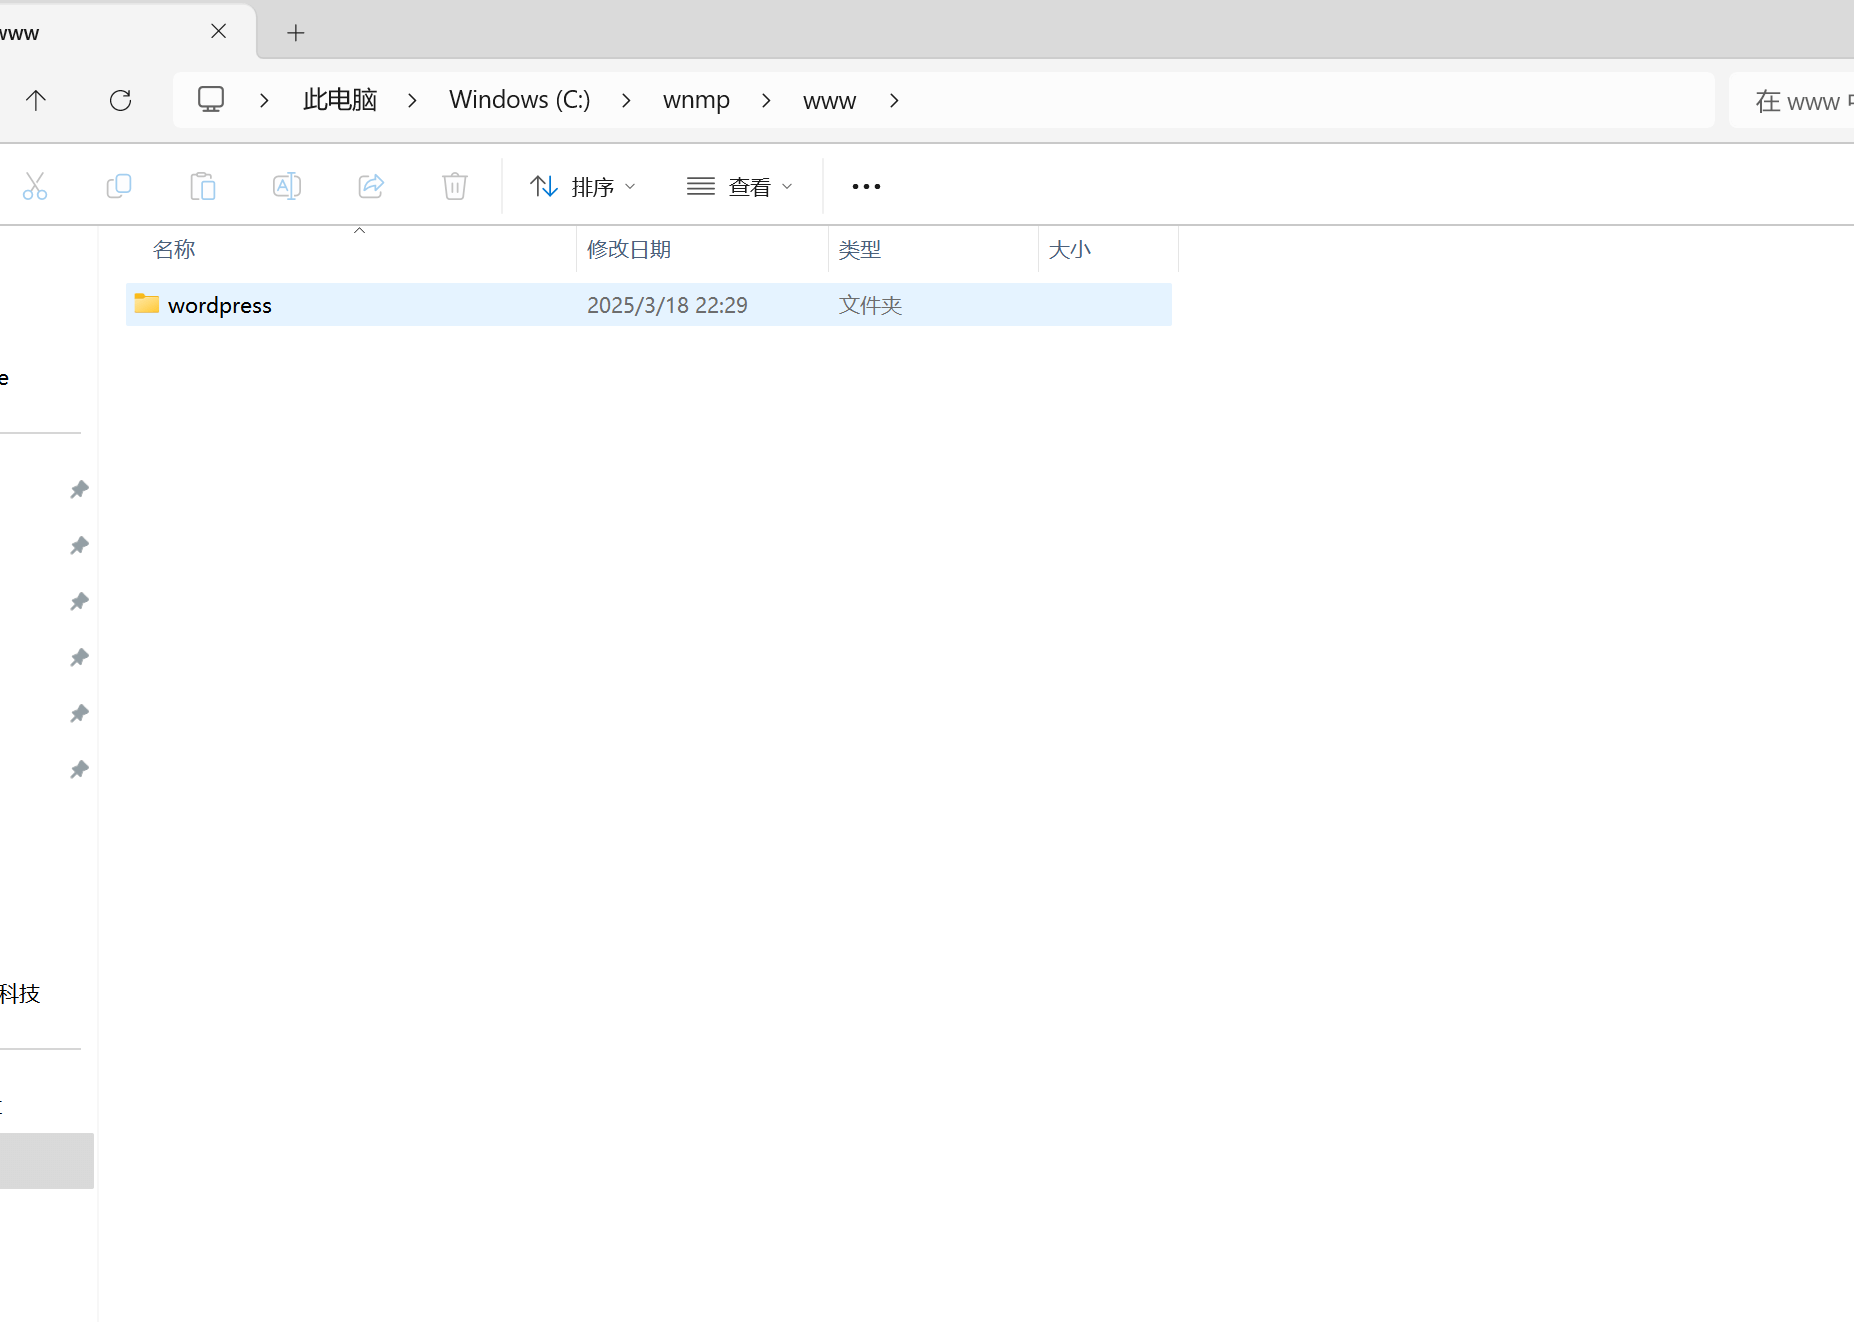
Visit the WordPress official download page, click to download the latest version of the WordPress.org zip installation package, as shown in the image above. At the time of writing this article, the latest version of WordPress.org is 6.7.2. After downloading the WordPress installation package, extract it to our local website root directory (C:\wnmp\www\wordpress).
2、Configure Nginx Site to Point to WordPress
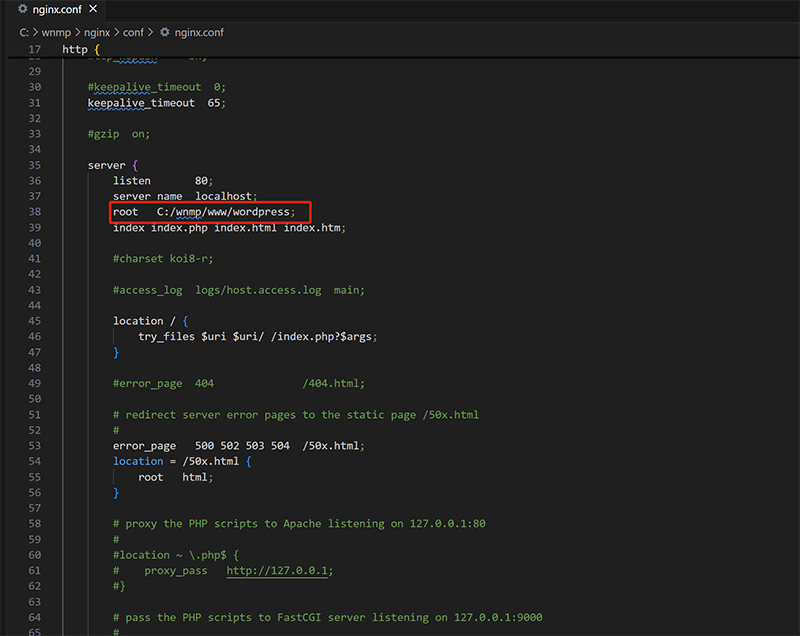
Enter the Nginx directory and open the nginx.conf configuration file. In the server block as shown in the image above, set the root path to point to the WordPress directory you just extracted (C:/wnmp/www/wordpress). Replace the following line of code in the server block or add "wordpress" to the original "root C:/wnmp/www/;" (as highlighted in the red box in the image above). After modifying the configuration, save the file and restart Nginx to apply the new settings.
root C:/wnmp/www/wordpress;3、Create WordPress Configuration File
Enter the WordPress folder and locate the file "wp-config-sample.php". Make a backup copy of this file and rename the copied file to "wp-config.php". Open this file using VSC. Once the file is opened, as shown in the image above, configure the MySQL connection information in the code. Enter the required database name, username, and password as per the comments in the following PHP code:
define( 'DB_NAME', 'wordpress' );
define( 'DB_USER', 'root' ); // 上面创建数据库时的'root'或 'wpuser'
define( 'DB_PASSWORD', '你的MySQL密码' );
define( 'DB_HOST', 'localhost' );
define( 'DB_CHARSET', 'utf8mb4' );
define( 'DB_COLLATE', '' );
4、Start WordPress Installation Wizard

Before officially launching the WordPress installation wizard, it is important to ensure that all core components of the local development environment—Nginx, PHP, and MySQL—are successfully deployed and running. These three components work together to provide the foundation for the normal access and operation of a WordPress site, and none can be missing. Nginx is responsible for handling frontend HTTP requests and forwarding them to PHP for parsing. PHP drives the core logic of WordPress, while the MySQL database is used to store all the content and configuration information of the site. Only when these three services are properly started and work together seamlessly, will the WordPress installation wizard run smoothly, avoiding connection errors or permission issues. Next, we will detail the process of launching and configuring the WordPress installation wizard, assuming the environment is ready.
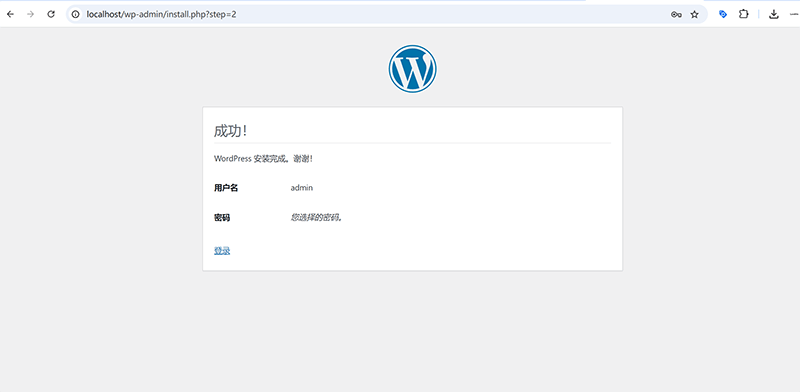
In the browser, use "http://localhost/" as the URL to connect to WordPress and launch the installation process. If all configurations for the WordPress environment components were done correctly earlier, it will automatically redirect to the WordPress installation page as shown in the image above. Follow the on-screen instructions to fill in the website information. Once the information is entered, click the "Install WordPress" button at the bottom of the page. After a brief moment, the installation will be completed, and you can log in to the backend directly.
- Site Title: Used to define the name of the WordPress site, which will be displayed in the browser title bar and on the homepage after installation. It can be customized according to the project requirements and can be modified at any time in the backend later.
- Username (Administrator Username): The super administrator account name used to log into the WordPress backend. It is recommended to avoid using the default "admin" for better security and to make future management easier.
- Password (Administrator Account Password): The login password used in conjunction with the administrator username. To ensure account security, it is recommended to set a strong password combination that includes letters, numbers, and special characters.
- Your Email (Administrator Account Email/Site Email): Used to receive WordPress system notifications (such as password resets, comment alerts, etc.). Even in a local environment, it is recommended to provide a valid email address for future use during migration.
- Search Engine Visibility: This option controls whether search engines are allowed to index the site, which is an important setting for SEO performance. However, in a local development environment, there is no need to focus on SEO optimization. Therefore, this setting can be ignored, and the system's default settings can be kept.
The page feedback after WordPress is successfully installed in the local environment is shown in the following image:
The interface shown in the following image is displayed after successfully logging into the WordPress admin dashboard on the local environment:

At this point, the entire process of setting up the WordPress local development environment is officially complete. From the local WNMP environment setup, database configuration, to WordPress installation and initialization, every step has been successfully completed. You can now confidently proceed with theme development, plugin development, or functionality testing locally, with a highly flexible and controllable development space.
Ⅲ、Key Files for WordPress Theme Development
When developing a WordPress theme, there are several basic and essential files that must be created. Together, they form the basic structure of the theme. Whether it's a simple blog theme or a complex corporate website, these files are the core elements that allow WordPress to recognize, load, and run the theme properly. In this chapter, the blogger will explain in detail the role of these four essential files and their key points for writing, helping developers build a theme skeleton that complies with WordPress standards.
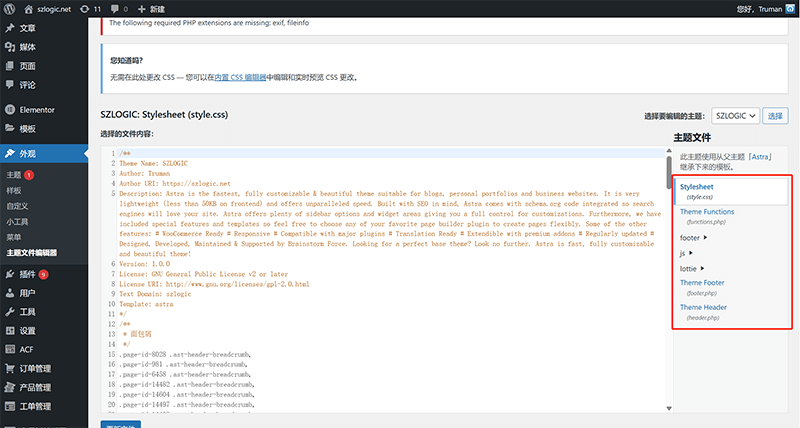
1、style.css
style.css is the main stylesheet file of a WordPress theme. It is used not only to define the front-end CSS styles but also plays a role in describing the theme's metadata. WordPress recognizes the theme's name, version, author, and other basic information through the header comments in the style.css file.
(1) Structure description
/*
Theme Name: My Custom Theme
Theme URI: https://example.com/
Author: Your Name
Author URI: https://example.com/
Description: A custom WordPress theme for demonstration.
Version: 1.0
License: GNU General Public License v2 or later
License URI: https://www.gnu.org/licenses/gpl-2.0.html
Text Domain: mycustomtheme
Tags: custom, responsive, blog
*/- Theme Name: The name of the theme, which is displayed in the WordPress admin theme list.
- Description: A brief introduction of the theme.
- Version, Author and other information are useful for version management and copyright declaration.
- Text Domain is used for internationalization and translation, which is essential when developing a multilingual theme.
2、index.php
index.php is the core template file of a WordPress theme and is an essential file in the theme folder. It is the fallback file at the bottom of the template hierarchy. If more specific template files do not exist, WordPress will default to loading index.php to render the page.
(1) Basic structure
<?php get_header(); ?>

<main>
    <?php
    if ( have_posts() ) :
        while ( have_posts() ) : the_post();
            the_title( '<h2>', '</h2>' );
            the_content();
        endwhile;
    else :
        echo '<p>No content found.</p>';
    endif;
    ?>
</main>

<?php get_footer(); ?>
(2) Key points for function calls in the index.php file
- Use get_header() and get_footer() to include the header and footer templates.
- Use the WordPress loop (have_posts() and the_post()) to output the list of posts or a single post's content.
- Ensure that index.php has basic page rendering capabilities to prevent blank pages when accessing the site.
3、header.php
<header.php is used to store the website's header structure, including meta information within the tag, CSS/JS file imports, the website logo, navigation menu, and other content. It is loaded by other template files via the get_header() function, enabling unified management and reuse of the site's header.
(1) Example structure
<!DOCTYPE html>
<html no numeric noise key 1007>
<head>
    <meta charset="<?php bloginfo( 'charset' ); ?>">
    <meta name="viewport" content="width=device-width, initial-scale=1.0">
    <title><?php wp_title(); ?></title>
    <?php wp_head(); ?>
</head>
<body no numeric noise key 1003>

<header>
    <div class="site-logo">
        <a href="/en/</?php echo home_url(); ?>"><?php bloginfo( 'name' ); ?></a>
    </div>
    <nav>
        <?php wp_nav_menu( array( 'theme_location' => 'primary' ) ); ?>
    </nav>
</header>
(2) Key points of the header.php file function
- Use the wp_head() function to ensure that WordPress plugins or themes can dynamically insert necessary CSS/JS resources.
- Use bloginfo() to output site name, encoding and other information to keep it dynamic.
- The navigation menu is mounted via wp_nav_menu(), and the menu can be customized in the background.
4、functions.php
Functions.php is a theme's function file, similar to a "plugin" for WordPress themes, used to extend theme functionality or modify WordPress default behavior. You can register navigation menus, enable theme support features, load style scripts, define custom functions, etc.
(1) Common usage examples
<?php
// 注册导航菜单
function mytheme_register_menus() {
    register_nav_menus( array(
        'primary' => __( 'Primary Menu', 'mycustomtheme' ),
    ) );
}
add_action( 'init', 'mytheme_register_menus' );

// 启用主题支持
function mytheme_theme_setup() {
    add_theme_support( 'title-tag' );
    add_theme_support( 'post-thumbnails' );
}
add_action( 'after_setup_theme', 'mytheme_theme_setup' );

// 加载样式和脚本
function mytheme_enqueue_scripts() {
    wp_enqueue_style( 'main-style', get_stylesheet_uri() );
    wp_enqueue_script( 'main-js', get_template_directory_uri() . '/js/main.js', array(), null, true );
}
add_action( 'wp_enqueue_scripts', 'mytheme_enqueue_scripts' );
?>
(2) Key points in the functions.php file
- Hook mechanism: add_action(), add_filter() gives you flexible control over WordPress behavior.
- Theme functions such as registration menu, sidebar, featured images, etc. are configured through functions.php.
- It is an important entry file for developers to customize theme features, optimize performance, and integrate third-party libraries.
The above four files, style.css, index.php, header.php and functions.php, form the most basic framework for WordPress theme development. Mastering their uses and standard writing methods can help developers quickly build a runnable and scalable theme structure. On this basis, you can further add more template files such as single.php, page.php, footer.php, etc. to enrich the theme functions and meet the actual project needs.
Ⅳ、WordPress Debugging and Testing

In WordPress theme or plugin development, debugging and testing are crucial steps to ensure code quality and website stability. A good debugging configuration not only helps developers quickly identify issues but also improves development efficiency and prevents uncontrollable errors after going live. This section will focus on debugging methods and testing techniques in WordPress development, introducing some efficient and practical debugging configurations and tools to ensure issues in the development environment can be located and fixed in a timely manner.
1、Enable WordPress Debug Mode (WP_DEBUG)
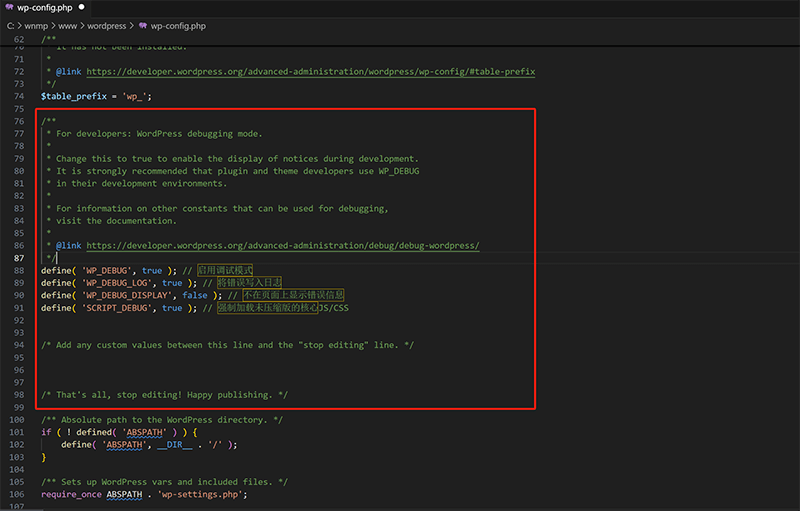
WordPress has a built-in debugging mechanism. By enabling the WP_DEBUG constant, developers can view PHP errors, warnings, notices, and other information in real-time, making it easier to troubleshoot issues. When used in combination with other debugging constants, error information can also be logged to a file, improving issue tracking control. Open the wp-config.php file and modify the configuration as shown in the red box in the screenshot above to enable WordPress debug mode (WP_DEBUG). After the configuration, error messages will be logged in the /wp-content/debug.log file for easy viewing. During the local development phase, it is recommended to keep WP_DEBUG enabled to identify potential issues in a timely manner. In the production environment, error display should be turned off to avoid exposing sensitive information, while keeping log records for backend troubleshooting.
define( 'WP_DEBUG', true ); // 启用调试模式
define( 'WP_DEBUG_LOG', true ); // 将错误写入日志
define( 'WP_DEBUG_DISPLAY', false ); // 不在页面上显示错误信息
define( 'SCRIPT_DEBUG', true ); // 强制加载未压缩版的核心JS/CSS
2、Use Query Monitor Plugin for Performance and Database Debugging
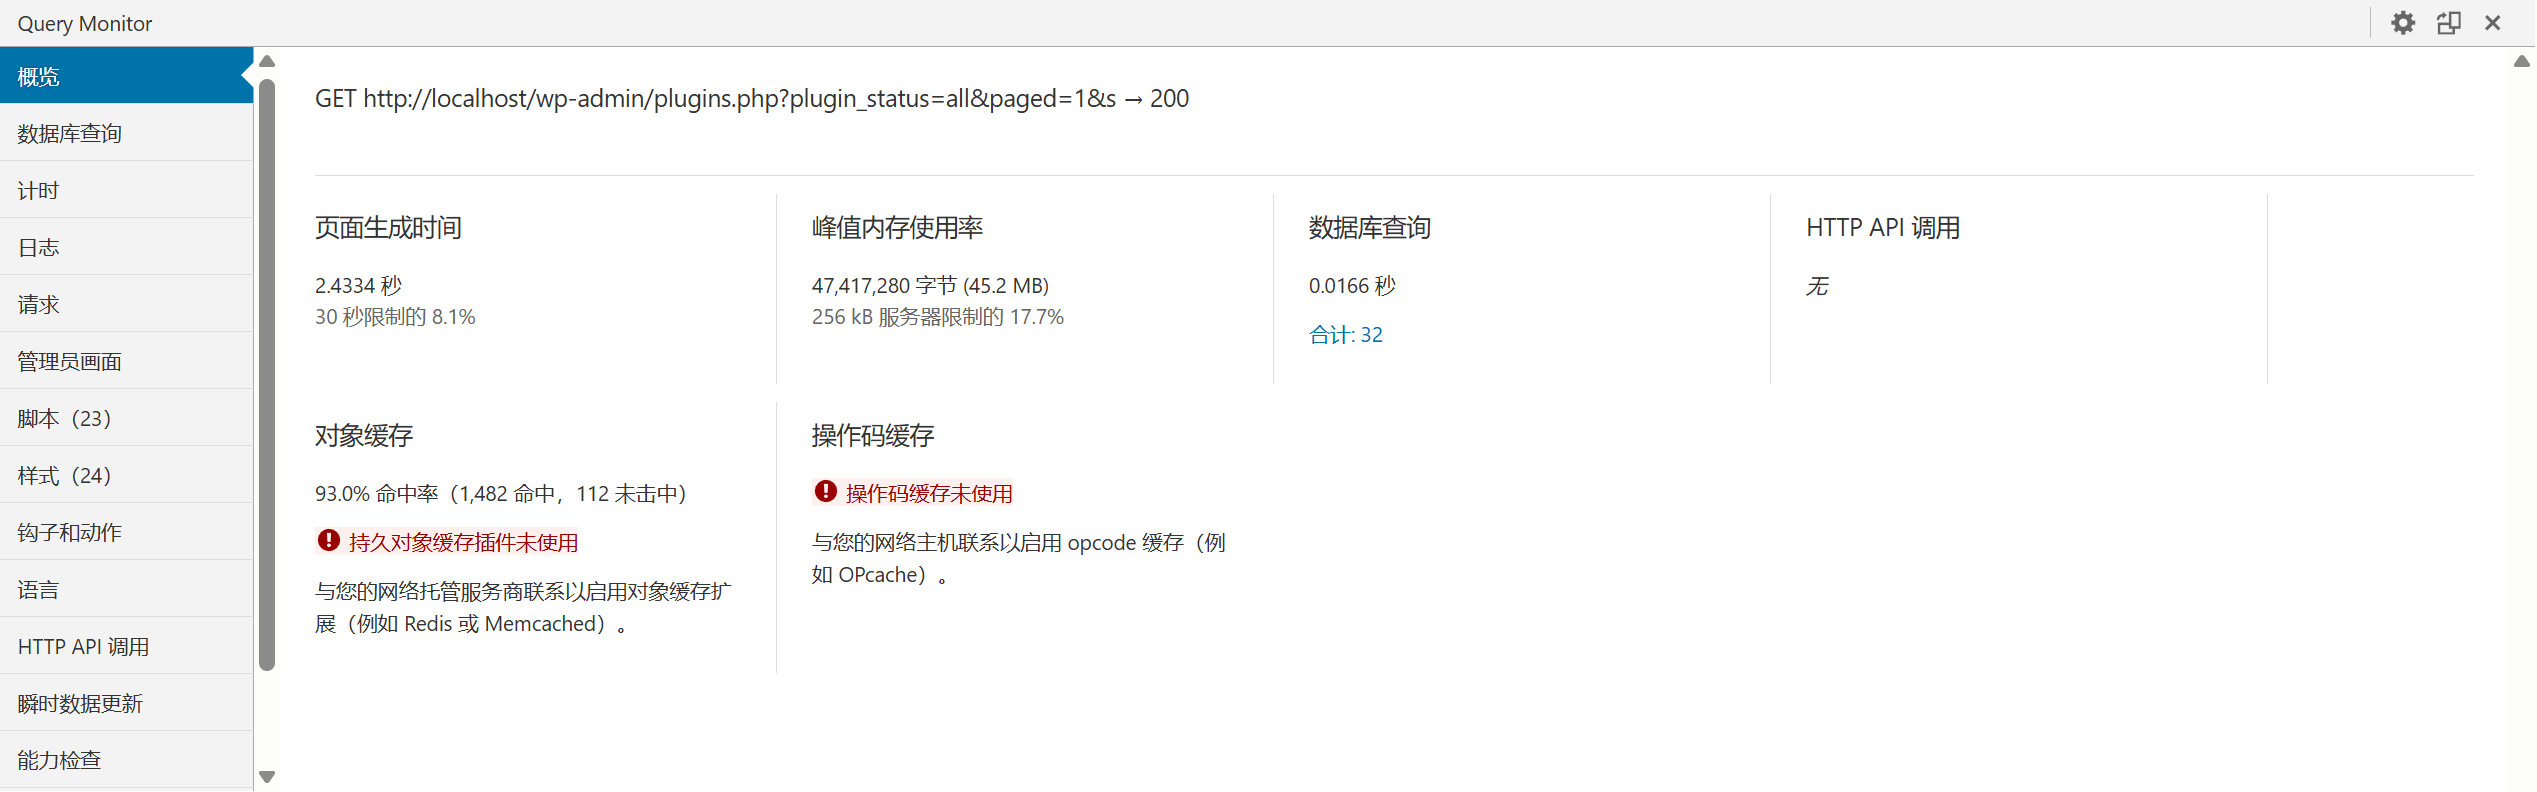
Query Monitor is a powerful WordPress debugging plugin. As shown in the image above, it integrates various features such as database query analysis, HTTP request monitoring, PHP error capture, and Hooks loading tracking. It is an essential debugging tool for developers.
(1) Query Monitor Feature Highlights
- Real-time display of page loading time, memory usage, database query times and time consumption.
- Lists each SQL query statement and its call stack to help locate slow or repeated queries.
- Displays the template files loaded by the current page and the Conditional Tags matching results.
- Tracks loaded hooks, themes and plugins' function load paths.
- Supports multi-site, multi-language, and REST API debugging views.
(2) How to use Query Monitor
- Install and enable the "Query Monitor" plugin from the Backend Plugin Marketplace.
- Once enabled, a debug menu will appear in the WordPress administration toolbar. Click it to expand detailed debugging information.
- Locate and optimize database performance bottlenecks, code errors, and loading order issues.
(3) Query Monitor usage suggestions
- It works best with WP_DEBUG mode.
- This plugin is only recommended to be enabled in the development environment to avoid adding performance burden in the formal environment.
3、Browser Developer Tools and Mobile Responsiveness Testing
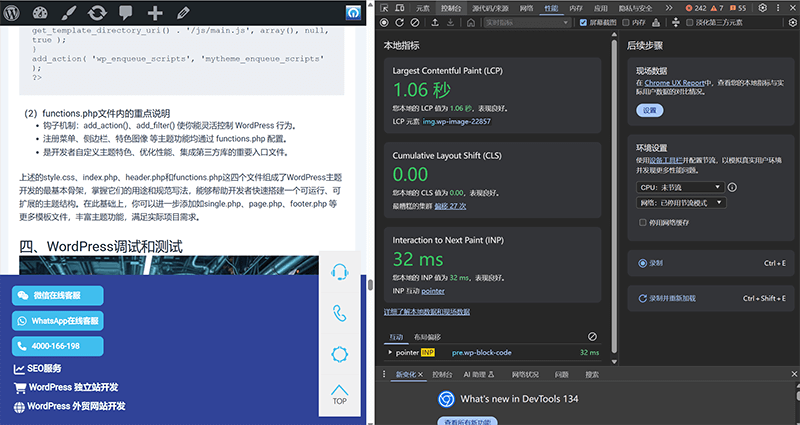
In addition to WordPress's internal debugging mechanisms, modern browsers' built-in developer tools (such as Chrome DevTools) are also important tools for frontend debugging. Through these tools, you can analyze HTML structure, CSS styles, JS execution, network requests, and more, allowing you to quickly locate frontend issues. These tools are especially useful during theme development.
(1) Key Functions
- Elements(Elements): View and modify the DOM structure and CSS styles in real time to debug layout issues.
- Console(Console): View JS errors and debug information, and execute debug code.
- Network(Network): Analyze page loading resources, request time, and locate slow-loading resources
- Device Mode(Device Mode): Switch to mobile device view to test responsive layout compatibility.
- Lighthouse(Performance Report): Generate a page performance report to evaluate loading speed, accessibility, and more.
(2) Usage Tips
- Right-click a page element → Inspect to quickly locate the element and its style source.
- Simulate website display under different resolutions and check whether menus, buttons, content areas, etc. are adapted.
- Use console output (console.log()) to assist JS interactive debugging.
WordPress debugging and testing not only rely on its own mechanisms, such as WP_DEBUG and Query Monitor plug-ins, but also need to be combined with browser tools, error log analysis and other methods to form a complete debugging closed loop. Through scientific debugging and sufficient testing, developers can efficiently solve problems, optimize performance, and prepare for subsequent deployment and maintenance.
Ⅴ、Two Methods for WordPress Backup and Restoration

During the WordPress development and testing phase, frequent code modifications, plugin installations, theme adjustments, and even database operations carry unpredictable risks. If configuration errors, data corruption, or accidental operations occur, the site may fail to function properly, potentially leading to data loss. A comprehensive backup and recovery mechanism is the first line of defense against such issues. Whether it's switching versions during development or restoring environments during testing, timely and effective backups allow developers to quickly revert to a stable state, significantly reducing the cost of recovery and enhancing development efficiency and project security. In this chapter, which is also the final chapter of this article, the blogger will introduce two commonly used backup and recovery methods in WordPress, covering file-level, database-level, and automated backup tools. This will help developers establish a robust and reliable backup strategy for local development, testing, and even production deployment, providing solid security for the entire development process.
1、Manually Backup WordPress Files and Database
Manual backups are the most basic and straightforward backup method, especially suitable for individual developers who need temporary version saving and restoration in local or testing environments. The content of a WordPress site is primarily made up of two parts: files and the database. The file portion includes the core WordPress program files, theme files, plugin files, and multimedia files uploaded by users, which are usually located under the WordPress installation directory. The data in the wp-content folder is especially crucial. The database, on the other hand, stores all the site's posts, pages, user information, settings, and other dynamic data. To back up the files, simply copy the entire WordPress installation directory to a secure location on the local hard drive. It is recommended to name the backups by date or project phase for easy version identification. Additionally, don't forget to back up the configuration file wp-config.php, as it contains the database connection information and custom configurations.
For database backups, you can export the database using phpMyAdmin or command-line tools. In phpMyAdmin, select the corresponding WordPress database, click "Export," and choose the SQL format to export a complete data snapshot. Command-line users can use the `mysqldump` command to export the database, ensuring data consistency and integrity. The restoration process is also simple. To restore files, replace the backup folder with the one in the WordPress directory. For the database, you can import the previously exported SQL file via phpMyAdmin or use the command line to re-import the data into the database. This manual method is flexible, making it suitable for local development when frequently switching versions or testing new features before backups. However, it also comes with the risk of frequent operations and potential omissions, making it more suitable for small-scale development environments.
2、Use Plugin to Perform WordPress File Backup and Restoration
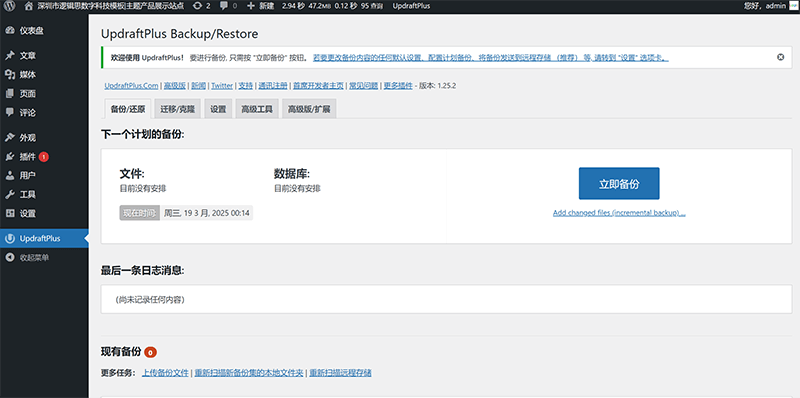
For development projects that require frequent backups or involve multiple collaborators, manual backups can be time-consuming, labor-intensive, and prone to errors. In this case, using an automated backup plugin can significantly improve efficiency and reliability. UpdraftPlus is a highly praised automated backup plugin within the WordPress ecosystem. It supports one-click backups of WordPress files and databases, and can automatically sync backup data to various cloud storage services such as Google Drive, Dropbox, and OneDrive, avoiding the risks of local hard drive failure or accidental deletion. The process of installing the UpdraftPlus plugin is the same as installing any regular plugin. Go to the WordPress dashboard, find Plugins → Add New, search for "UpdraftPlus," and activate it. After activation, users can find the dedicated UpdraftPlus interface in the settings menu, which is intuitive and easy to configure. Users can freely set the content to be backed up, including databases, themes, plugins, uploaded files, etc., and can choose the backup frequency, such as daily, weekly, or on-demand.
Even more advantageously, UpdraftPlus supports a one-click restore function. Backup files can be directly restored to the current site through the plugin interface, eliminating the need to manually replace files or import databases. This is especially useful during the development and testing phases when code, plugins, or themes are frequently adjusted, and when issues or configuration chaos arise. Simply clicking the restore button allows you to roll back to the stable state at the time of backup, greatly reducing manual intervention and the likelihood of errors. Additionally, UpdraftPlus allows you to set multiple remote storage backups for redundancy and supports backup encryption to ensure data security. This automated backup method is suitable for synchronized backup strategies in both development and production environments, particularly for WordPress projects that require long-term maintenance and collaboration among multiple people.
Conclusion: WordPress development and deployment is not simply about setting up a program online; it is a systematic process involving several stages, such as environment setup, theme development, debugging and testing, backup and recovery, and final deployment. This article starts with the complete setup of the local development environment, WNMP, and details the configuration methods for each essential component required for development, laying a solid foundation for developers. Then, through the explanation of key files needed for theme development, it provides a structured reference for custom theme design. In the debugging and testing phase, we explored commonly used debugging tools and testing workflows, helping developers promptly identify and fix potential issues during development. Regarding data security during the development and testing stages, this article focuses on two efficient and feasible backup and recovery solutions, satisfying the needs of individual developers for flexible manual backups while also providing automated backup strategies suitable for collaborative environments, minimizing risks caused by accidental operations or system failures. Through the entire development lifecycle process, we believe that both individual developers and team collaborators can establish a clear, efficient, and secure WordPress development workflow. In future projects, this complete set of development and deployment guidelines will serve as a solid foundation for continuous optimization and steady progress. We hope that every detail compiled in this article will inspire and assist you in your WordPress development practice.
Finally, a special recommendation for the company where the author works – Shenzhen Logic Digital Technology Co., Ltd. Logic Digital Technology focuses on in-depth development within the global WordPress ecosystem, dedicated to providing one-stop WordPress solutions for businesses and individual clients. Our services cover a wide range of areas, including WordPress website design and development, plugin custom development, theme programming development, and system integration. With rich development experience and technical expertise, we are capable of tailoring efficient, stable, and scalable WordPress projects for clients of different sizes and needs. If you have any customized requirements during the development, functionality extension, or system deployment of WordPress projects, feel free to contact the Shenzhen Logic Digital Technology team. We will provide strong support for your digital development with professional services and innovative technology.
This article is copyrighted by Logic Digital Technology (SZLOGIC) . Personal sharing and learning are welcome. Unauthorized use for any commercial purposes or reproduction of this article is strictly prohibited.