


Install Google Analytics On Your Website
Google Analytics is a must-install tool for foreign websites, while Chinese websites typically do not need it due to network issues and differences in user regions. With Google Analytics, users can gain deep insights into the sources of their visitors, how they found the website, their browsing paths on the site, and how they interact with the content. These insights help website administrators and operators make more informed decisions, improve user experience, optimize content, increase conversion rates, and ultimately achieve business goals.
Through this technical article you will learn:
- How to Create Google Analytics Media Resource Manager and Application
- How to Install Google Analytics on Your Website
This tutorial will guide you through the process of installing Google Analytics on your website using the following structured content outline. If the article addresses specific issues you encounter, readers can also click on the directory links below for selective reading.
- Creating a Media Resource Manager and Application
- Installation Methods for WordPress and Shopify Websites
- Verifying If Google Analytics is Successfully Installed on Your Website
Ⅰ、Creating a Media Resource Manager and Application
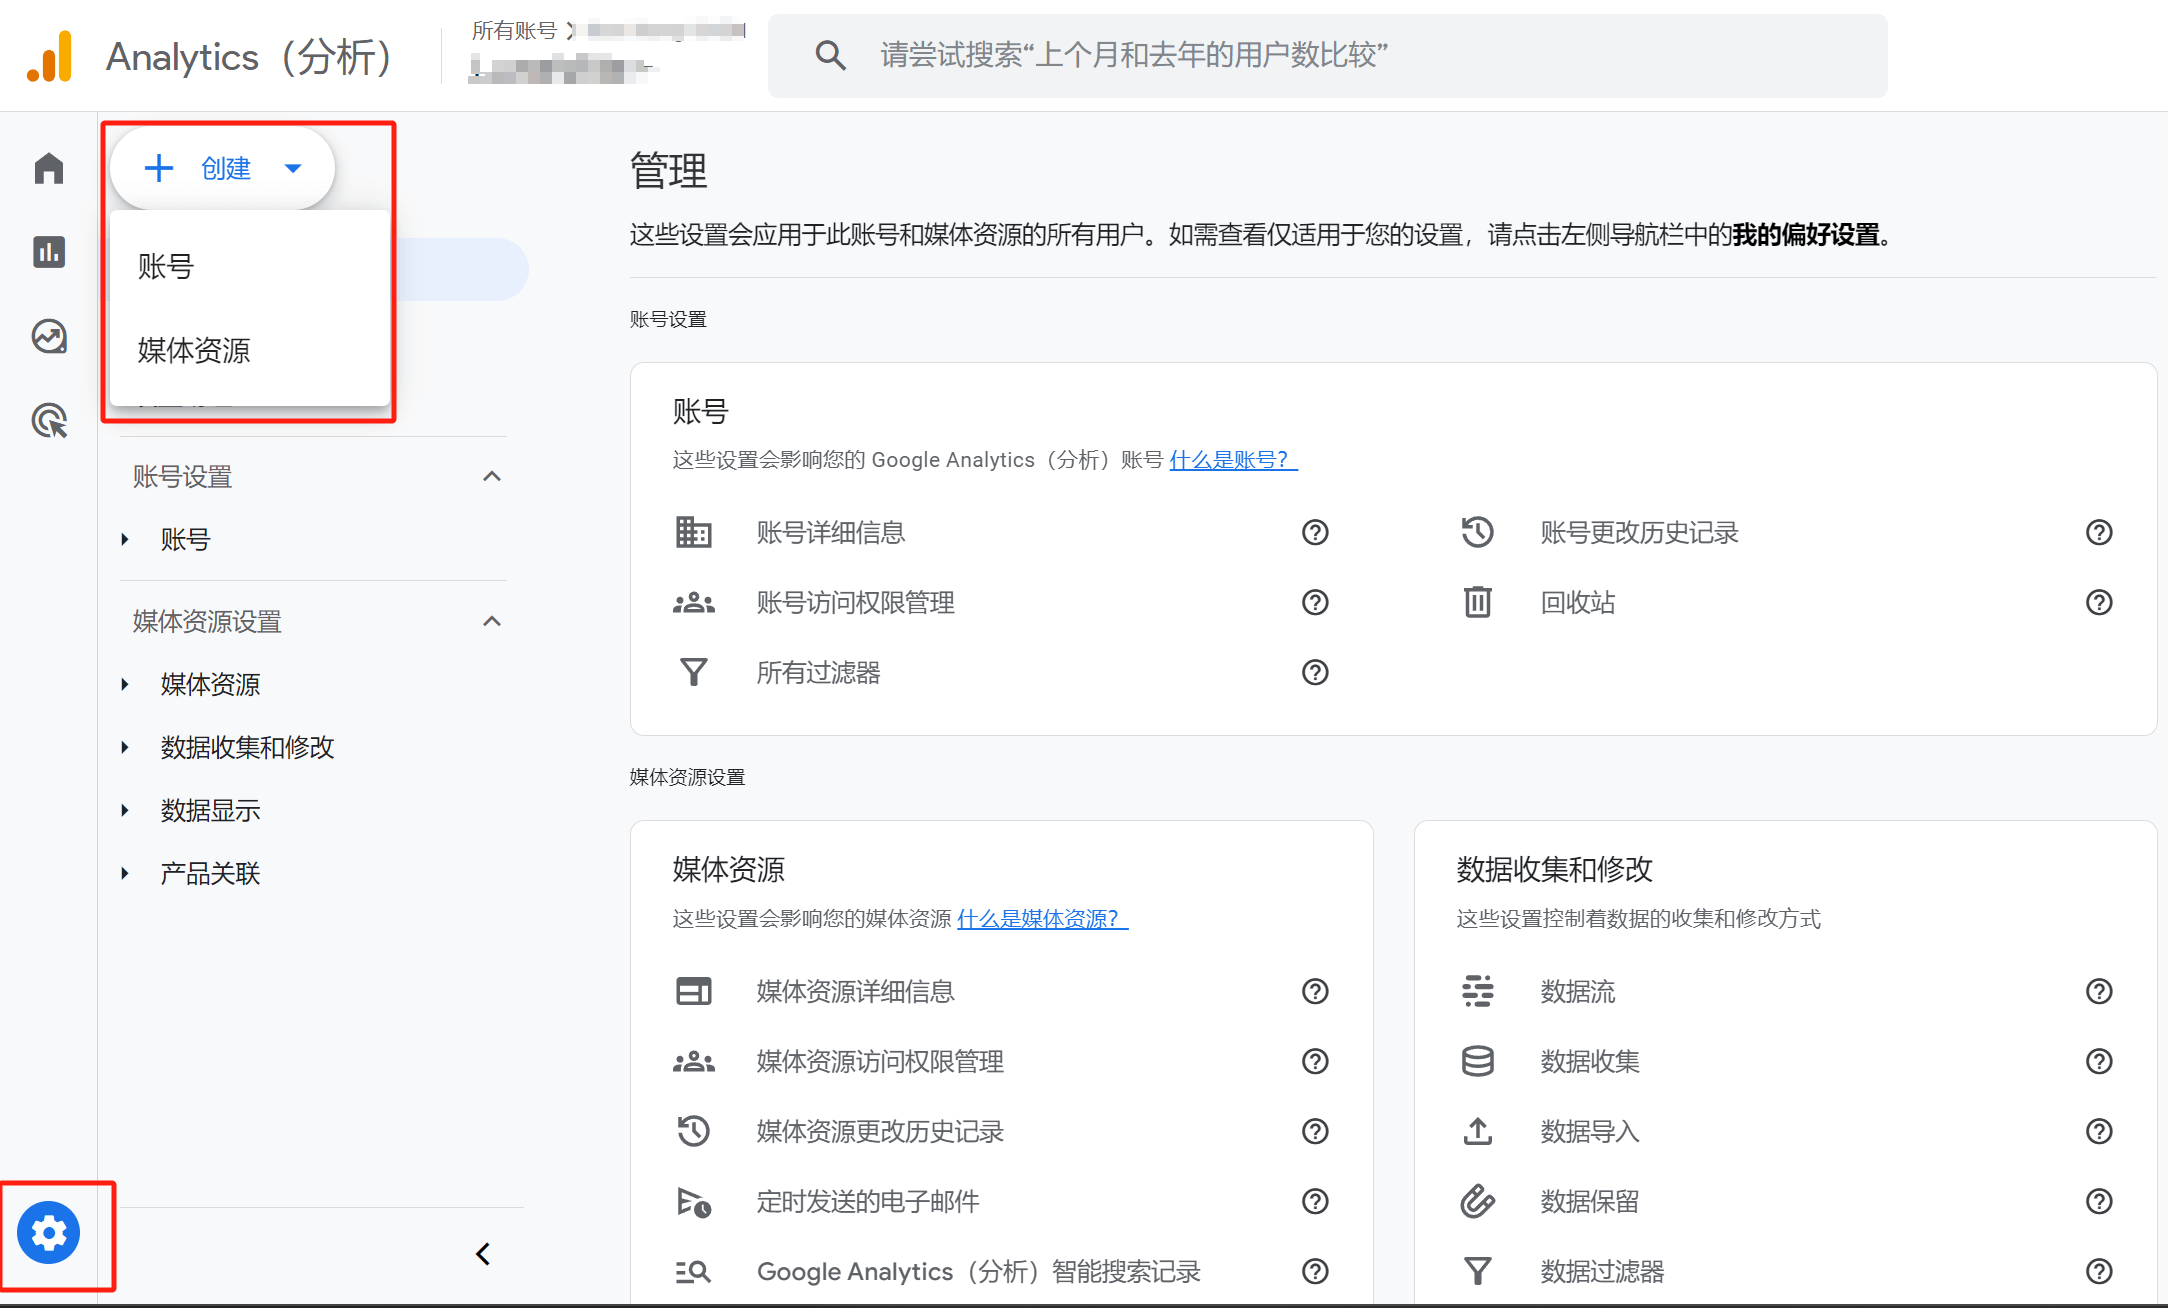
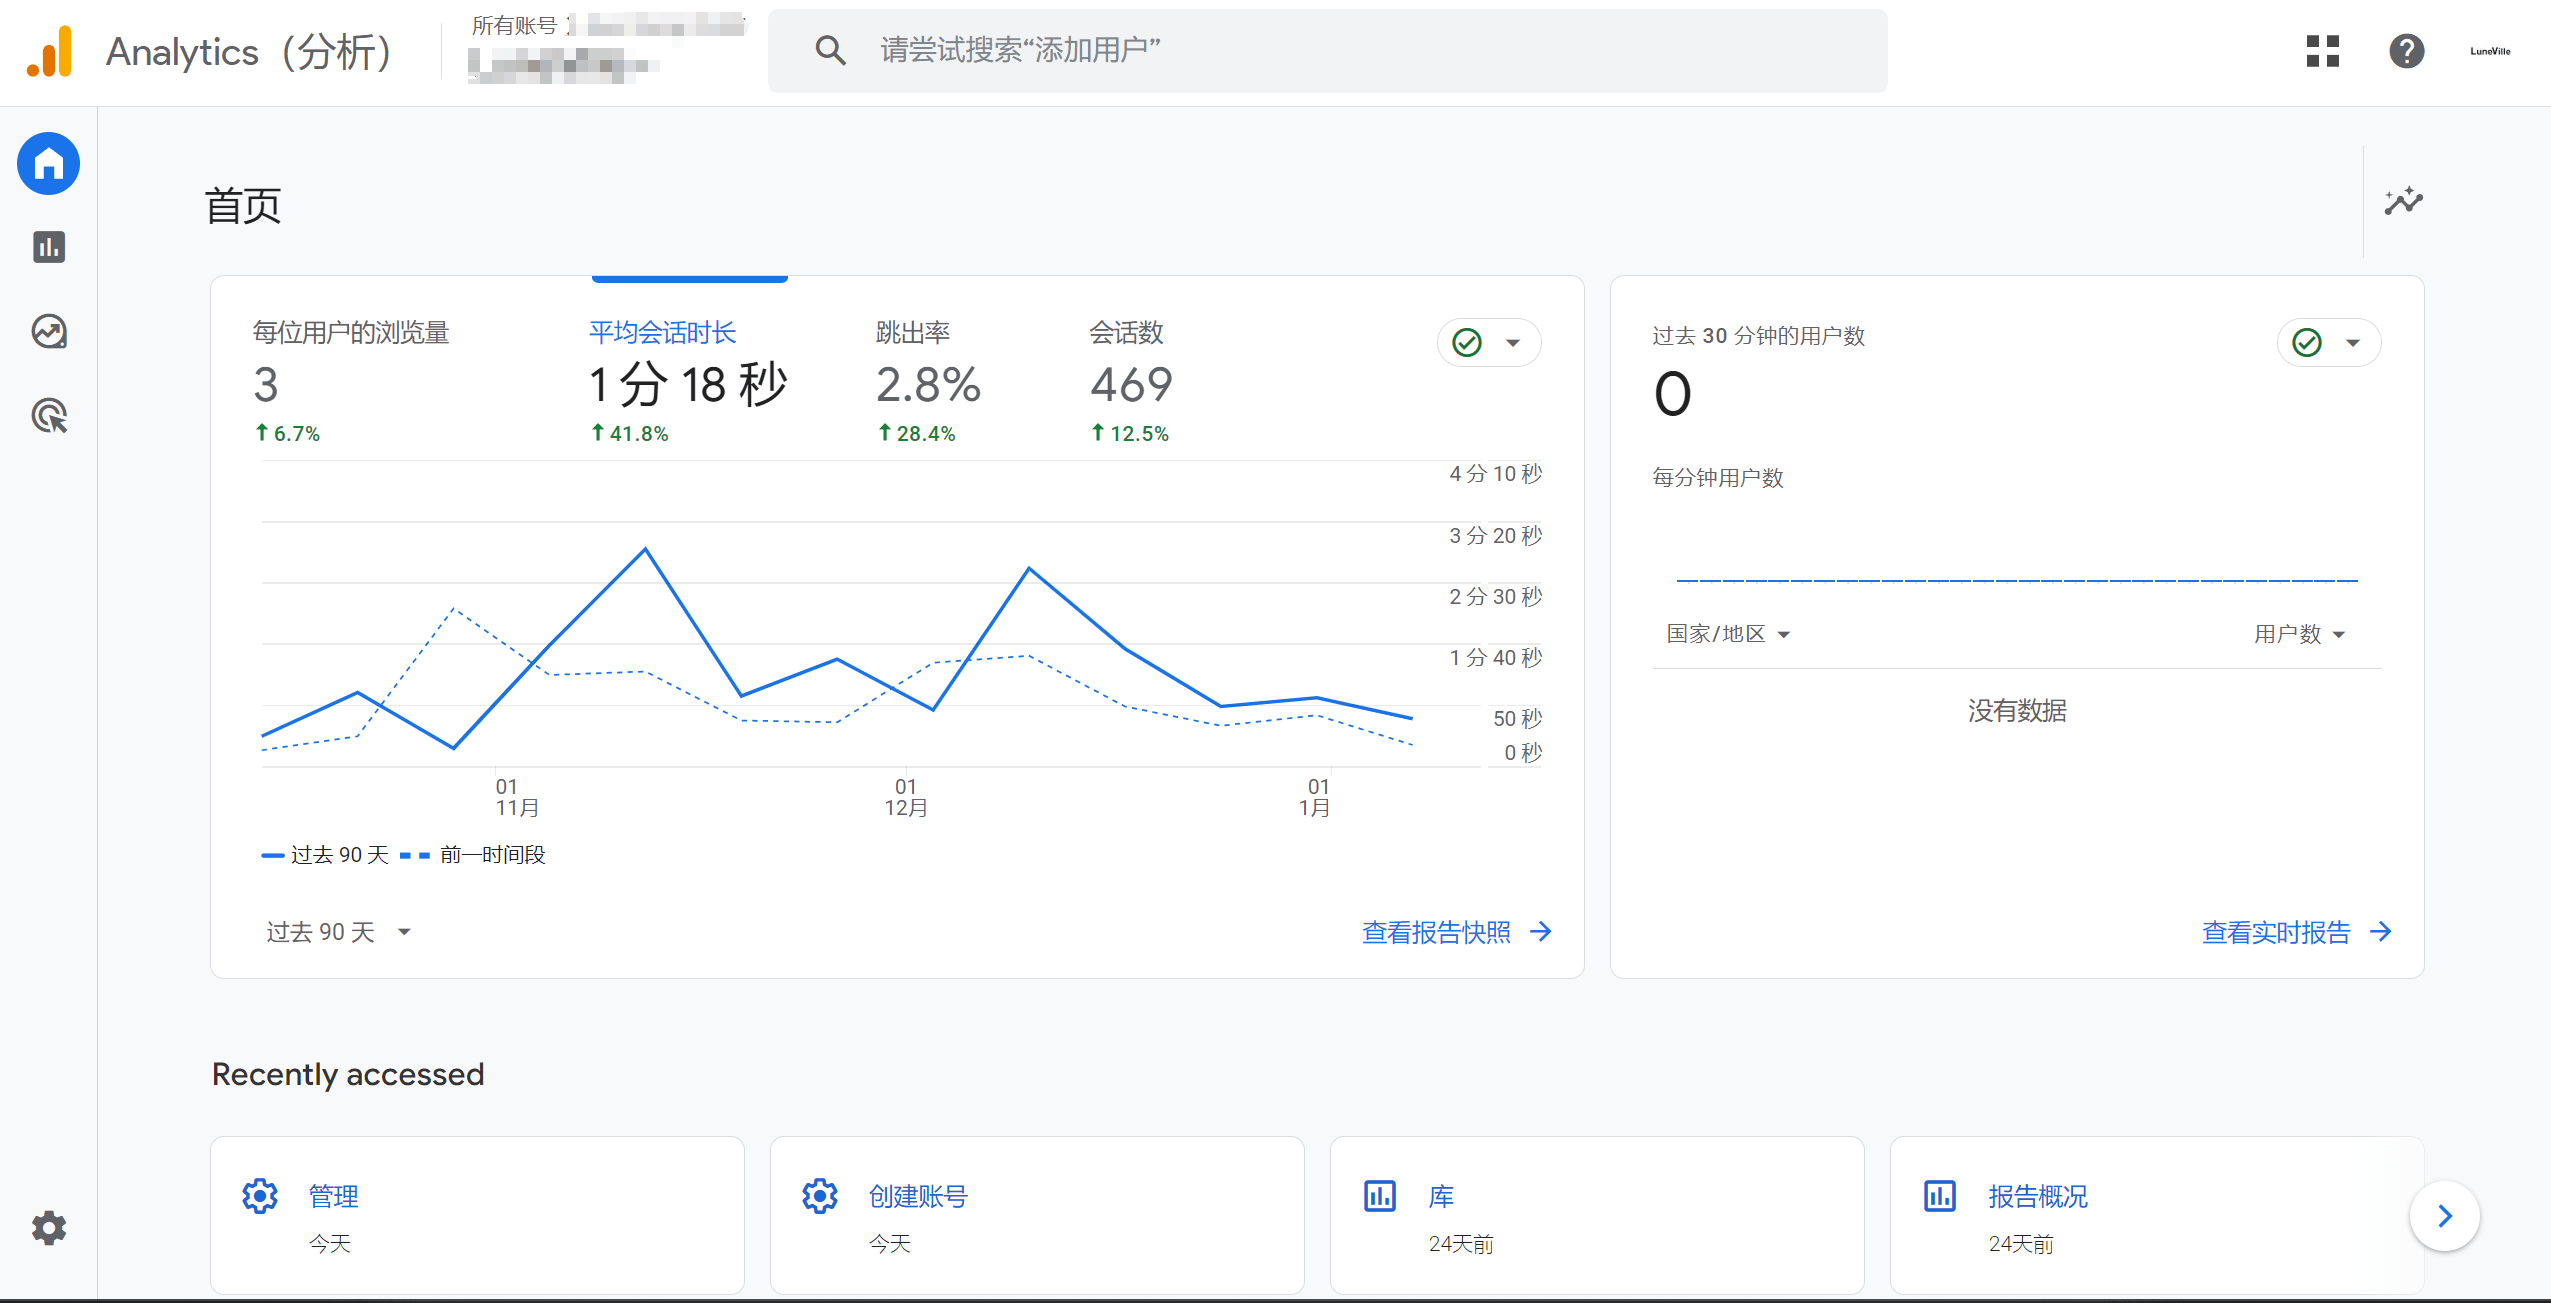
Click on the "Admin" icon at the bottom of the Google Analytics homepage to access the Google Analytics management page. At this point, in the upper section of the left management toolbar (highlighted in the red box in the image), there will be a "Create" button. After clicking the button, click on "Media Resources" to proceed to the specific steps for creating a Media Resource Manager, as shown in the image below.
Note: The above steps assume that you have already enabled Google Analytics for your Google account. If you haven't, first log in to the Google Analytics page and enable Google Analytics for your Google account.
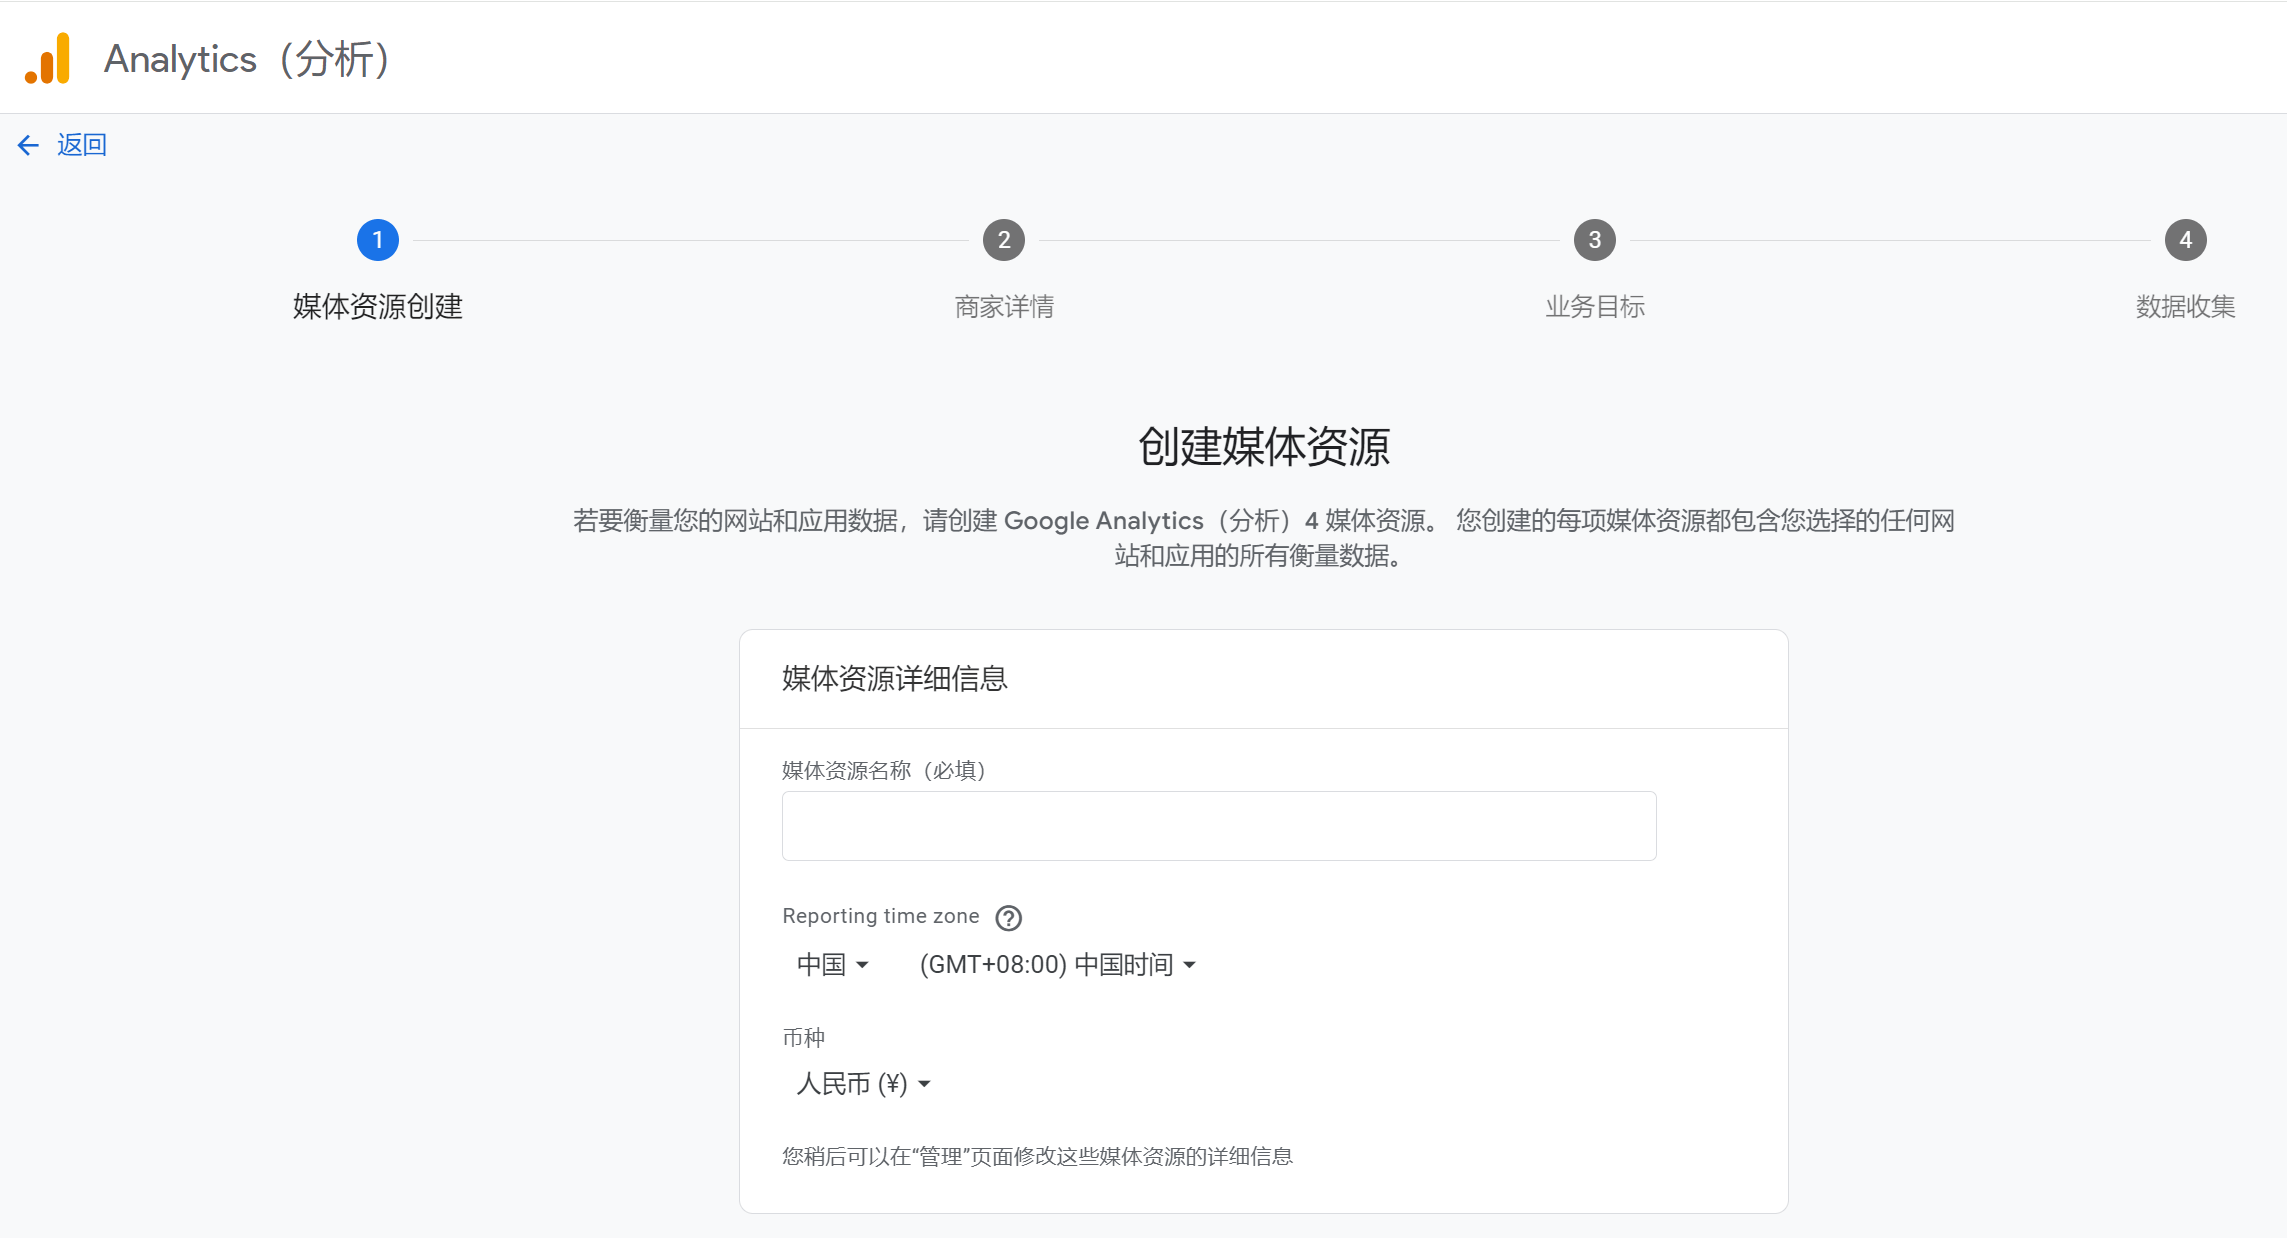
Media Resource Name: Enter your custom media resource name. This field is required. The specific name can be chosen based on personal preference, as long as it is easy to remember and distinguish. It could be the website name, brand name, etc.
Reporting Time Zone: This is the time zone for the analysis report. Google Analytics will automatically detect it based on the IP address. You can leave it at the default setting.
Currency: This is the currency used in the conversion value of Google Analytics data reports. Choose the currency based on your preference. If no specific requirement, you can leave it at the default setting.
After completing the above steps, click the "Next" button on the page to proceed to the next step, which is the merchant details page, as shown in the image below.
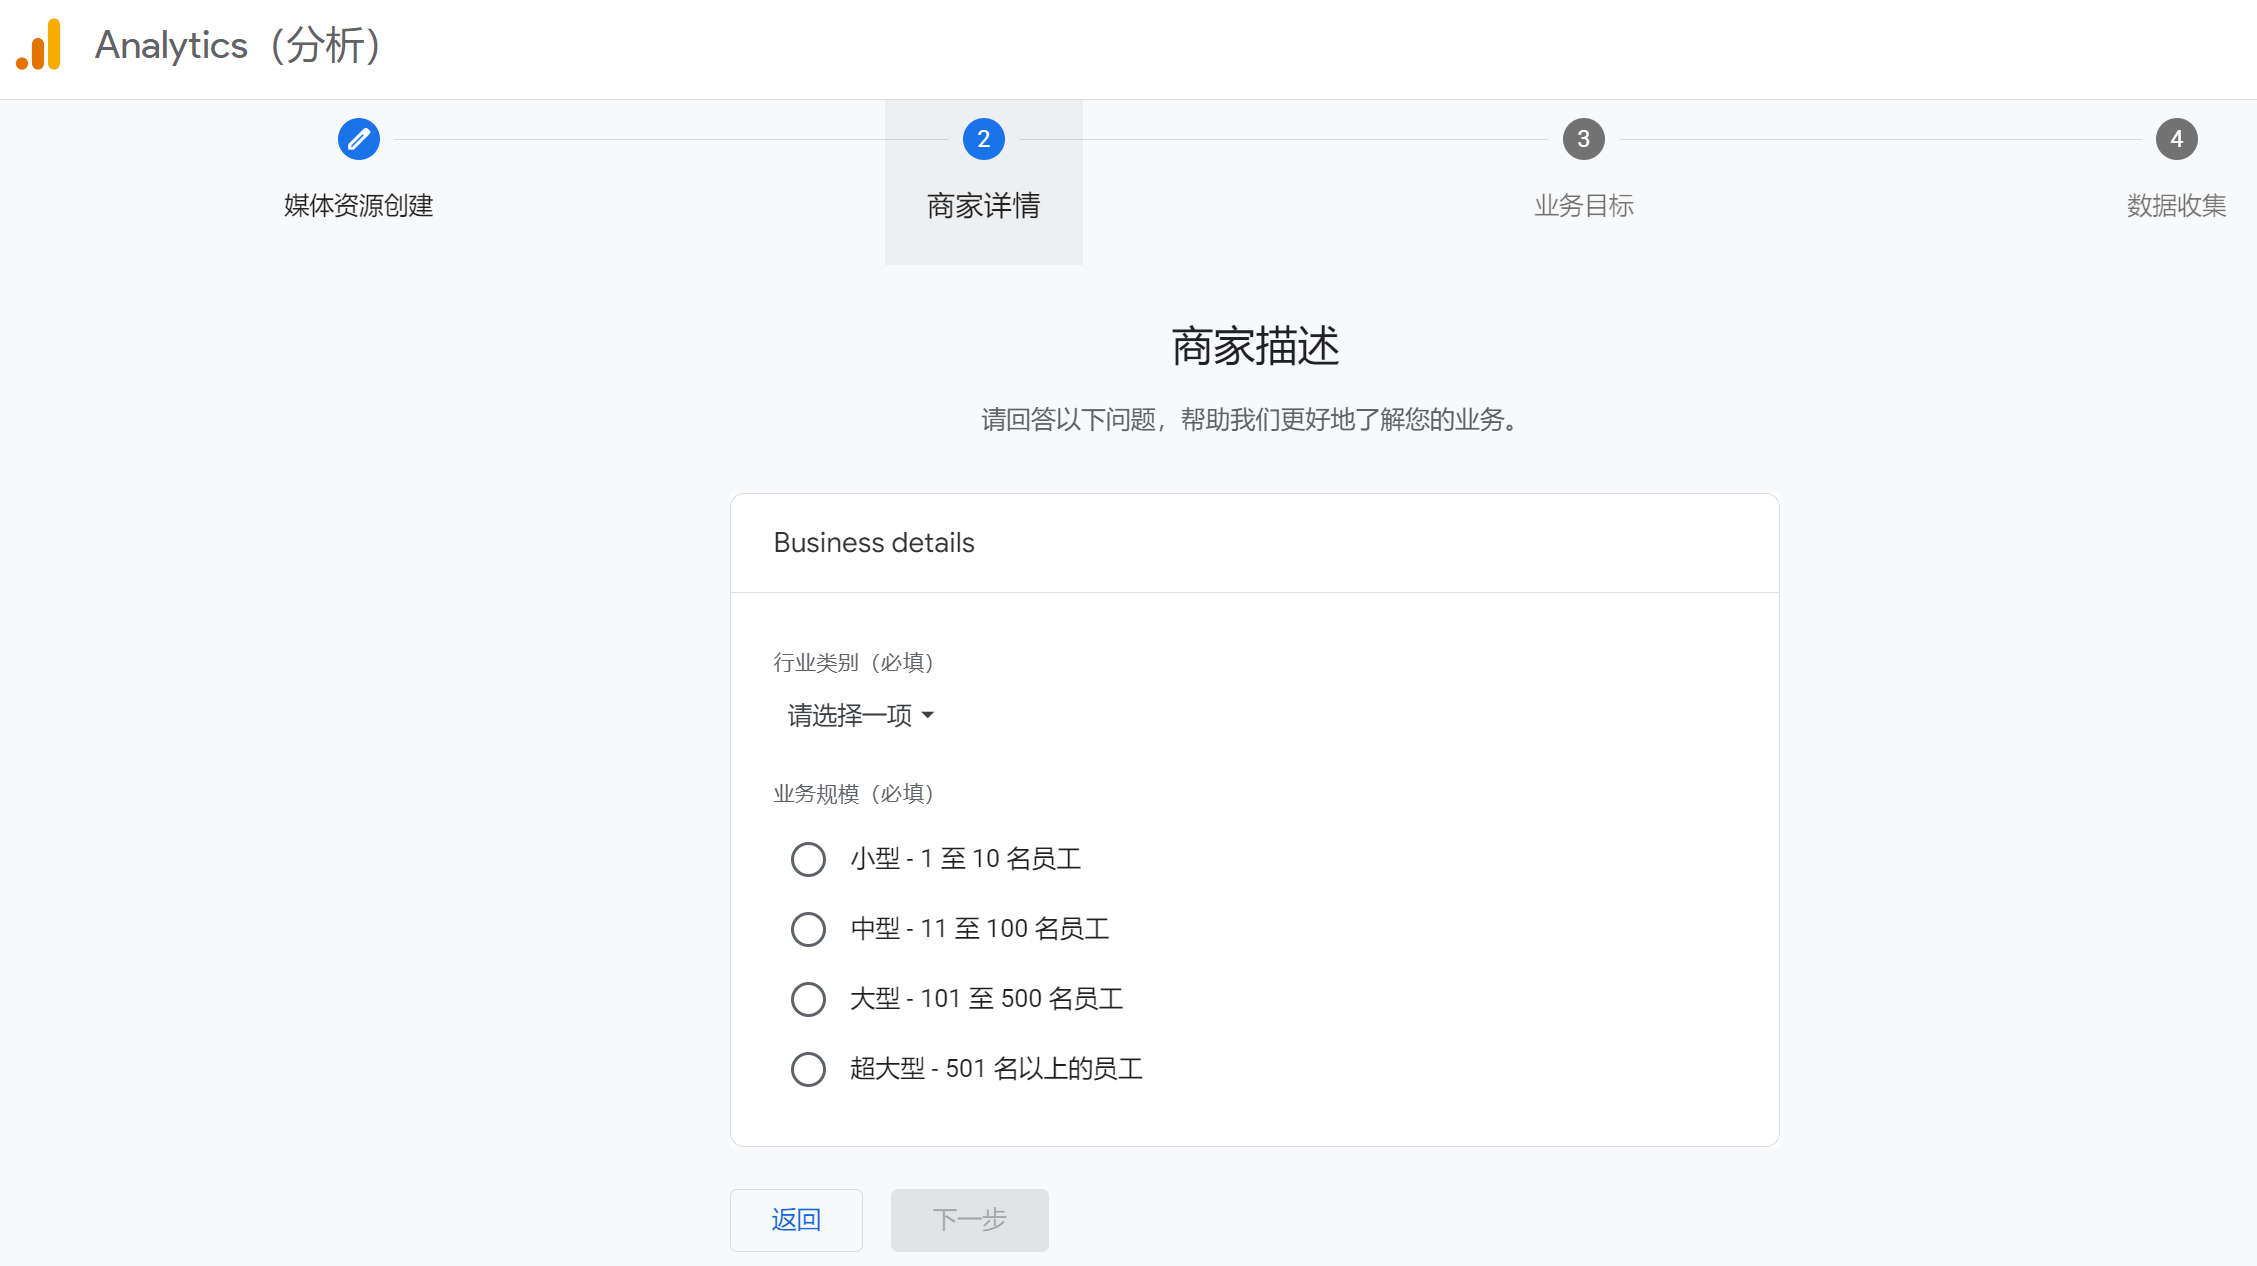
Industry Category: Click the dropdown menu and select the industry category that is most relevant to your business.
Business Size: Choose according to your preference, the size can be large or small.
After selecting the above two items, continue by clicking the "Next" button to proceed to the third step of creating the media resource manager, which is the "Business Goals" page, as shown in the image below.
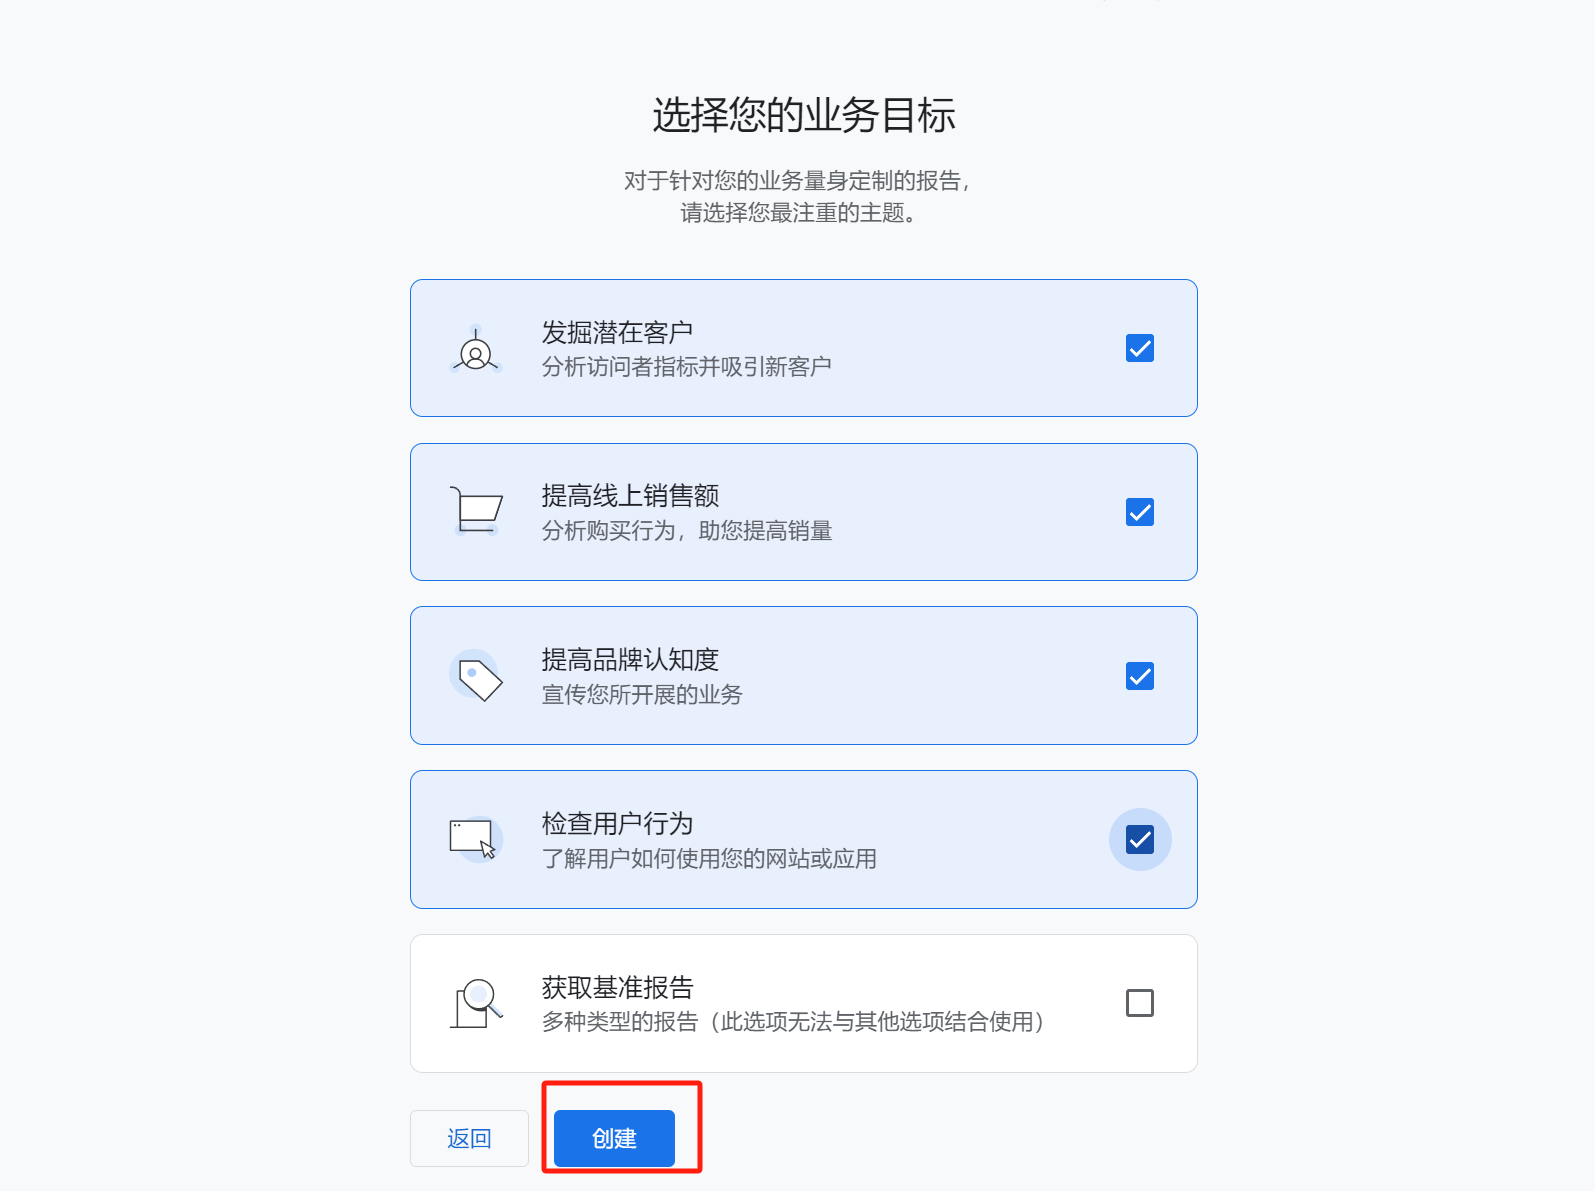
Identifying potential customers, increasing online sales, improving brand awareness, and analyzing user behavior are all key data report dimensions in Google Analytics. Make sure to check these options so that the created Google Analytics media resource manager can track and analyze a comprehensive set of data. The "Get Benchmark Report" option cannot be selected together with other options. This option refers to a combined benchmark report, but we do not know the specific dimensions that make up this report, so it is best to leave this option unchecked.
Once everything is completed, click the "Create" button. At this point, the media resource manager will be created, and you will be directed to the data collection page, as shown in the image below.
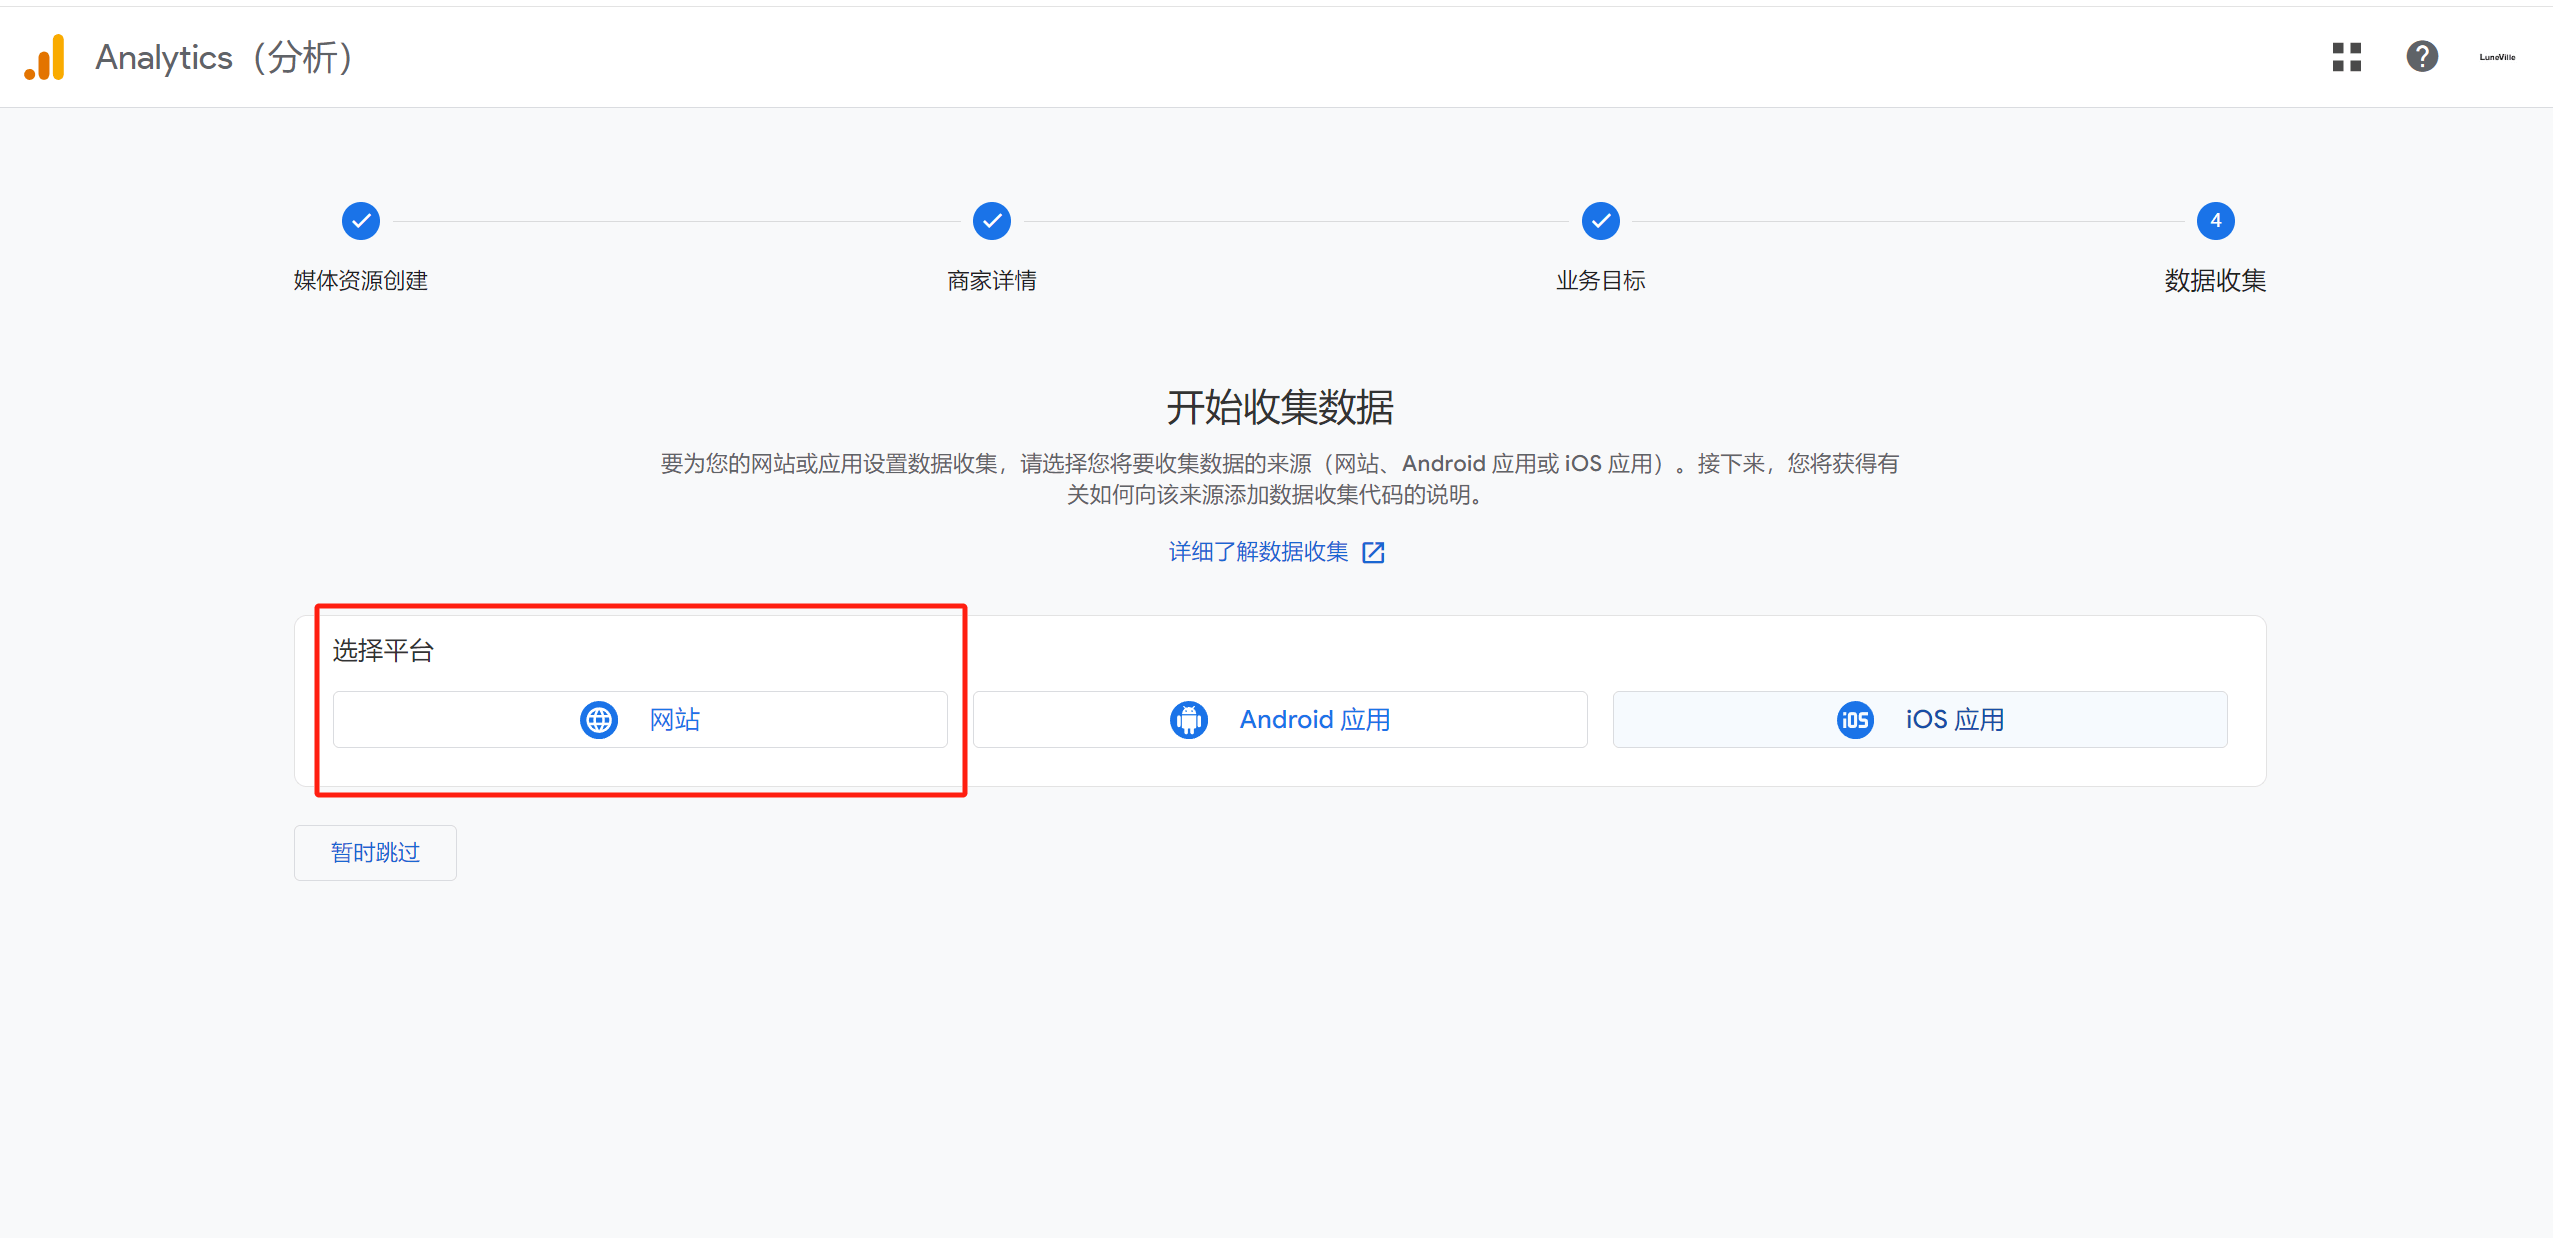
Before starting data collection, Google Analytics requires us to specify the type of application platform for data collection. Since this tutorial is about how to install Google Analytics on a website, as shown in the red box in the image, select "Website." After selecting the platform as "Website," a page for setting up the data stream will pop up. Fill in the required information as indicated on the page.
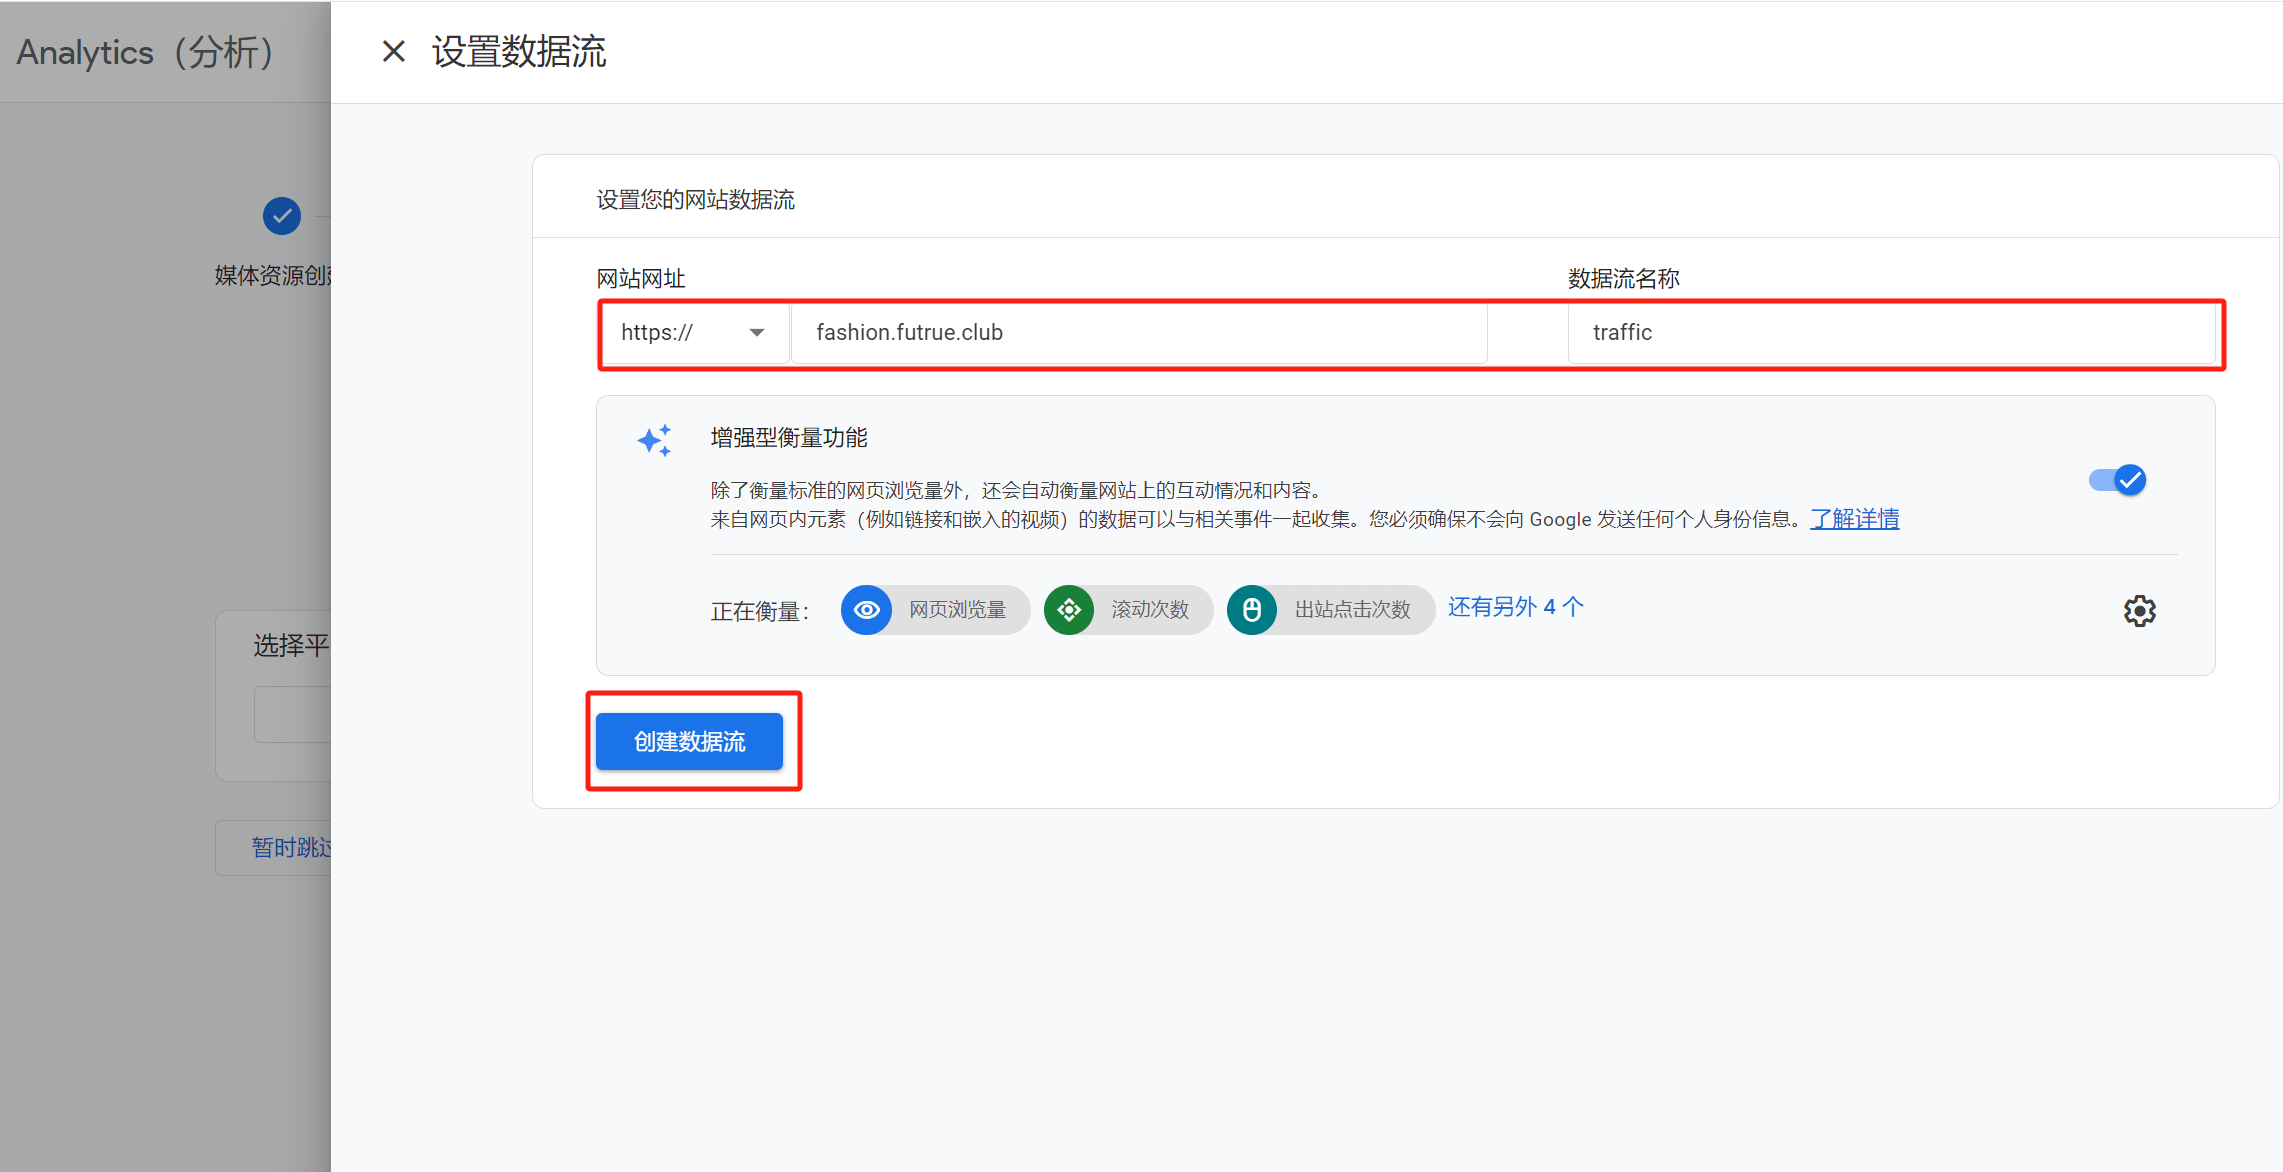
Website URL: Enter your domain name. Google has already prefilled "https://", so there is no need to include the "https://" protocol prefix.
Data Stream Name: Enter a name that is easy for you to recognize. Then click the “Create Data Stream” button to proceed to the step where the code is installed on the website.
II. Installation Methods for Shopify and WordPress**
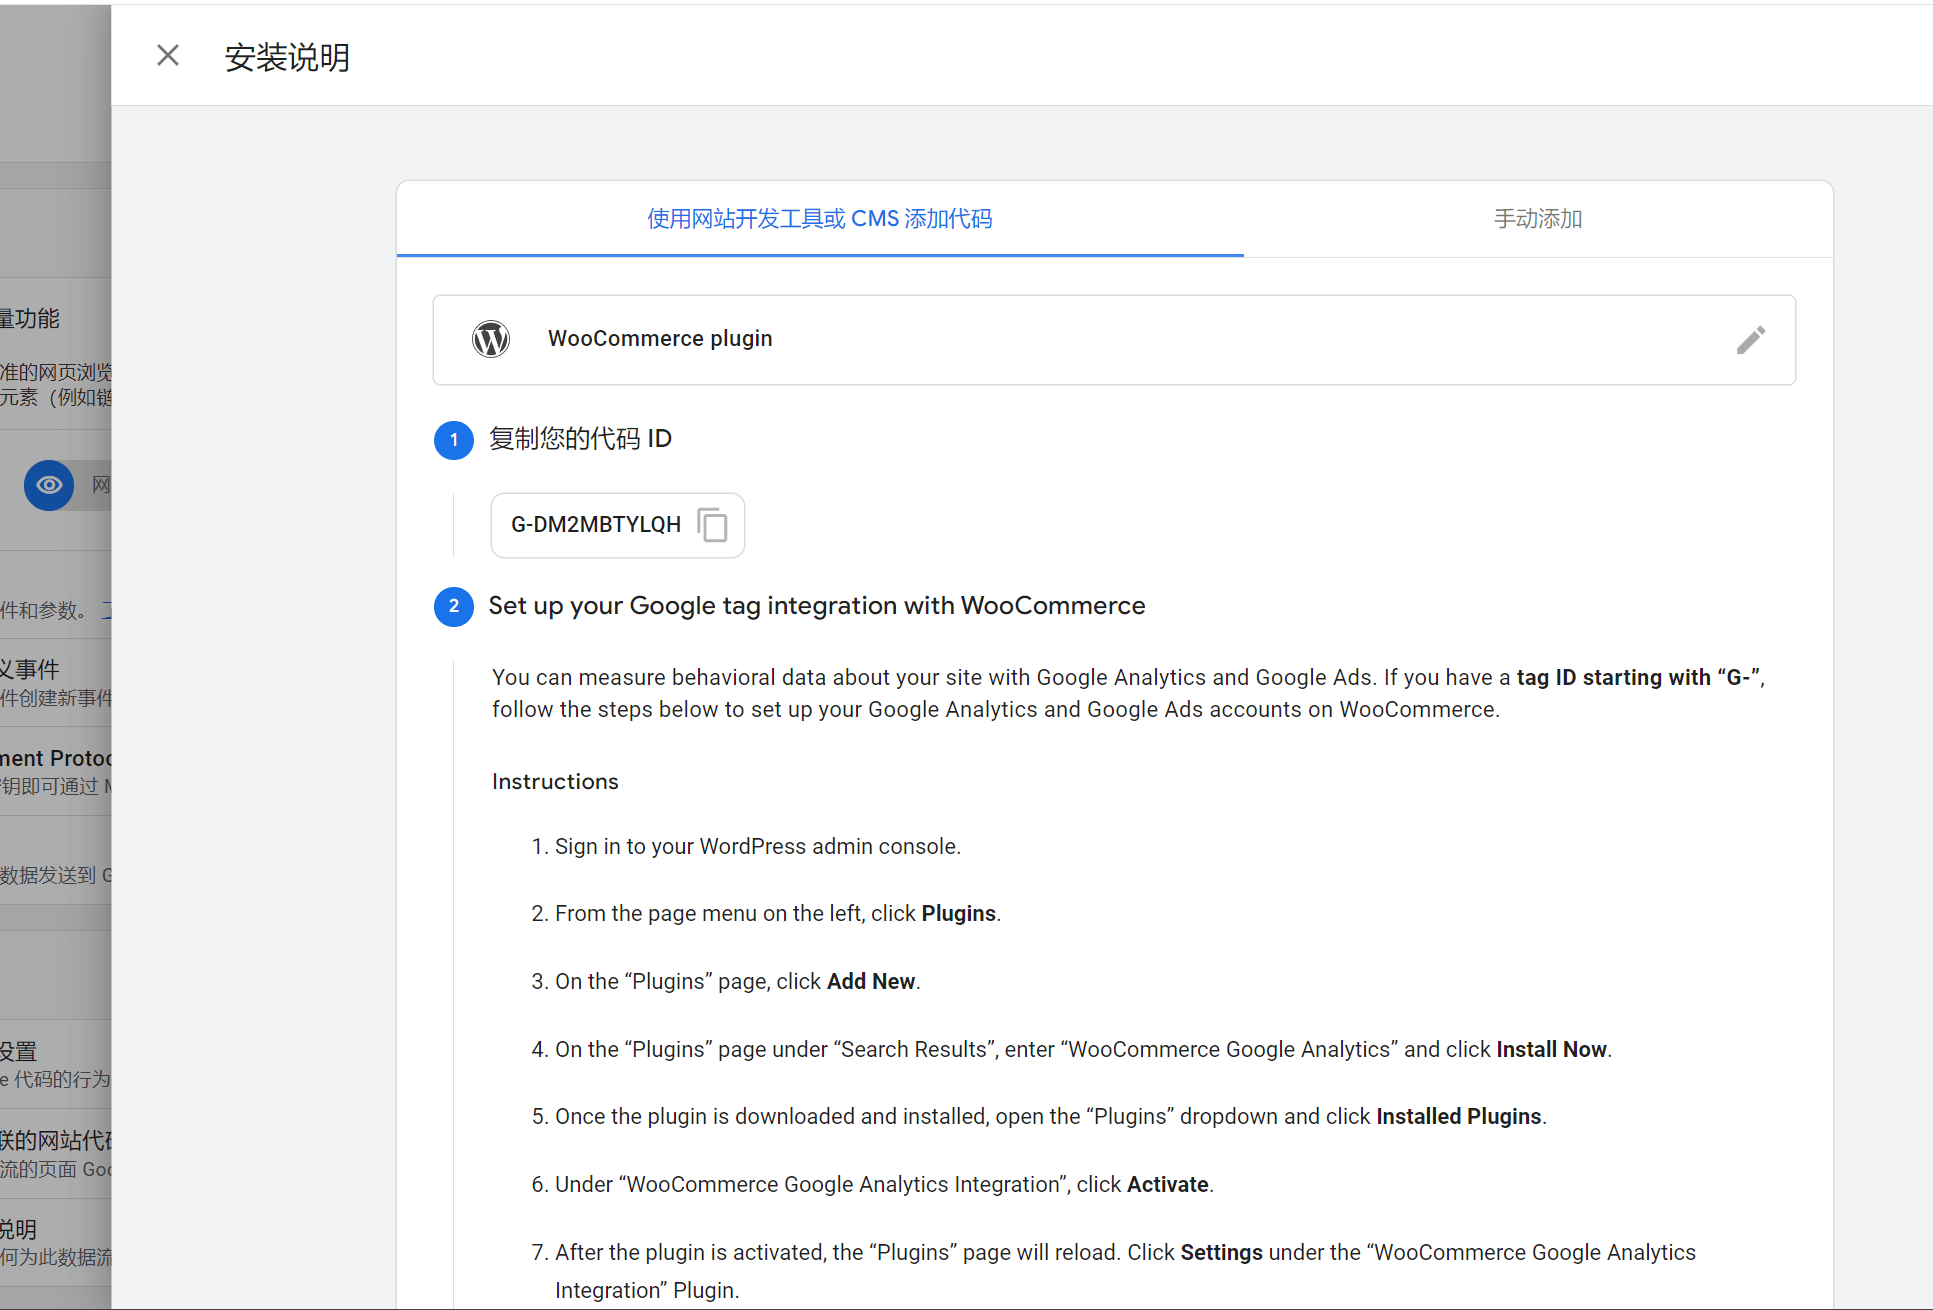
The domain used for the demonstration is a WordPress domain, which Google Analytics will automatically detect. Therefore, the installation instructions provided are for WordPress. Google Analytics offers two installation methods: one is "using website development tools or CMS to add the code," and the other is "manual addition." We will first demonstrate the installation of Google Analytics on a WordPress site, and then show the installation on a Shopify site.
How to install Google Analytics code on WordPress website
Method 1: The installation method of adding code to website development tools or CMS can usually be achieved using the following two plug-ins:
- The installation instructions for Google Analytics suggest using the WooCommerce Google Analytics extension plugin, which is the WooCommerce Google Analytics plugin.
- Site Kit by Google is another plugin that can be used. Site Kit by Google is a plugin I often use to help clients build WordPress sites and install Google code. Site Kit by Google is an integration plugin for Google codes, and with one plugin, you can install and manage all Google codes, including GTM and GSC code installations and management, making it very convenient. The following method explains how to use the Site Kit by Google plugin to install Google Analytics.
Configuration of Site Kit by Google (Site Kit)
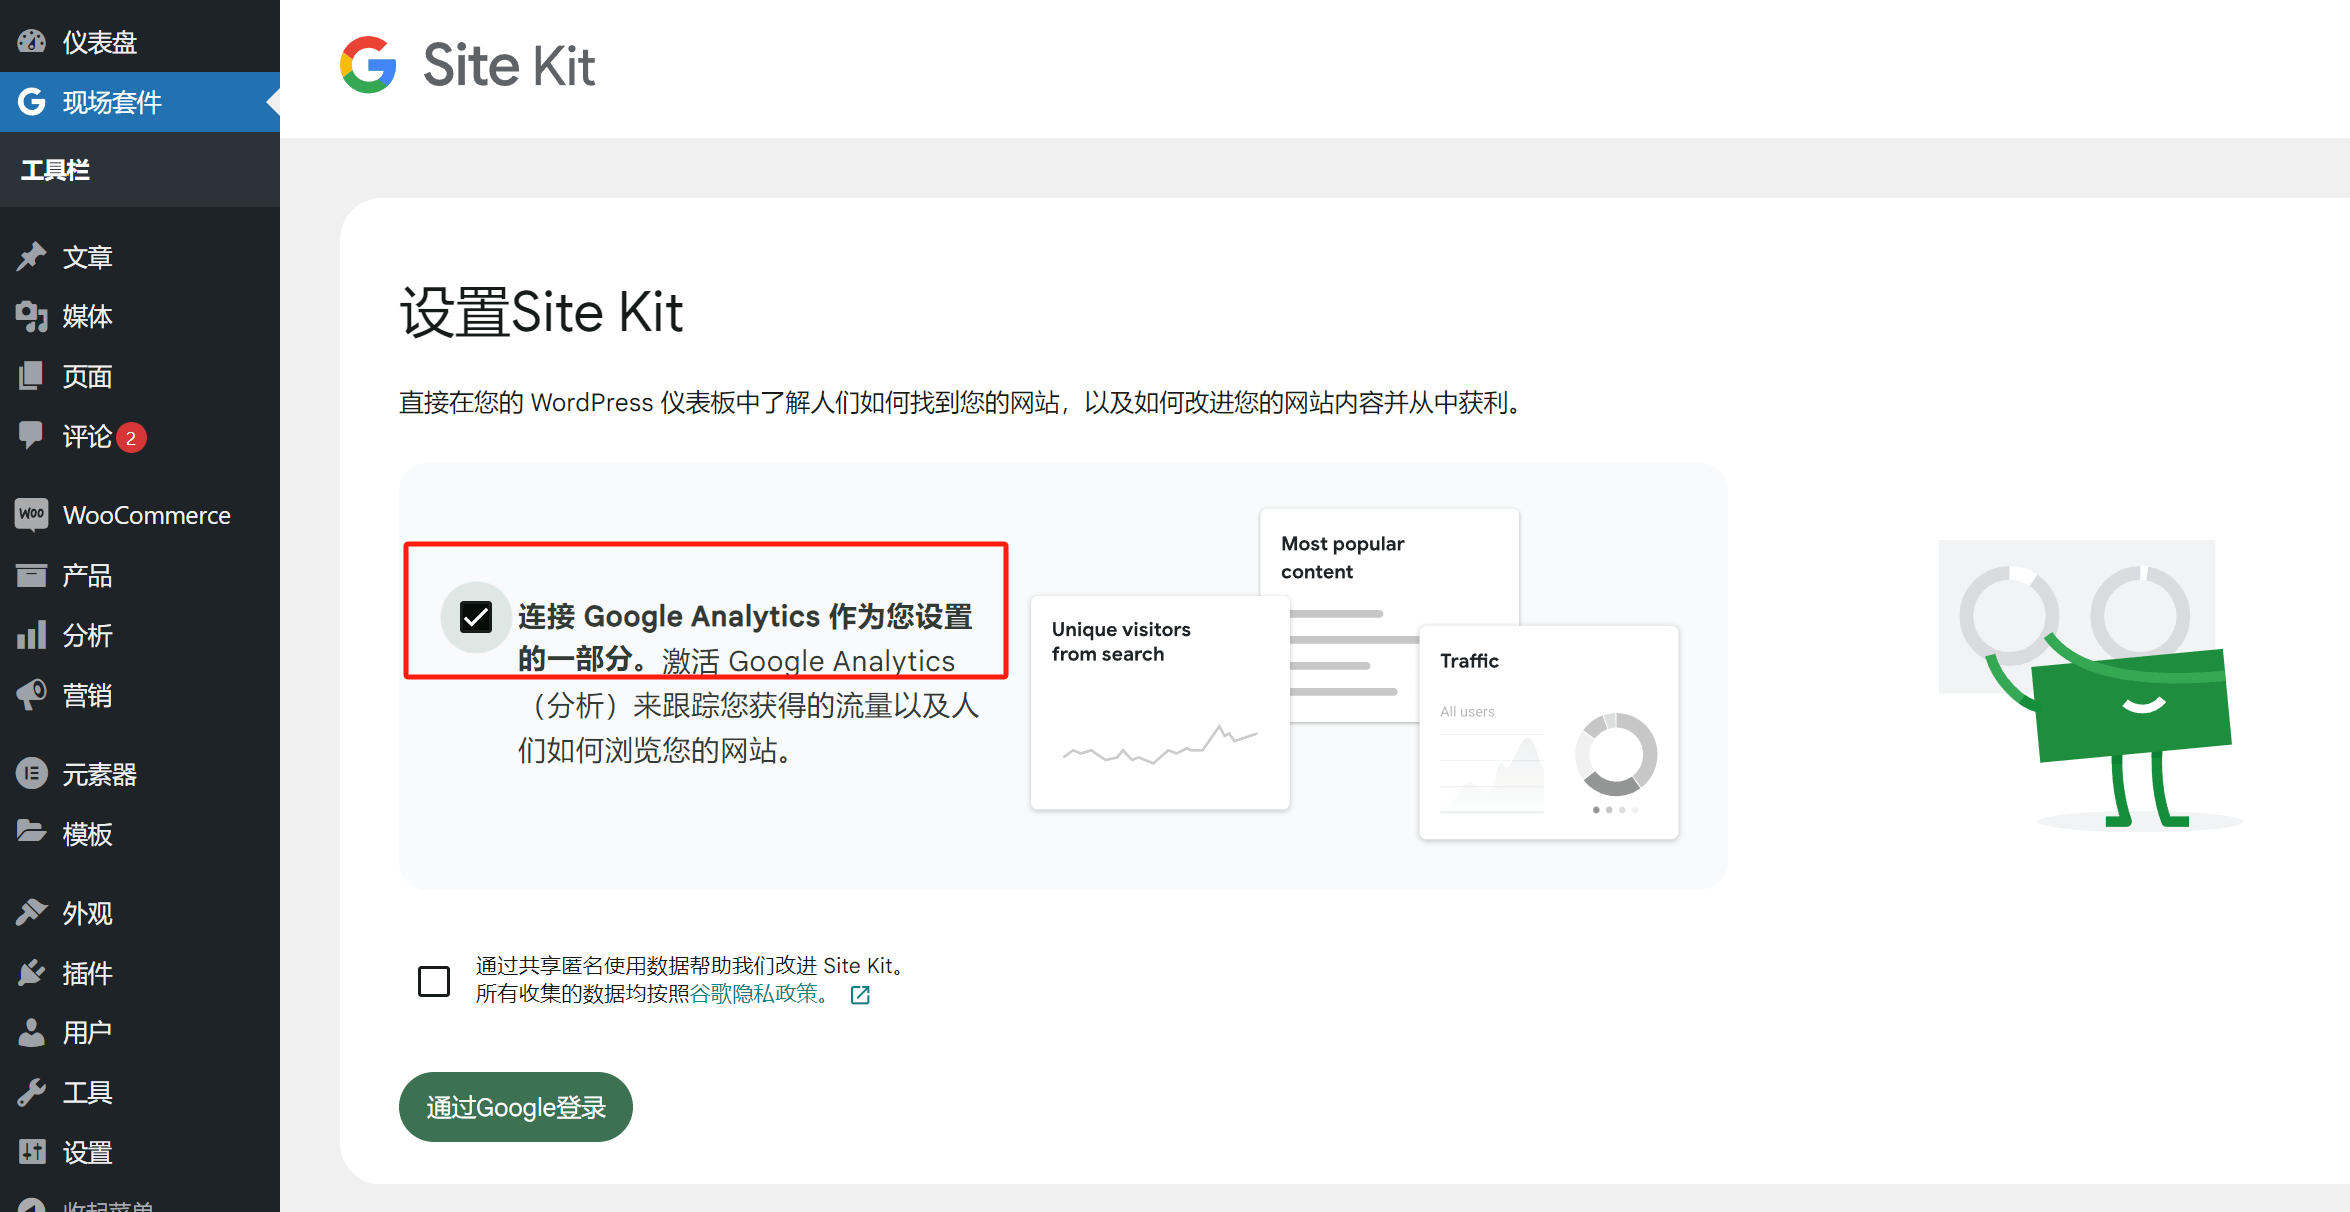
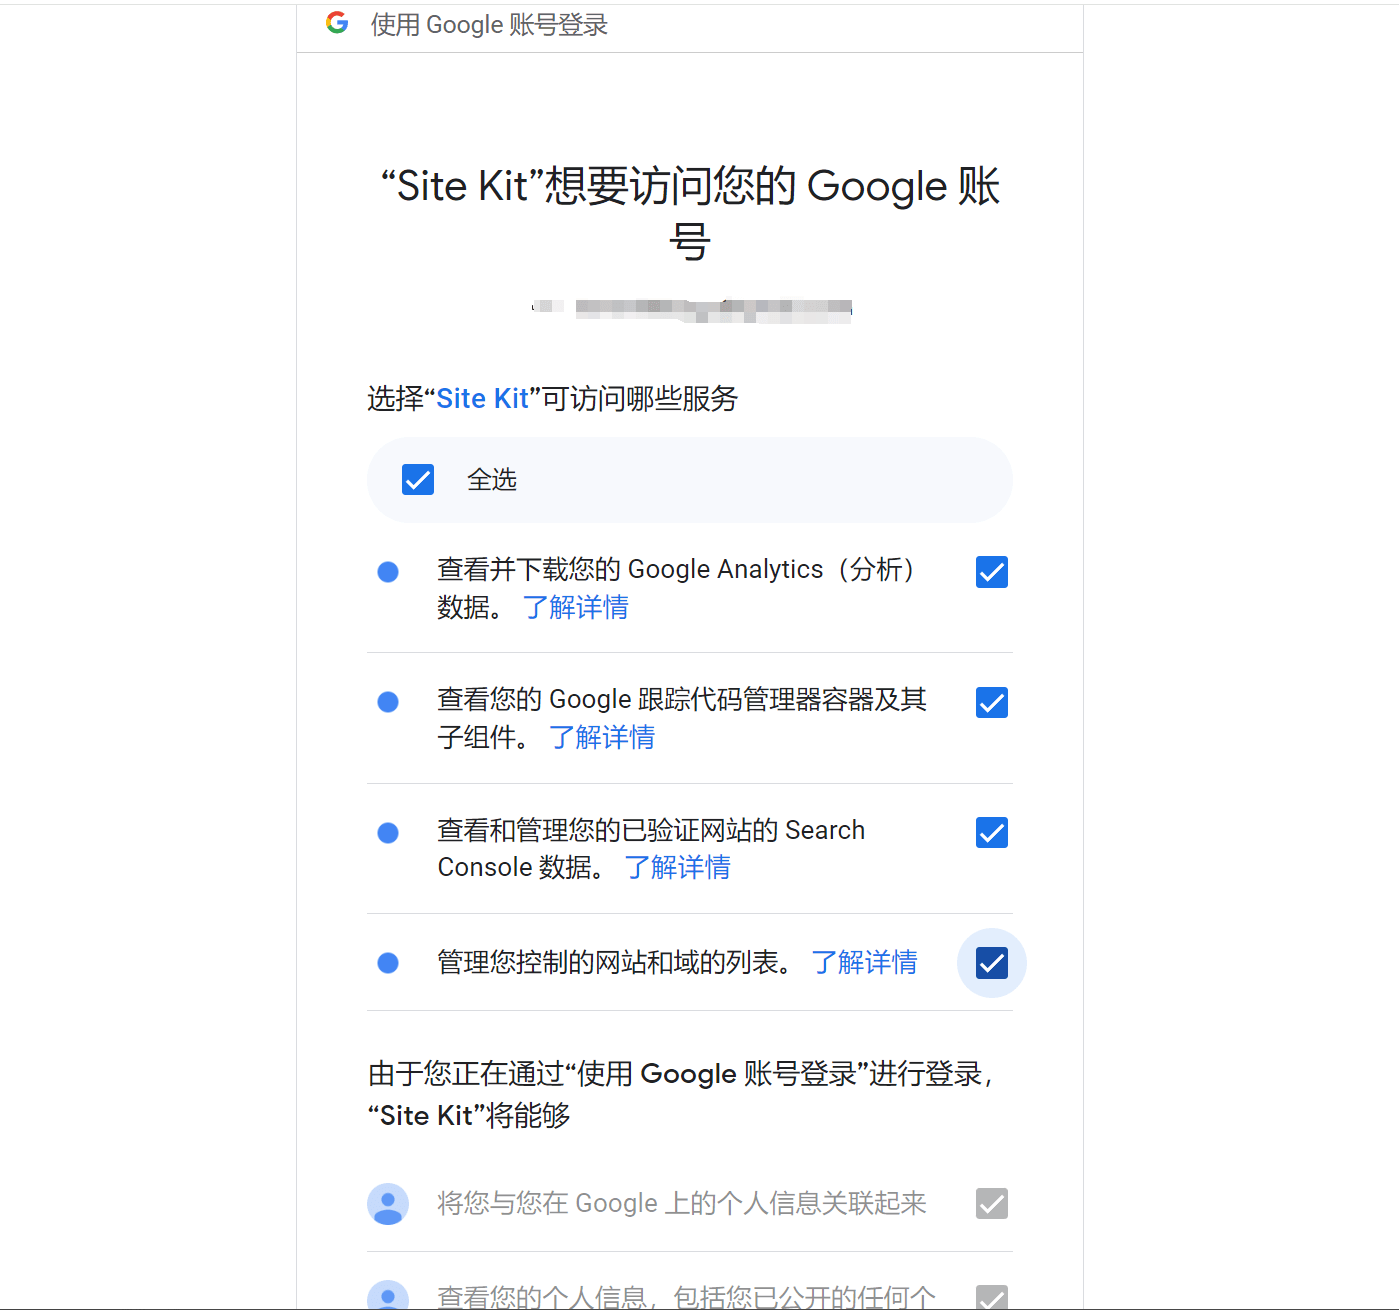
After installing and activating the Site Kit by Google plugin, go to the WordPress dashboard sidebar and click on the tool for configuration. You need to check the option "Connect Google Analytics as part of your setup," then click "Log in with Google." Choose the Google account you want to log in with, as shown in the image below. Check the box to grant Site Kit all necessary access permissions, scroll to the bottom of the page, and click the "Continue" button to verify ownership of your website.
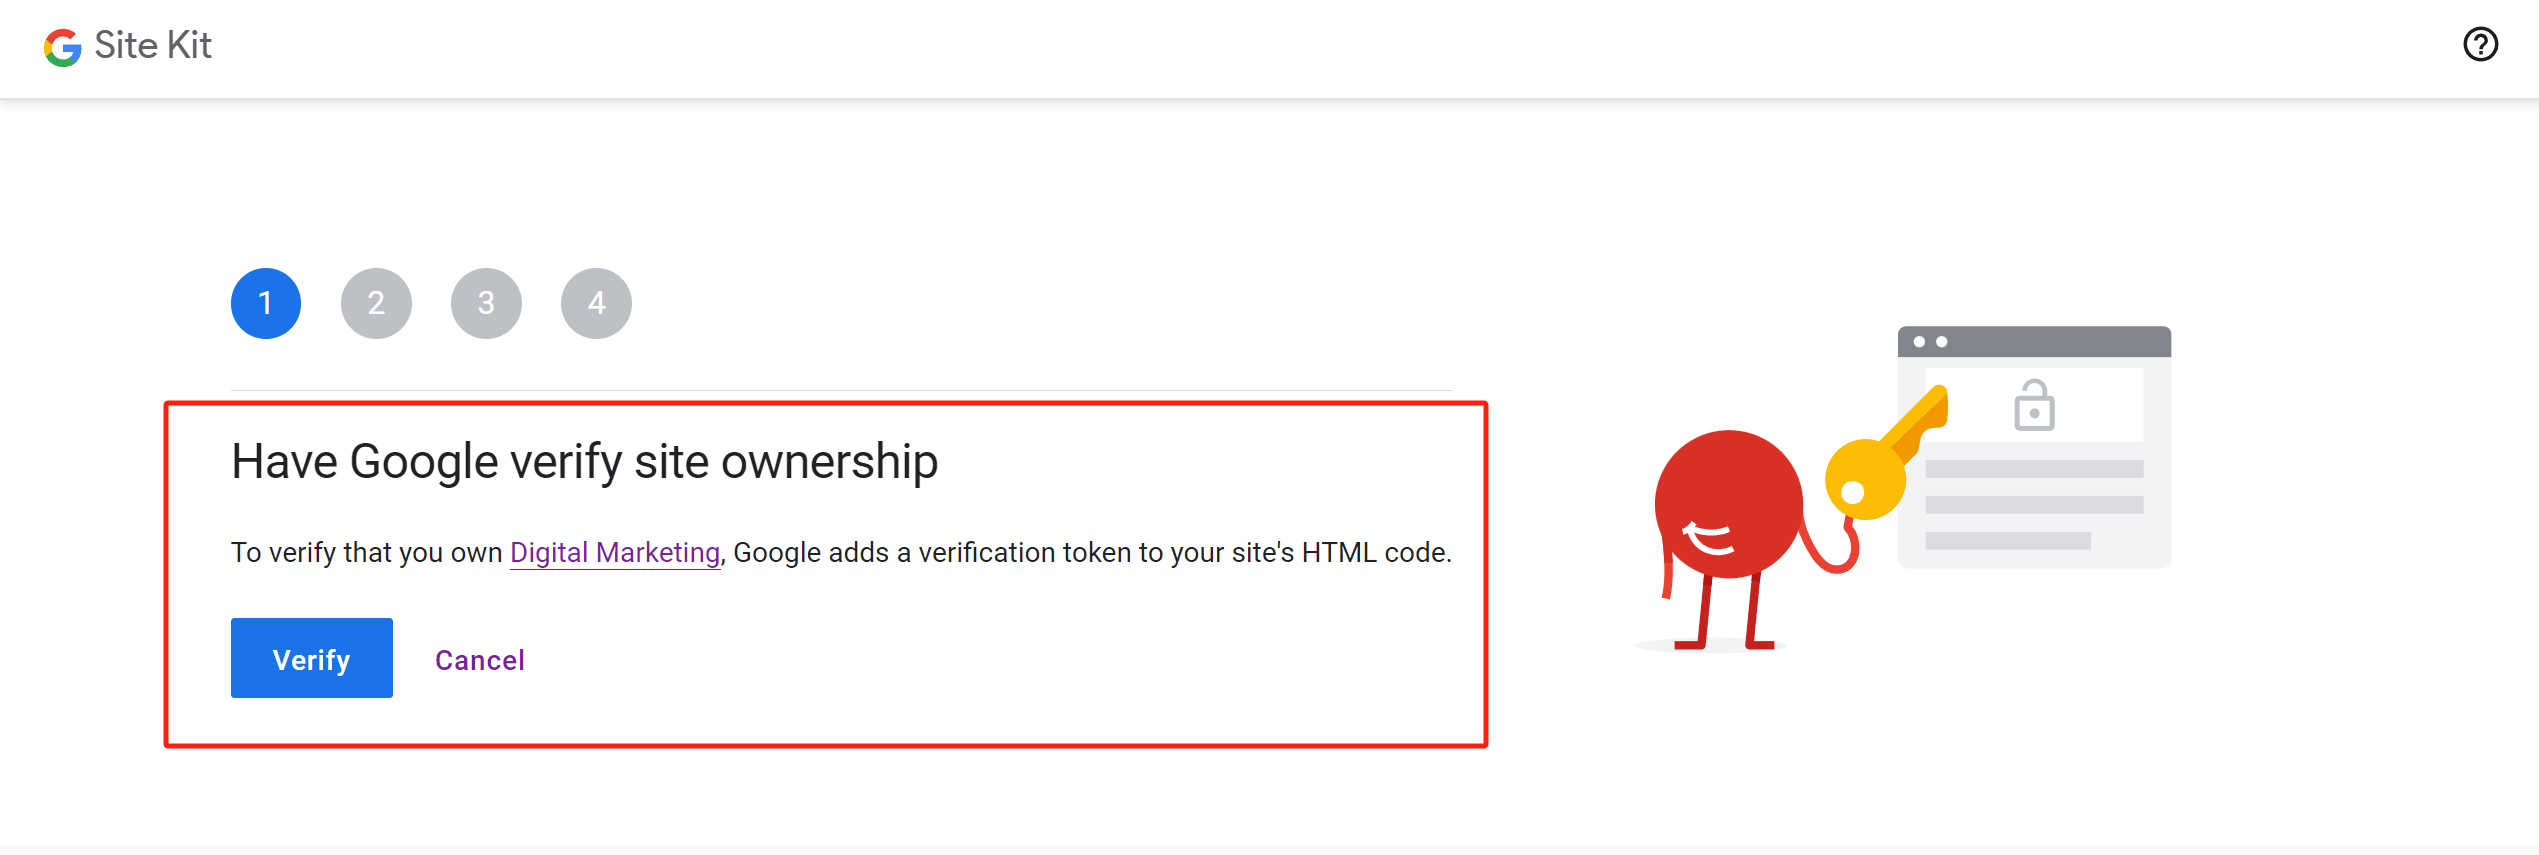
As shown in the image below, click the "Verify" button to verify website ownership. There are a total of four steps, and you can keep clicking "Next" to proceed. Each step verifies and installs a Google tool: PageSpeed, Google Search Console, and Google Analytics. If you need to connect more Google tools later, you can configure them within the plugin settings.
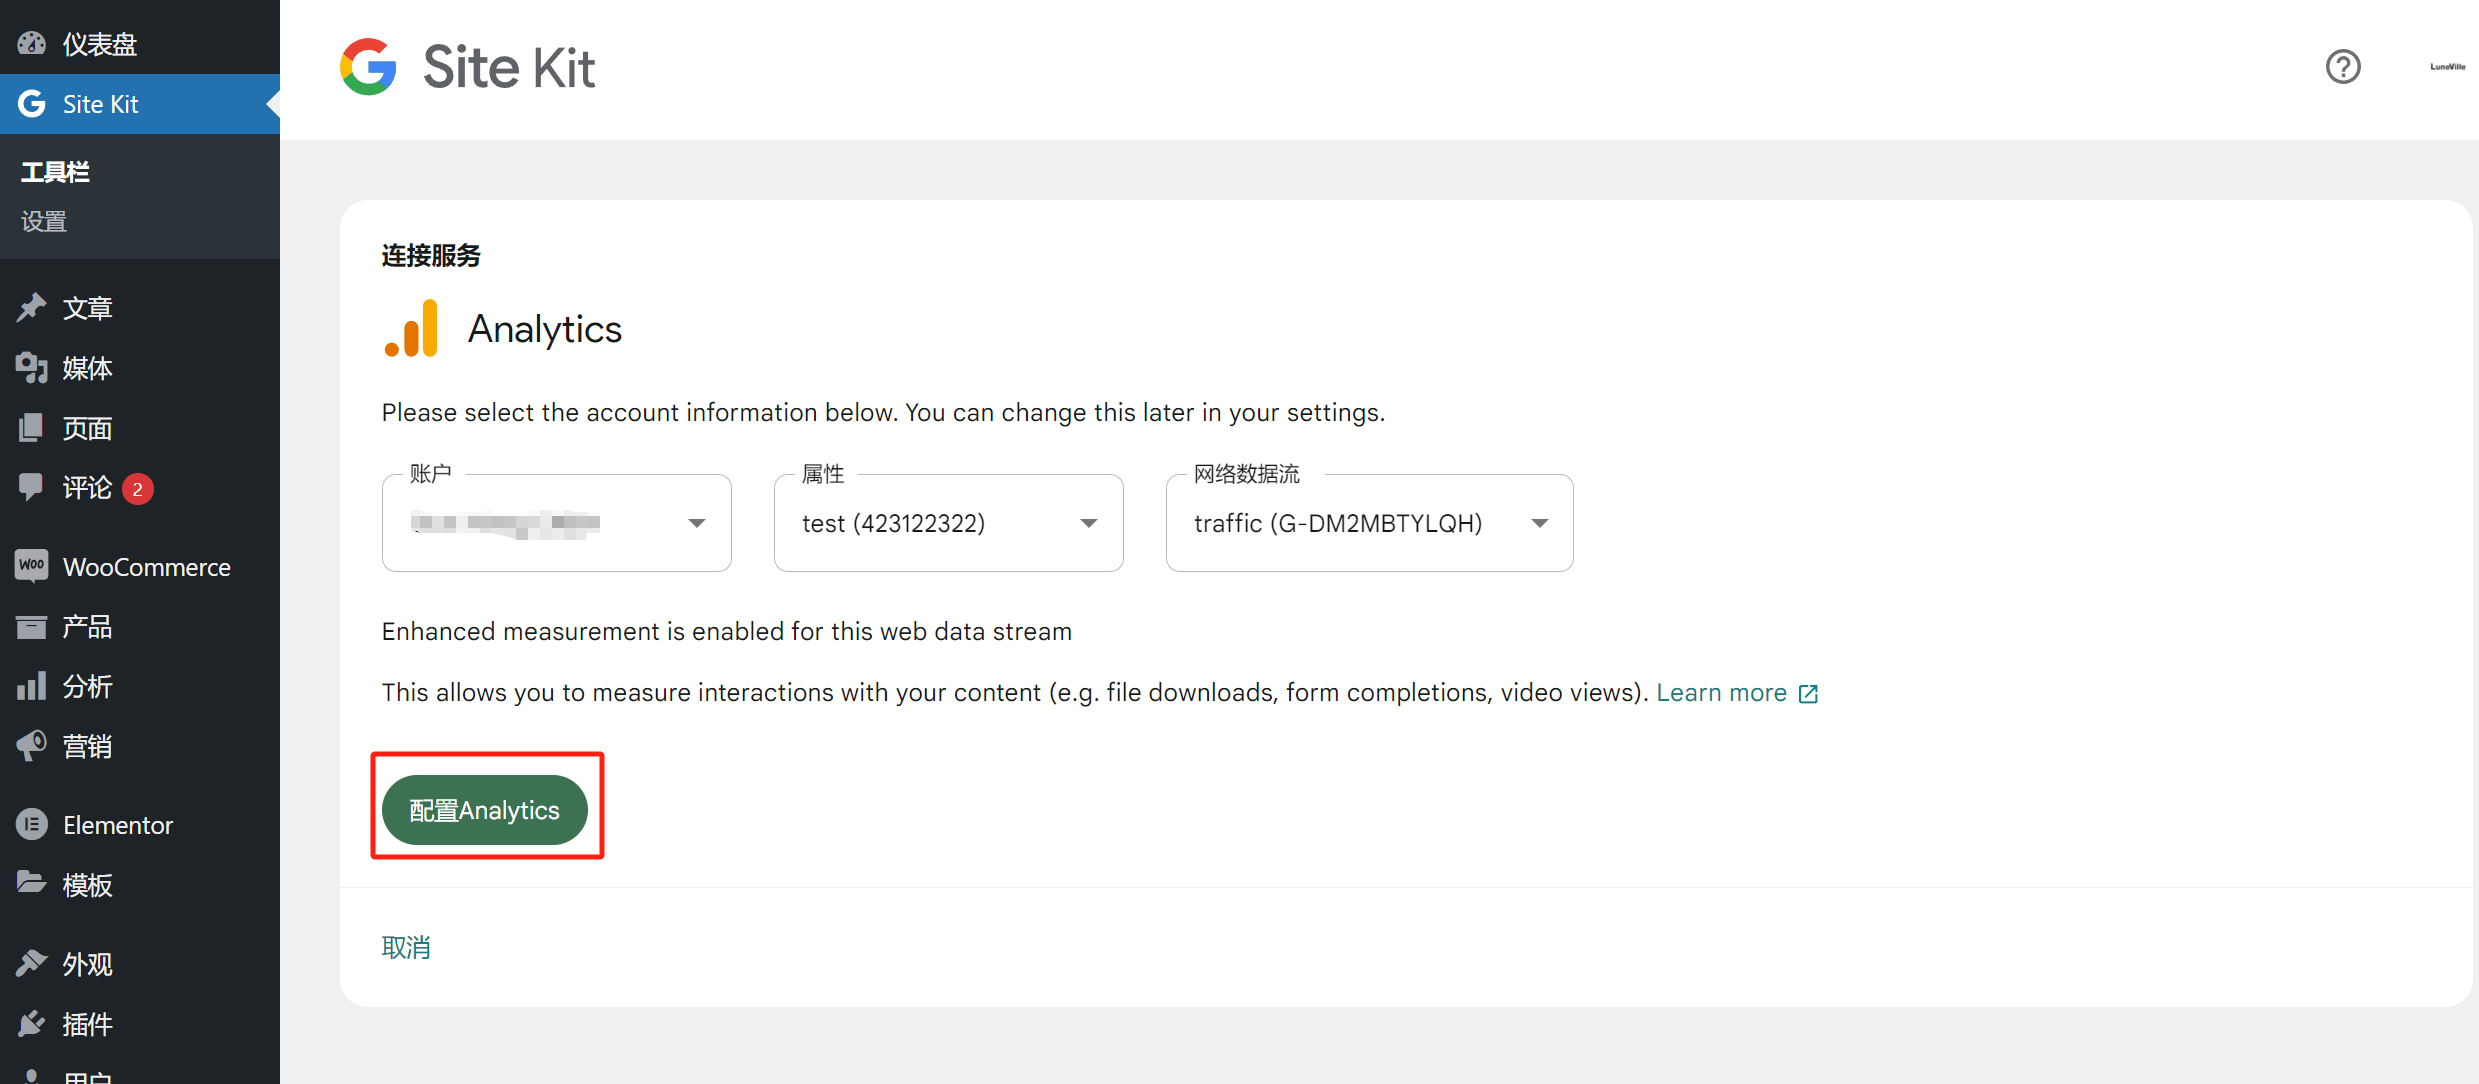
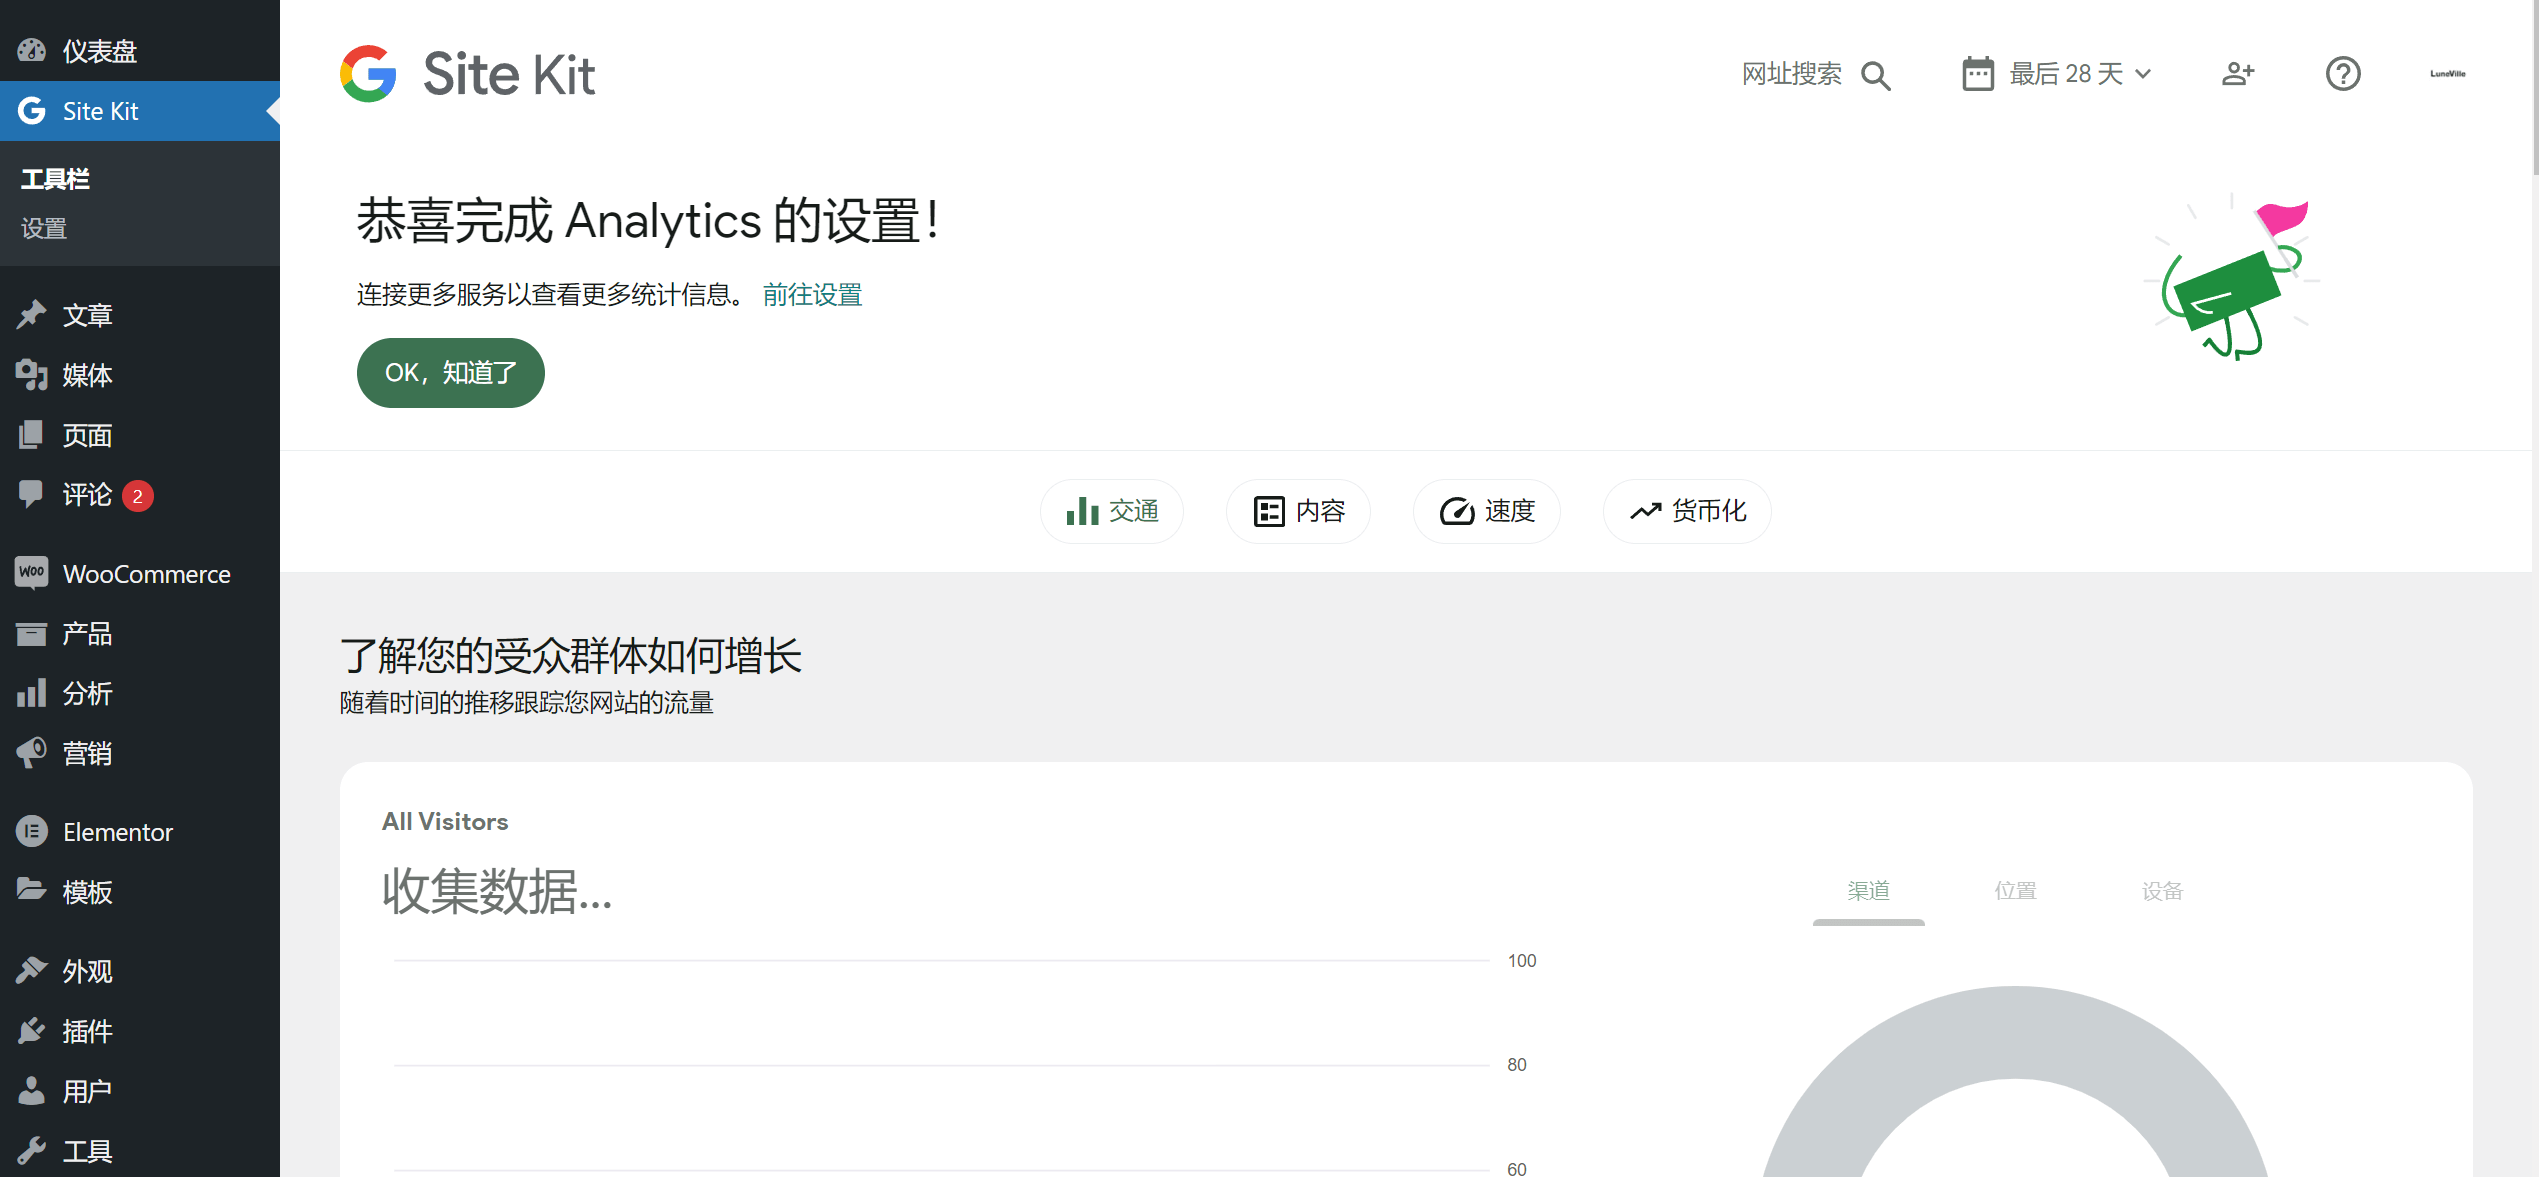
After Google Analytics is installed via Site Kit, the interface will display a final configuration prompt. Click the "Configure Analytics" button, and no further actions are needed. A confirmation page will pop up, indicating that the setup for Analytics is complete. At this point, all the steps for installing Google Analytics through Site Kit have been fully completed.
Method 2: Manually add and install Google Analytics code on WordPress website
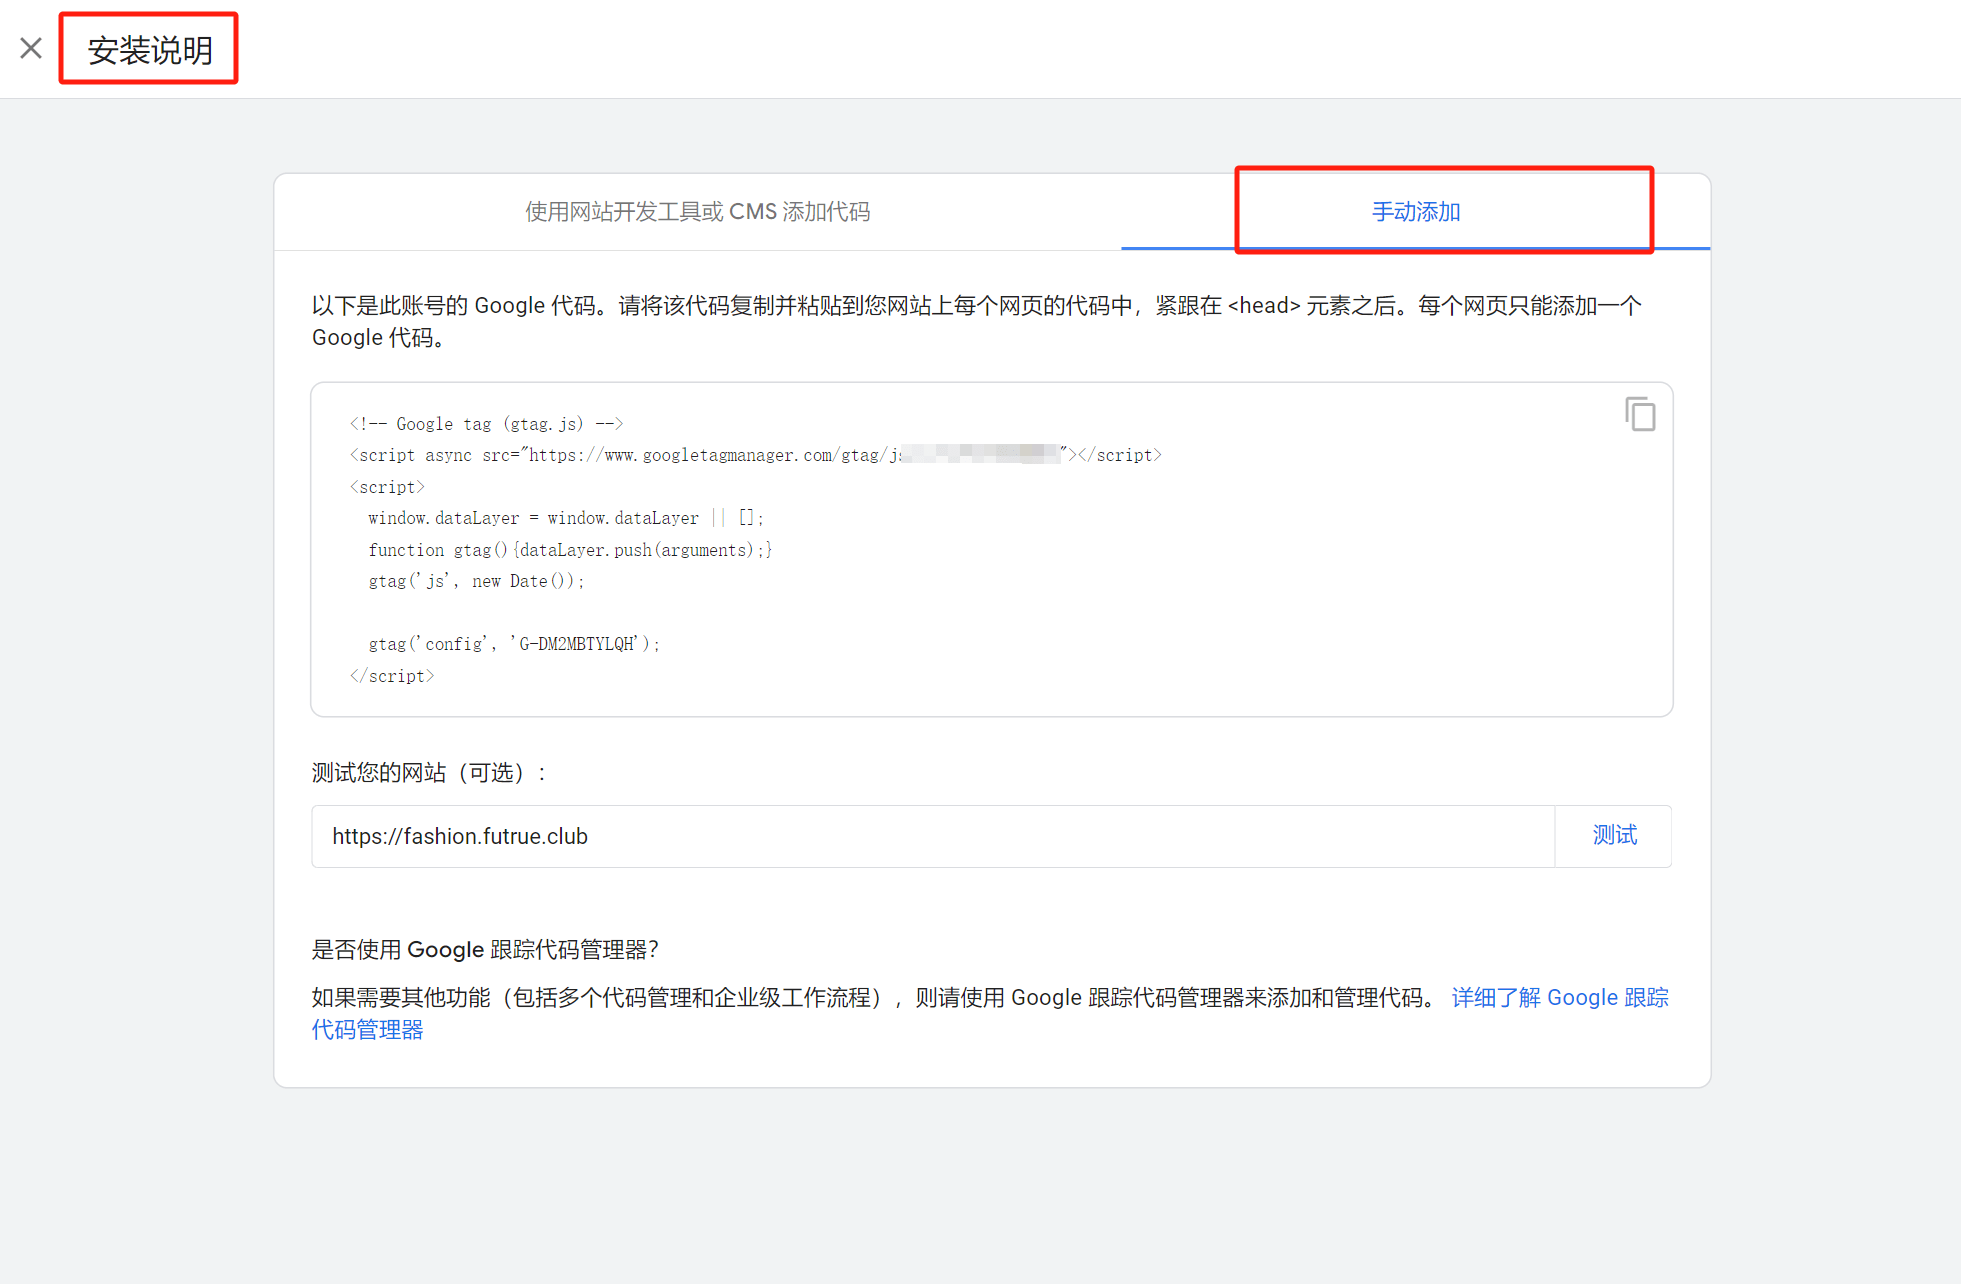
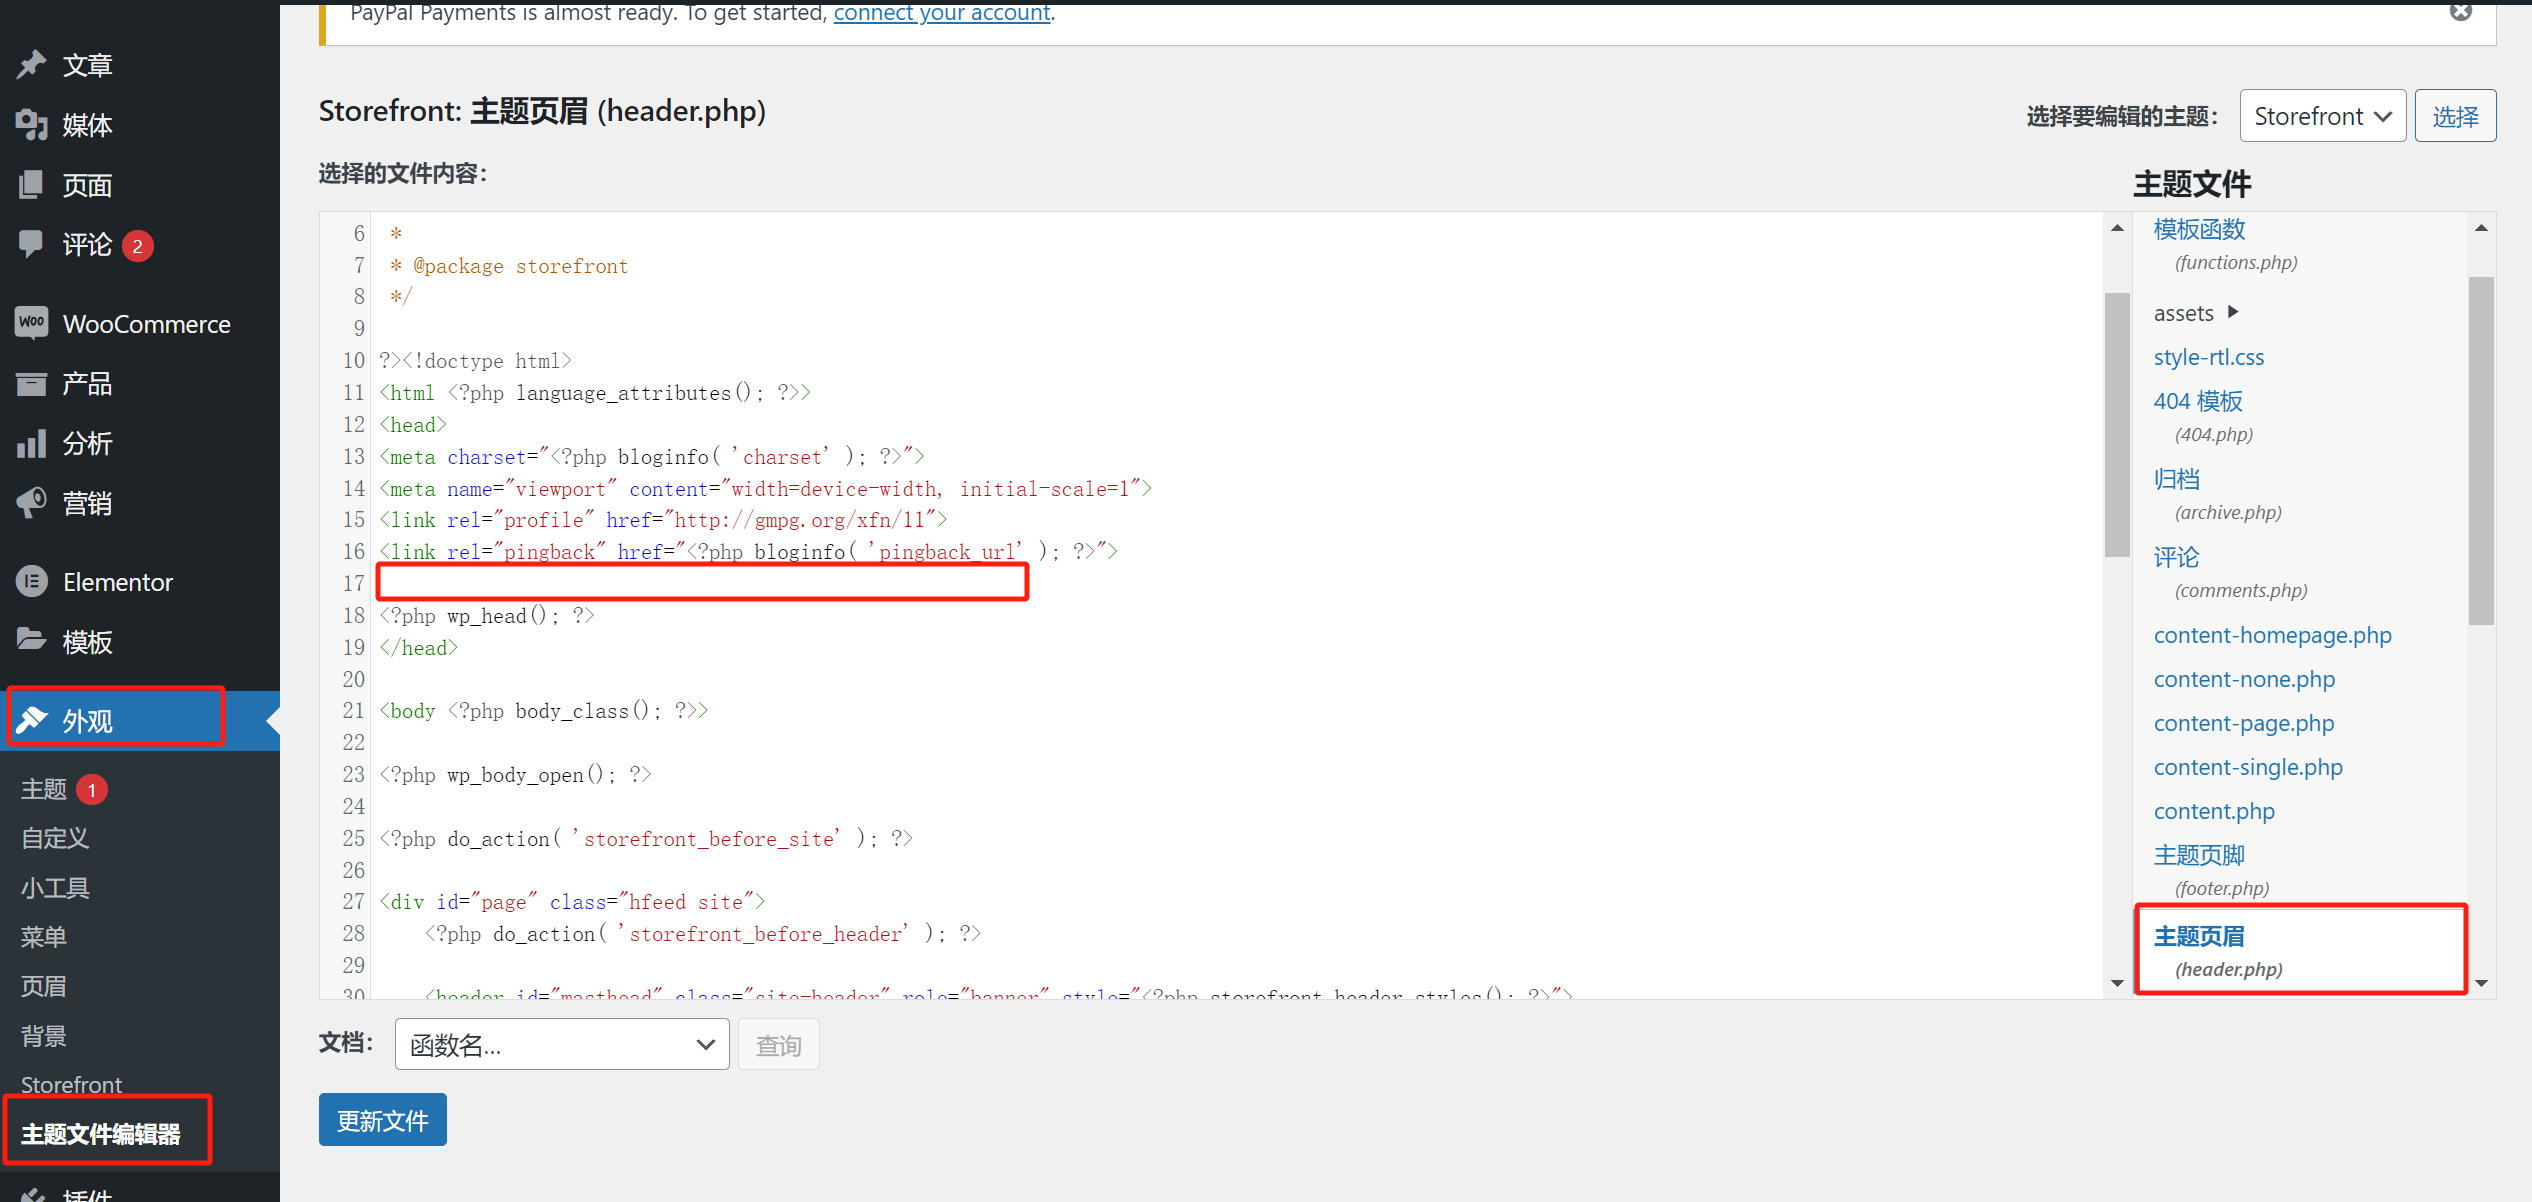
Click on "Manual Installation" on the instruction page to reveal the complete Google Analytics JS code. Copy the code in its entirety and paste it into the `header.php` file of your WordPress theme. The specific steps to do this in the WordPress admin sidebar are as follows: go to "Appearance" → "Theme File Editor", then select the "header.php" file under "Theme Files" on the right side of the page. Paste the code above the `` line and below the `` tag. Afterward, click the "Update File" button to complete the manual installation of Google Analytics on your WordPress website.
Method to Install Google Analytics Code on Shopify Website
I always prefer to manually add the Google Analytics code when installing it on a Shopify website. In this tutorial, I will demonstrate only the manual installation method. Installing Google Analytics on a Shopify website involves two parts: installing the code in the theme files and installing it on the checkout page.
Shopify Theme File Installation for Google Analytics Code
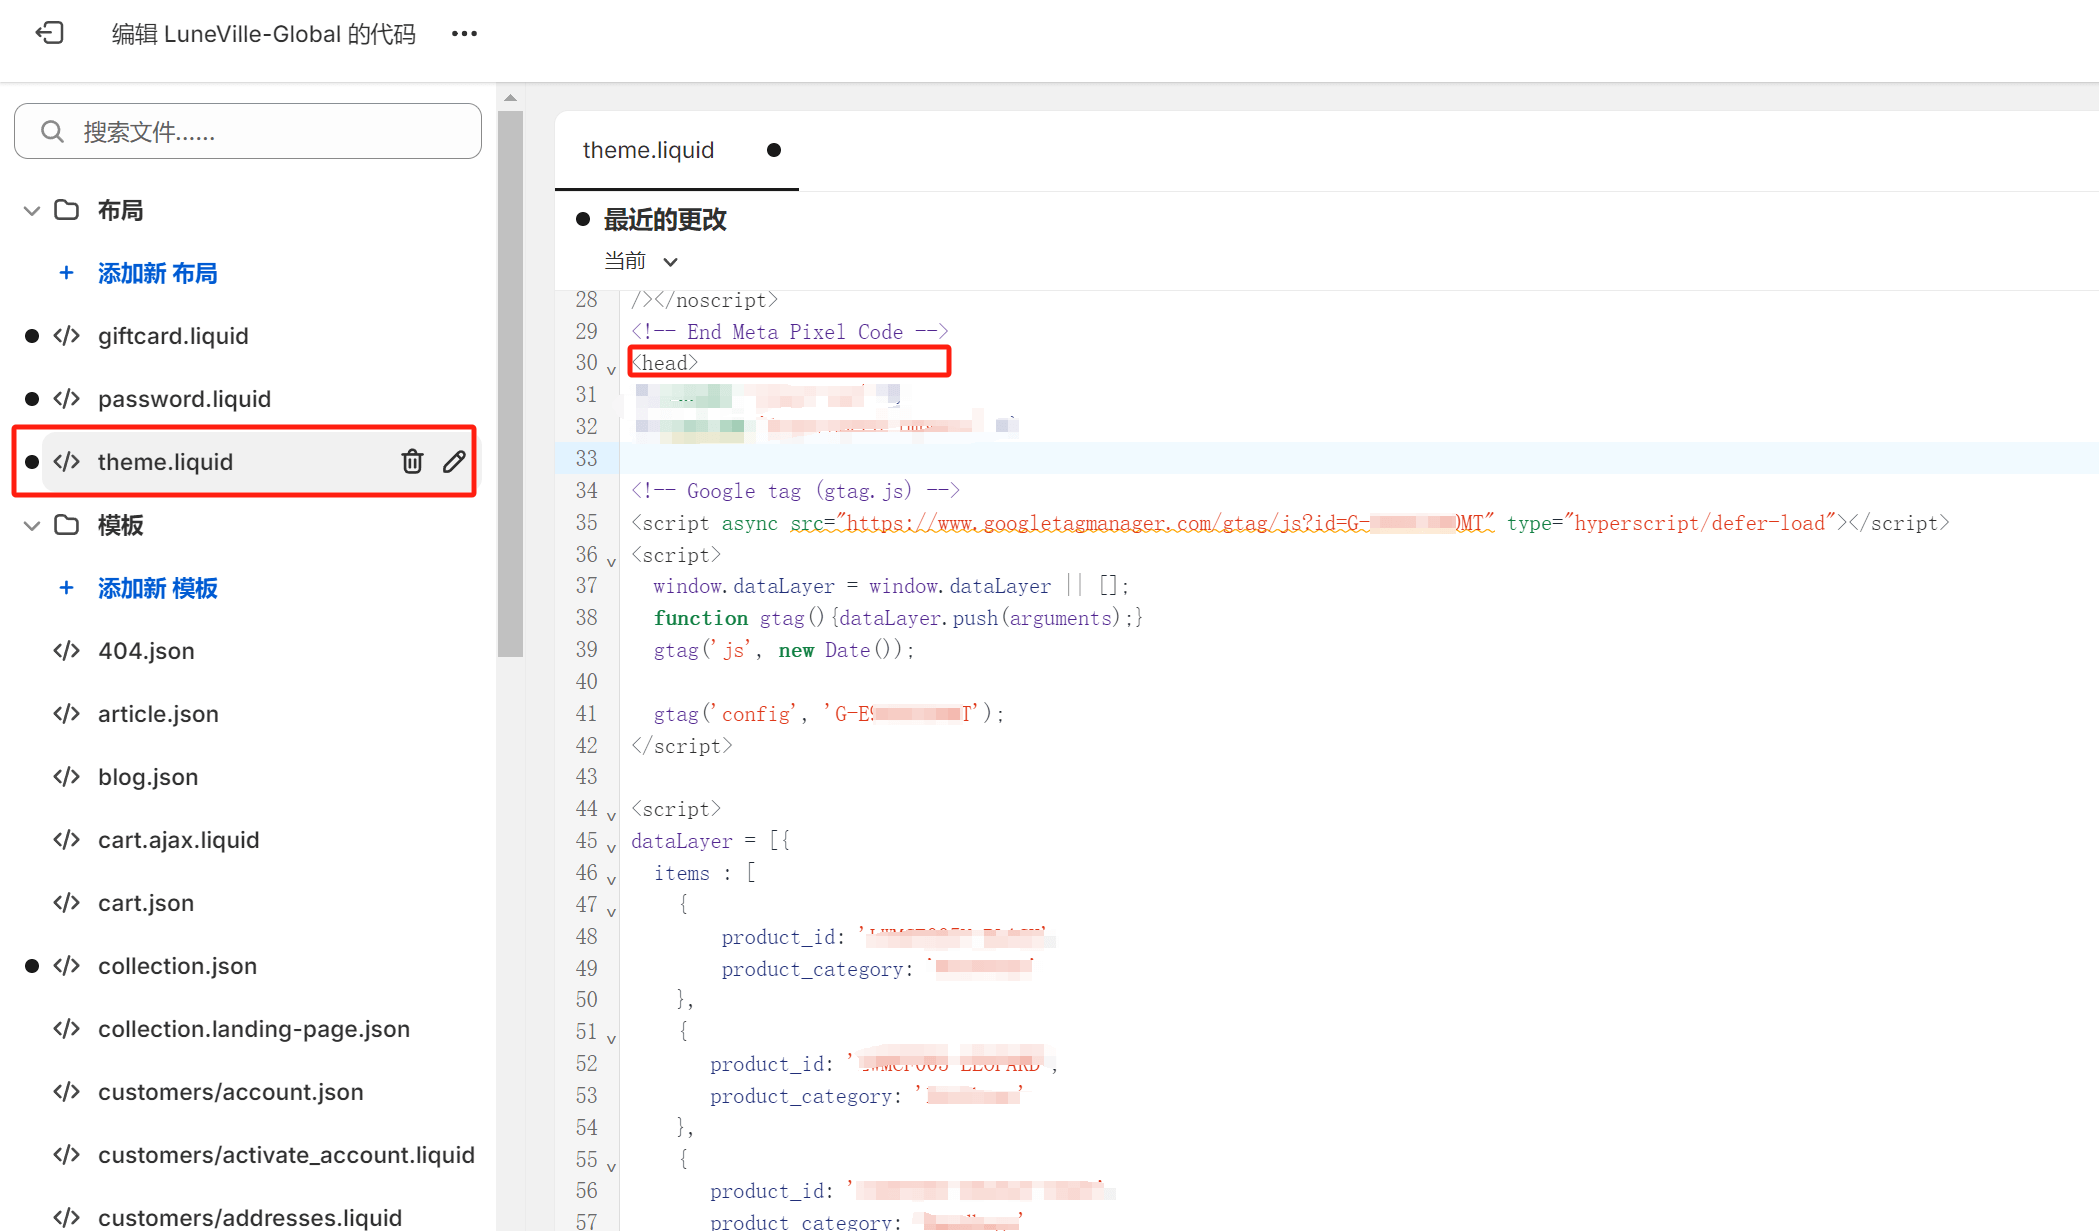
Let's first focus on installing the Google Analytics code in the theme file. In the Shopify admin panel, the path is: "Online Store" → "Themes" → "Edit Code." Then, locate the theme file where the Google Analytics code will be installed. The default theme file for inserting various marketing codes is usually theme.liquid. As shown in the image, copy and paste the code below the ‘head’ tag. Afterward, click the "Save" button in the top-right corner of the page to complete this part of the Google Analytics installation for the Shopify theme file.
Installing Google Analytics Code on Shopify Checkout Page
To install the Google Analytics code on the Shopify checkout page, go to the Shopify admin panel and open the settings for the checkout page. The path is: Settings → Checkout. Scroll down to the "Order Status Page" section, and you will find the "Additional Scripts" text input box, as shown in the image below.
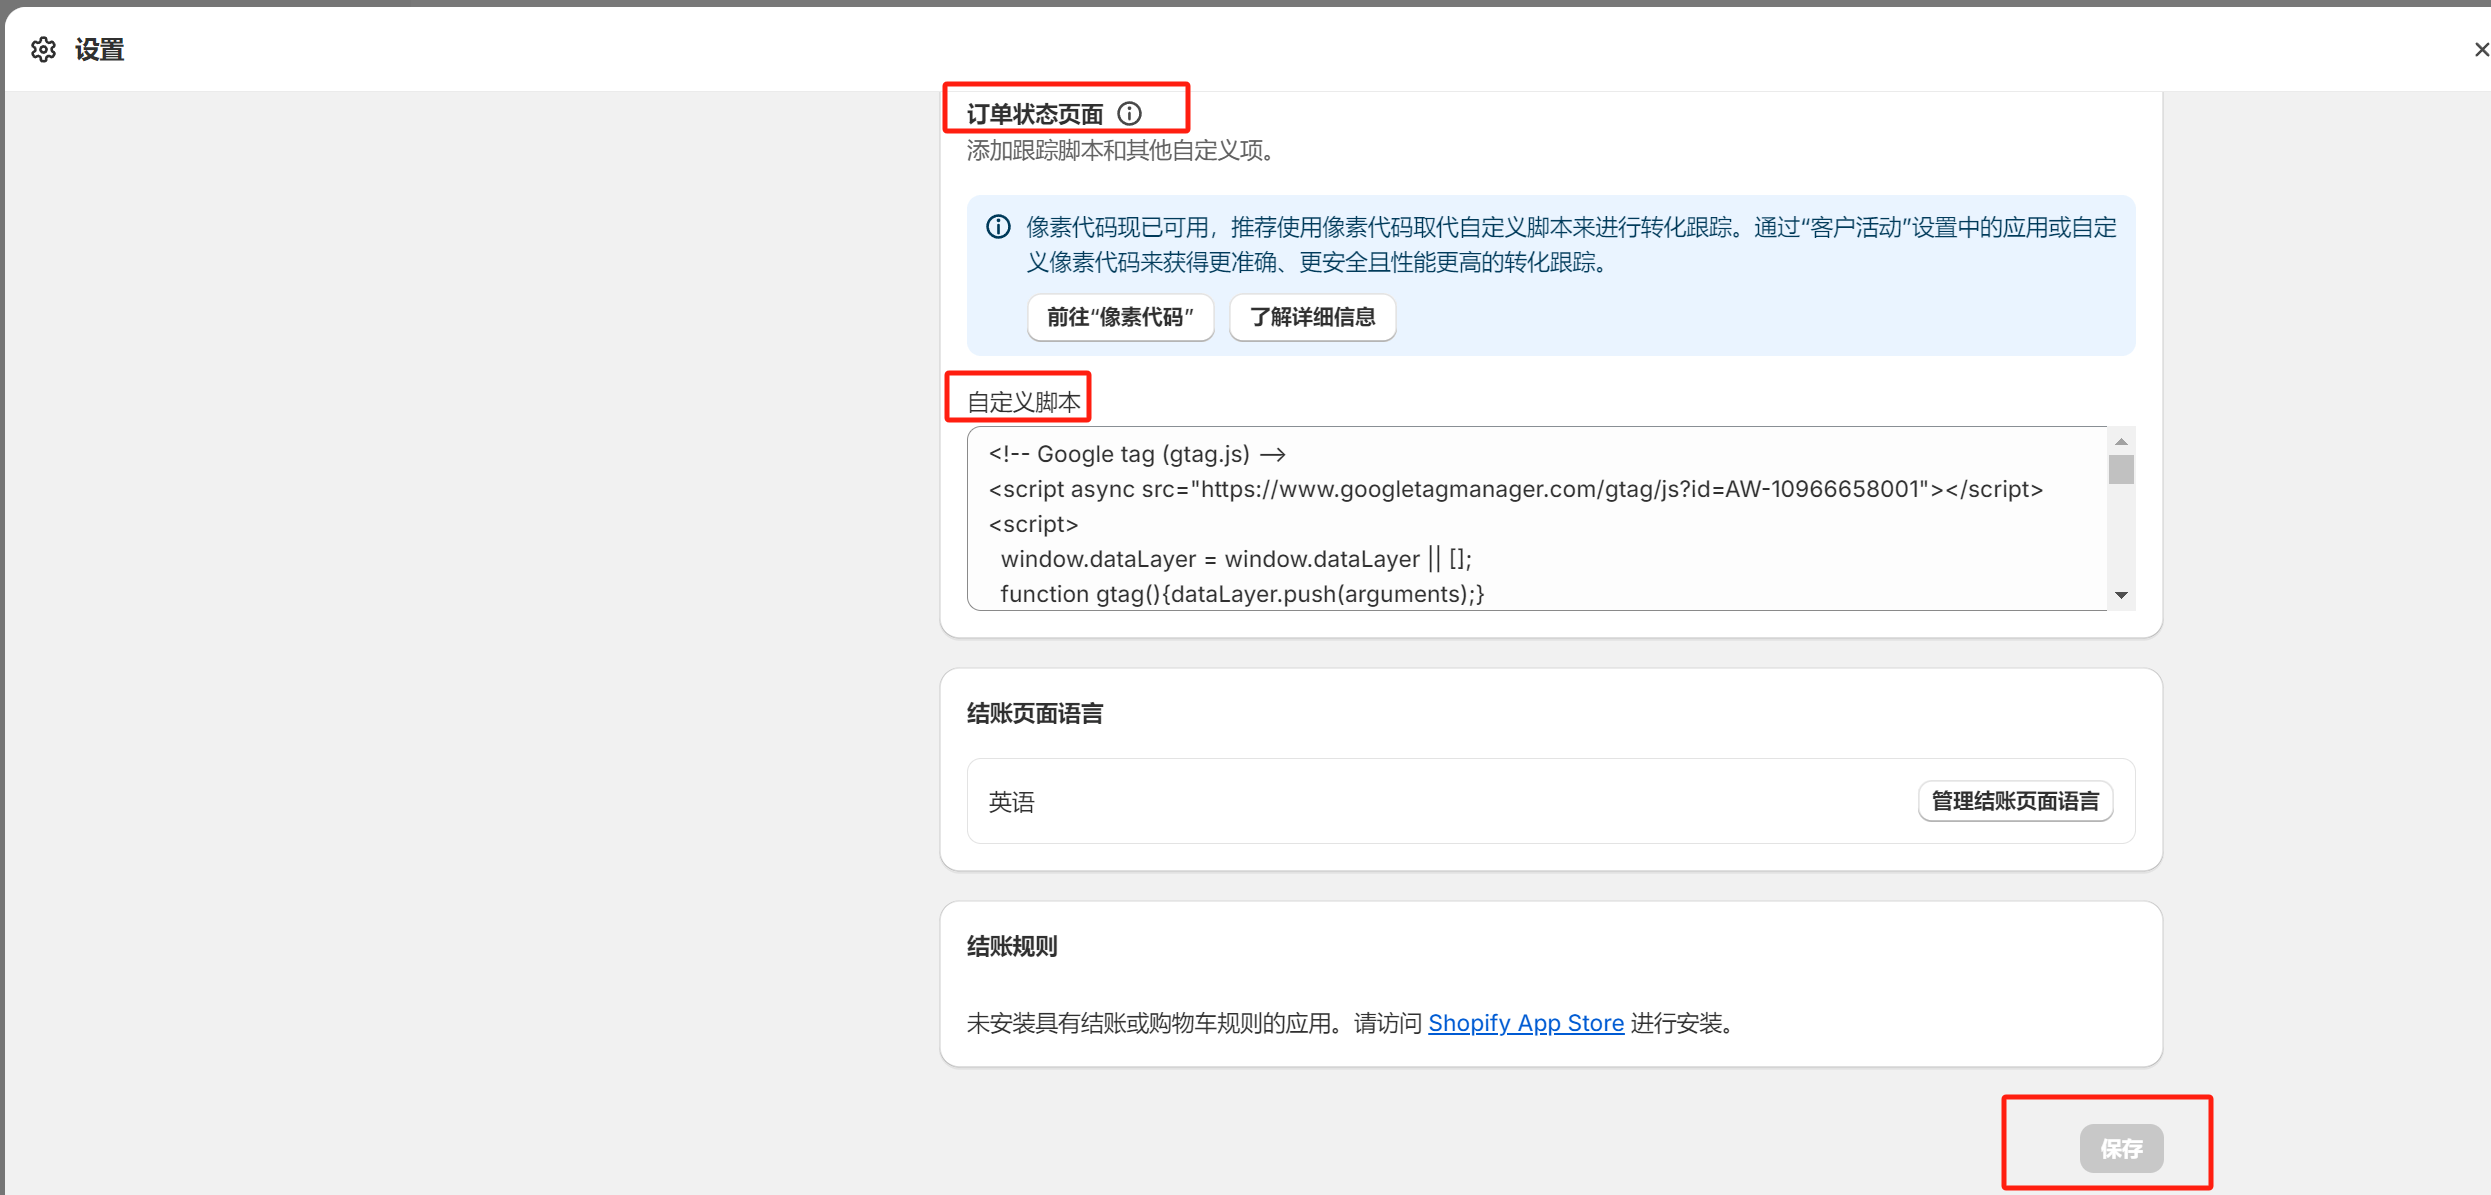
Copy and paste the manual Google Analytics installation code into this box, and then click the "Save" button. Once this is done, you have completed the installation of Google Analytics on the Shopify website.
Ⅲ、Verifying If Google Analytics is Successfully Installed on the Website
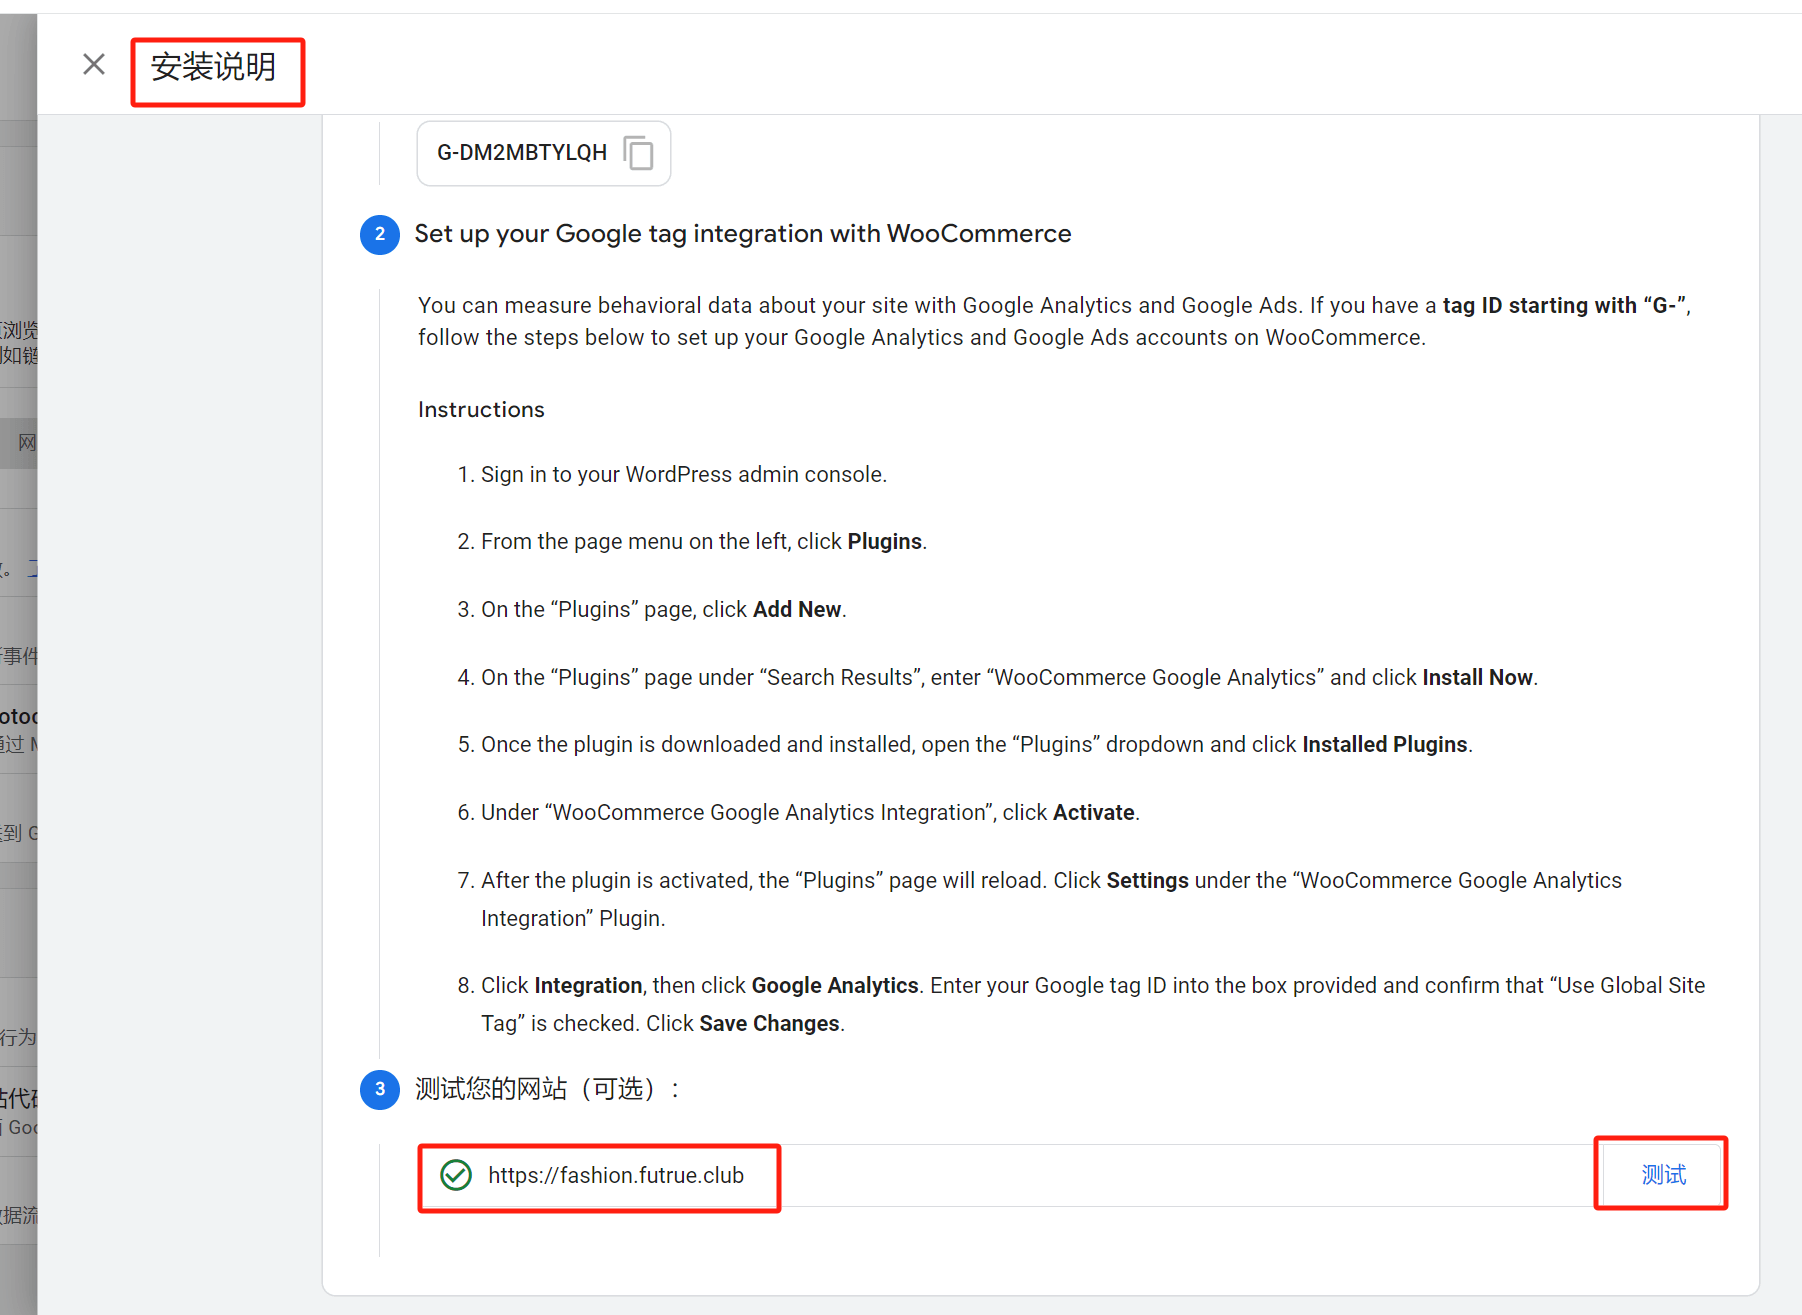
Finally, to ensure everything is set up correctly, it's important to verify that Google Analytics is properly installed. The verification process is very simple. Just scroll to the bottom of the Google Analytics installation page, and you'll find a test button provided by Google Analytics. Click the "Test" button. If the domain input field returns the correct status (as shown in the image), it means the installation was successful. If you get an error message, you'll need to go back and check each step to find where the issue occurred, correct it, and then retest.
Conclusion: This is the complete tutorial for installing Google Analytics on WordPress and Shopify websites. By following the specific steps in the article, you will be able to successfully install Google Analytics on your own website.
Logic Digital Technology (SZLOGIC) All rights reserved. Reproduction is prohibited.


